& Construction

Integrated BIM tools, including Revit, AutoCAD, and Civil 3D
& Manufacturing

Professional CAD/CAM tools built on Inventor and AutoCAD
1 min read
The Markforged Add-In for Autodesk Fusion provides a seamless bridge between Autodesk Fusion and Markforged’s Eiger, a powerful online 3D printing platform. This article provides a step-by-step guide on how to use this connection to prepare and manage your models for remote printing on Markforged printers.
After you’ve downloaded the Add-In from the App Store and opened your desired project in Fusion, you’ll notice a new group in the Design Workspace ribbon. This group offers three options:
To upload your part to Eiger, choose ‘Upload to Markforged Eiger’. Enter the necessary API access key and API secret key. Remember, these keys can be generated exclusively by an Eiger organization owner. Next, select the model you wish to upload and the user who’s uploading it. If your part is a solid body, you’ll have the option to select the tessellation quality. Remember to choose the tessellation quality that best suits your project needs for optimal results. After making your selections, hit ‘Upload model’ to send your design to Eiger.
Next, select the model you wish to upload and the user who’s uploading it. If your part is a solid body, you’ll have the option to select the tessellation quality. After making your selections, hit “Upload model” to send your design to Eiger.
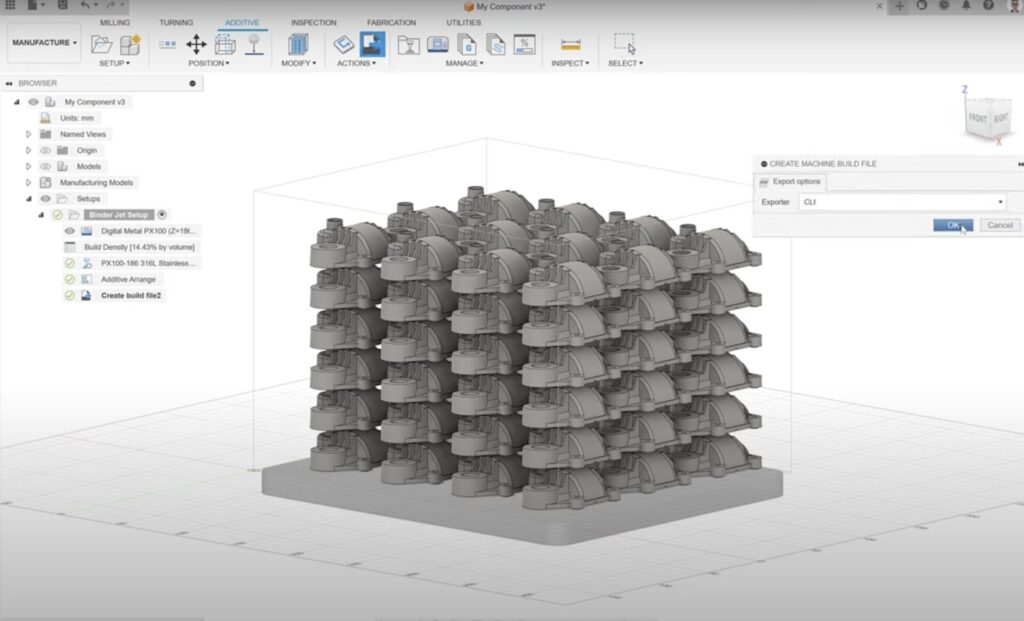
If you’re looking to send your model to a Markforged binder jet printer, head back to the Markforged group in your Design Workspace ribbon and select “Create Markforged Metal Binder Jet Setup”. Subsequently, once the binder jet setup is created, generate your machine build file and upload it to your machine.

Using the Markforged Add-In, prepare your models for printing directly within Fusion. Additionally, manage your prints on the printers with ease, all from the same interface.
By clicking subscribe, I agree to receive the Fusion newsletter and acknowledge the Autodesk Privacy Statement.
Success!
May we collect and use your data?
Learn more about the Third Party Services we use and our Privacy Statement.May we collect and use your data to tailor your experience?
Explore the benefits of a customized experience by managing your privacy settings for this site or visit our Privacy Statement to learn more about your options.