
Elevate your design and manufacturing processes with Autodesk Fusion
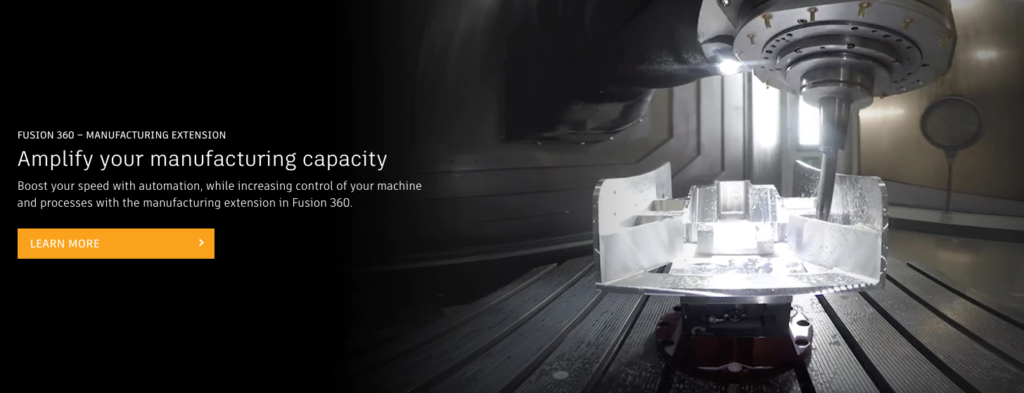
In 2019, we launched Fusion 360 – Manufacturing Extension, a collection of tools and strategies available within Fusion 360 for an additional subscription. At launch, the manufacturing extension contained:
Since then, we’ve been working hard to develop more functionality to make the extension even more powerful. To help keep up with the new features in the manufacturing extension, take a look here to see what’s new and what’s coming next. Click the video to watch a tutorial for each feature or check out the help documentation, linked below.
[icon name=”star” class=”” unprefixed_class=””] New! Newly added features or strategies are marked like this.
[icon name=”flag-o” class=”” unprefixed_class=””] Public Preview! Public preview features will are called out like this.
The manufacturing extension is free until June 30th, 2020, as part of the Extended Access Program, which aims to help give you the tools you need in these uncertain times.
[icon name=”star” class=”” unprefixed_class=””] New! Toolpath Trimming
While the name may be unassuming, Toolpath Trimming is the first piece of Toolpath Modification functionality in Fusion 360. Toolpath Trimming allows you to draw a polygon around problem areas of select toolpaths and trim them away, keeping either what’s inside the polygon or what’s outside the polygon. The actual value here is that only the leads and links are regenerated. This is a huge time saver, especially on large or complex toolpaths. Since only the leads and links are recalculated, generation time tends to be much shorter. Take a look at the video below to see toolpath trimming in action and how you might use it in a few different scenarios. Keep an eye out for more Toolpath Modification features soon!
Check out the Product Documentation for more detailed information.
[icon name=”star” class=”” unprefixed_class=””] New! 4-Axis Rotary
4-axis Rotary allows the simultaneous milling of non-revolved profiles using a 4th axis, helping you get the most out of any 4-axis capabilities in your shop. Select geometry to control front, back, and angular limits directly from the model or using work geometry. Make fine adjustments with clear, easy to use graphical manipulators. Choose from multiple pass types to best suit the geometry of your part, including Spiral, Circle, and Line.

4-axis Rotary also allows you to offset the tool, such that the cut moves up off the tip of the tool, helping to improve cut conditions, which can lead to longer tool life and better surface finish. Check out the video linked below to see the pass types and tool offset in action.
Read through the Product Documentation for more details on how to use 4-axis Rotary.
[icon name=”star” class=”” unprefixed_class=””] New! 5-Axis Tilting and Collision Avoidance
5-axis tilting controls and automatic collision avoidance have been added to the Steep & Shallow Strategy. There is now a 6th tab in the toolpath dialog, the Tool Axis tab. Here you can set the primary tool mode, as shown below. The Vertical option allows you to use Automatic Collision avoidance, such that the tool automatically tilts to avoid collisions with the model, tool, and holder.
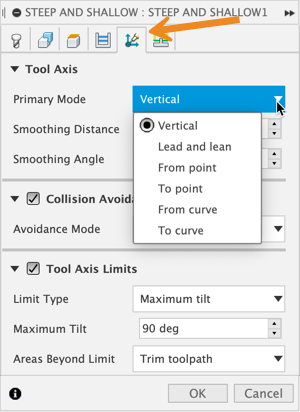
Choose Lead and Lean to set the specific lead and lean angles as they relate to the surface normal, where lead is the angle in the direction of motion, and lean is the angle about the direction of motion. Choose To/From Point/Curve to drive the axis of the tool based on a selected point or curve. When selecting “to,” the tool points inwards toward the point or curve, making those choices better suited to convex geometry. When selecting “from” the tool points away from the point or curve, making those options better suited to concave geometry.
For all Primary Mode options, Tool Axis Limits keep the tool from tilting too far. If the tool reaches the maximum tilt, there are two options for what happens to those sections of the toolpath. The “Trim toolpath” option simply removes those toolpath sections while the “Machine at maximum angle” keeps the tool at the maximum tilt while continuing to machine. Check out the tutorial and Product Documentation below for a more detailed look at these options and to see them in action.
Make sure to check out the Product Documentation for more information on using 5-axis tilting and collision avoidance in Fusion 360.
Public Previews
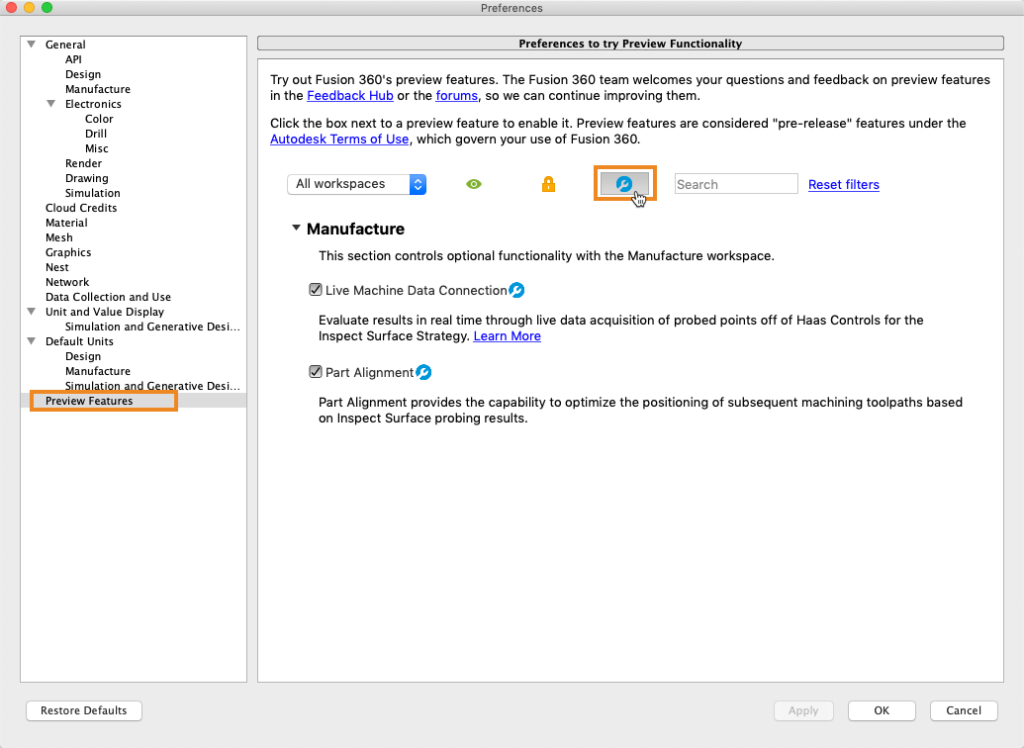
Public Preview features will be marked with this icon [icon name=”flag-o” class=”” unprefixed_class=””]. These features are not quite ready for full release, but we think they’re close enough to let you try them out. To enable a public preview, navigate to Preferences by clicking on your name in the upper right corner of Fusion 360. Navigate to the Preview section on the left side. Here you can use the filters to view extension previews only and enable them to get access.
[icon name=”flag-o” class=”” unprefixed_class=””] Public Preview Part Alignment
Part Alignment allows you to inspect the stock, casting, or part itself to best align it for downstream operations. This is available for 3-axis (translation in all 3 axes), 4-axis (translation + rotation in 1 axis), and full 5-axis alignment. Part alignment increases part accuracy and process reliability as it reduces error between manufacturing processes. This can also be used to realign in-process material to ensure there is enough material to make the finished part like castings or metal prints that need subsequent machining operations. Watch the tutorial below for an example walkthrough.
[icon name=”flag-o” class=”” unprefixed_class=””] Public Preview Live Machine Connection
For some extension features, like Surface Inspection, we wanted to make a more seamless results collection process. We’ve started to add the capability to connect Fusion 360 directly to the machine control, so results appear live as they are measured in the machine. For the first step, you can connect your Haas classic control to your PC via an RS232 cable. In the tutorial below, Richard shows you how to wire up the connectors and configure the control for live connection.
We look forward to hearing what you think as we continue to add more functionality – and value – to the manufacturing extension. Be sure to check back here for more updates!
Learn more about the extension here: https://www.autodesk.com/products/fusion-360/manufacturing-extension


