How to export Inventor assembly files and open them in Fusion

Autodesk Support

Oct 10, 2024


Products and versions covered


Issue:

How to export Inventor assembly files and open them in Fusion.

Solution:

Follow one of the following processes to export your assembly from Inventor and upload it to Fusion.

Inventor and Fusion Interoperability by Desktop Connector using Fusion Team

More information in: About Inventor and Fusion 360 Interoperability

Get files without Inventor without cloud connection 

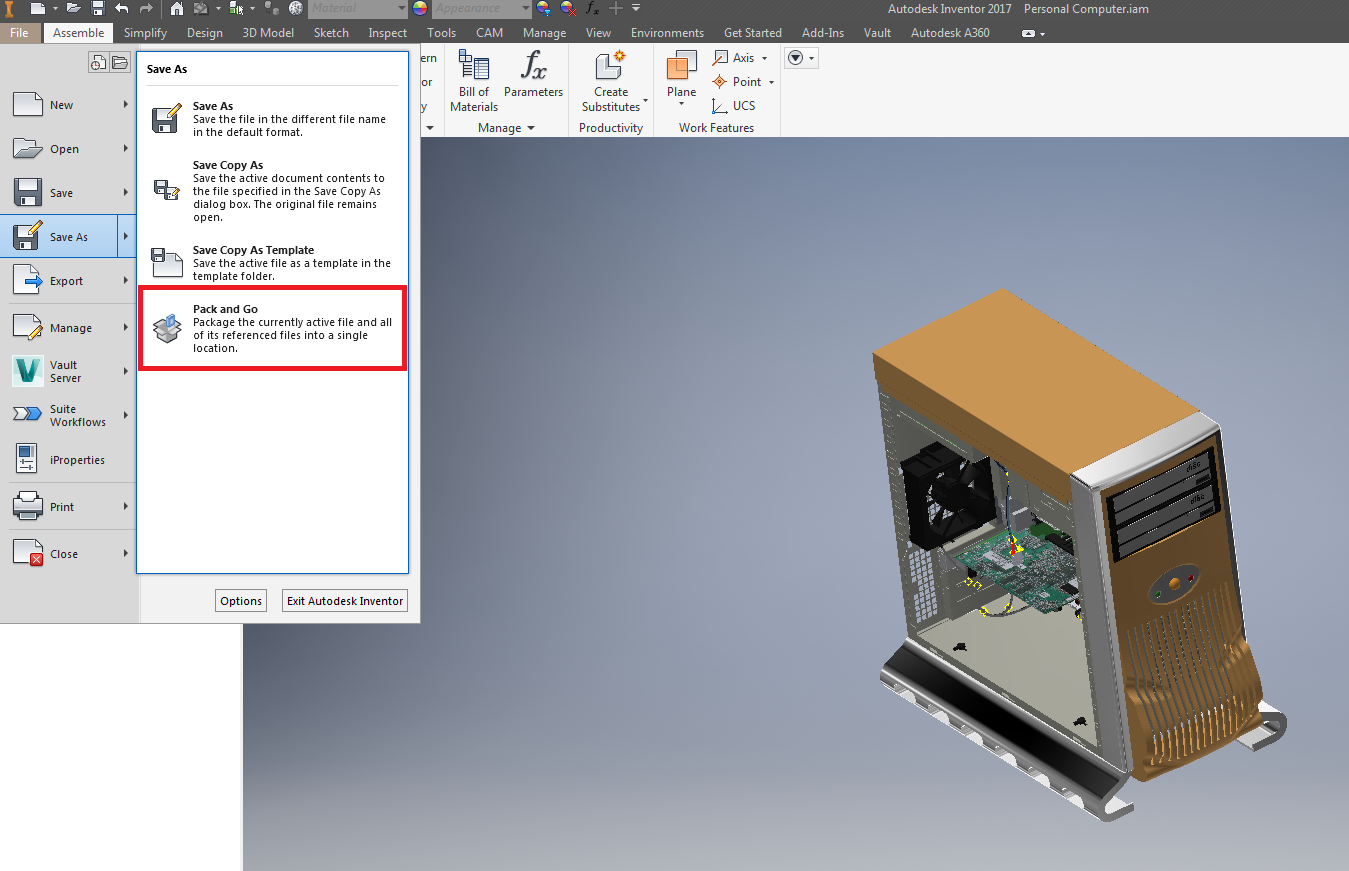
  1. Perform a Pack and Go in Inventor to package the assembly file and the part files used in the assembly. This command is accessed from the File > Save As menu:
Initiate Pack and Go in Inventor
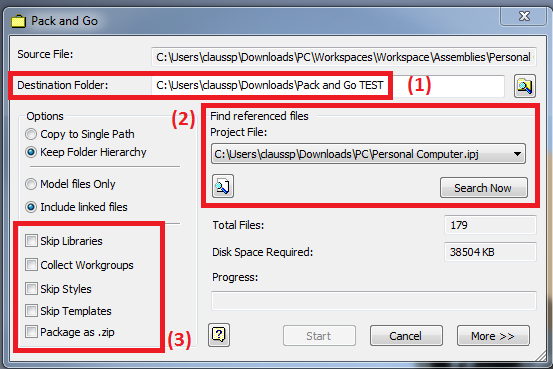
The Pack and Go dialogue box requires the input the destination folder (1), which is where the assembly package will be saved to. It also provides the option to find referenced files (2) by using a project file, and provides some export options such as "Package as .ZIP" (3).
Illustrating the necessary steps in form Pack and Go
Click the "Search Now" button to find referenced files and then click "Start" to begin exporting the assembly from Inventor.
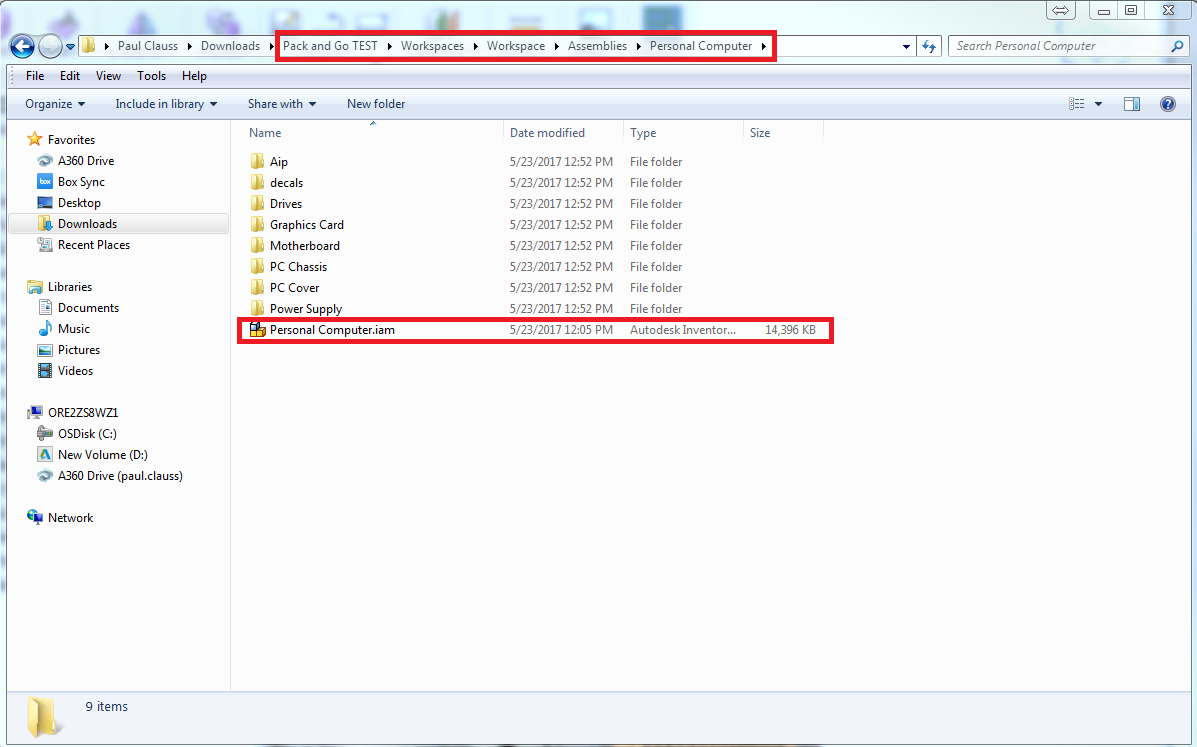
  1. After running a Pack and Go from Inventor, all Inventor files associated with the assembly will be found in the Destination folder selected in Step #1. The folder can be viewed in Windows File Explorer or Mac Finder.
The top level assembly file (.IAM) will be found in the Workspaces>Workspace>Assemblies><file name> folder created in the Pack and Go:
Where to find the top-level assembly file
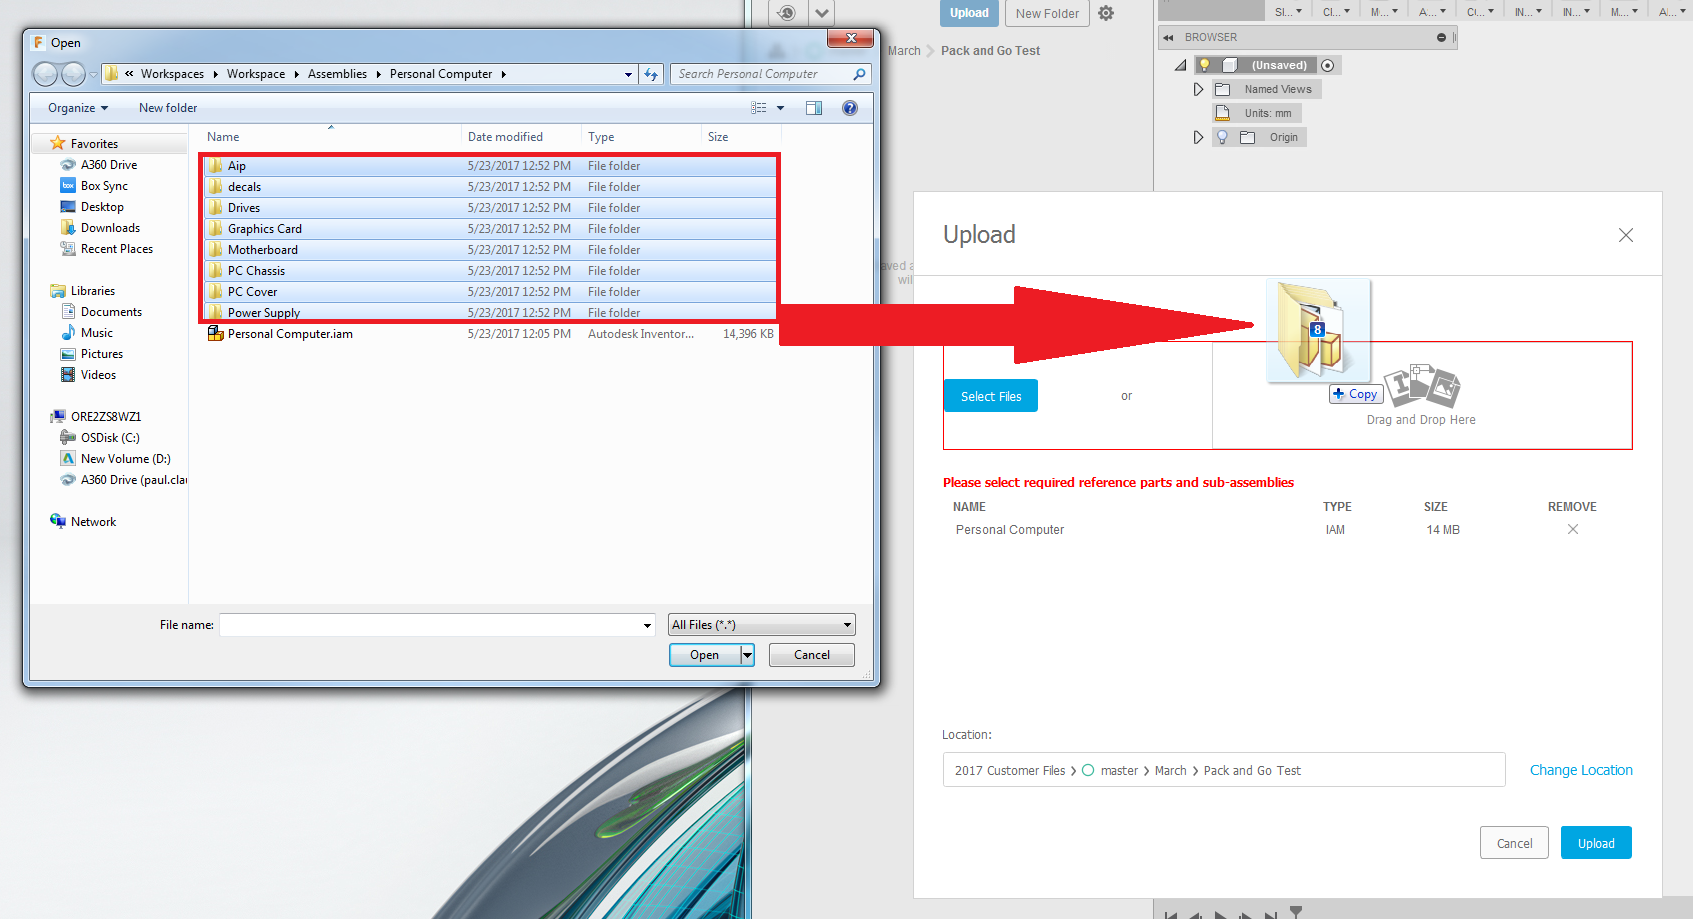
The other folders in the screenshot shown (Air, decals, Drives...) contain any subassemblies and individual part files used in the top level assembly, in this case "Personal Computer.iam." Both the top level assembly and all the supporting files (contained in the folders) will need to be uploaded to Fusion.
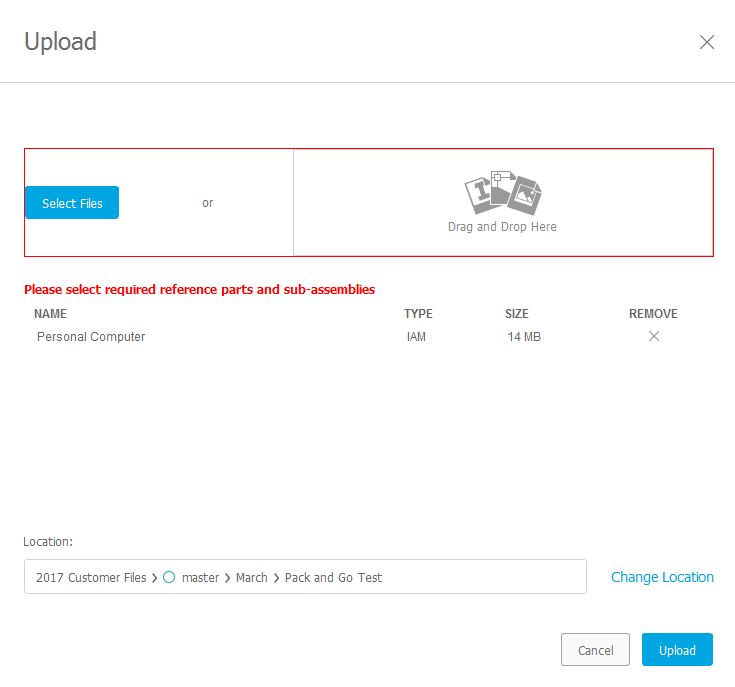
  1. Upload the assembly file and supporting files through the Fusion Data Panel. Make sure that all subassemblies and related files are uploaded to Fusion. Start by adding the top level assembly .IAM file to the Fusion uploads.
Uploading the main assembly *.iam file to Fusion
Select "Upload" with only the top level .IAM assembly selected will not be possible - include any corresponding subassemblies and part files from the folders mentioned in Step #2 if necessary. Drag the folders into the Fusion Uploads window by selecting them all and dragging them over:
Drag and Drop assembly and corresponding part files into the Fusion Upload window
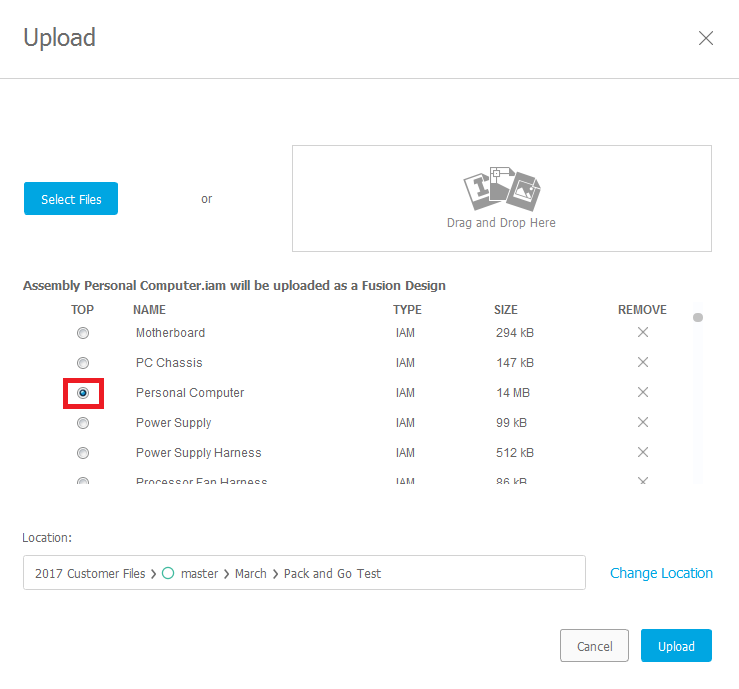
All subassembly and part files will then be seen in the Upload window. Make sure that the top level assembly is selected as the Top in the dialogue and upload the files to Fusion.
Process of uploading Inventor assembly and part files to Fusion
After the upload is complete, the assembly file will then be shown in the Data Panel and will be able to be opened in Fusion.

See this screencast for a video of this process: Inventor Pack and Go to Fusion 360 (.IAM Assembly Uploads)
 

Directly send Inventor data to Fusion

  1. Open a part or assembly in Inventor.
  2. Select tab Fusion:
Directly transfer data from Inventor to Fusion
  1. Select the appropriate icon as described in To Connect to Fusion 360 Workspaces.

Note: Importing Inventor files will not bring over sketches, Constraints (Fusion Joints) or parameters, and sheet metal parts are converted to standard model bodies. Imported files are in direct modeling mode by default. 


Products:

Fusion; Inventor Products;


Was this information helpful?


Need help? Ask the Autodesk Assistant!

The Assistant can help you find answers or contact an agent.


What level of support do you have?

Different subscription plans provide distinct categories of support. Find out the level of support for your plan.

View levels of support