Solution:
One option that was and still available it using the MDT file and creating a proxy file for use in Inventor. This will take in the MDT model and it create Inventor ipt or iam file. The drawback to this process is that the MDT (DWG) must remain and that any editing of the files must be done in MDT. The following will outline the process to do so. This works even if you don’t have any version of MDT still available it just that if you do still have a version of MDT 2009 you can still edit the MDT file and changes will be updated in the Inventor proxy file.
The second option would be if you still have Inventor 2012 available you can still download the MDT 2009 version for Inventor 2012 and translate the components. You will need to have Inventor installed first then install the MDT 2009 download.
More information about downloading MDT in:
How to import Mechanical Desktop 2009 files into InventorThis information will focus on using the proxy file. There is some set up ahead of time to ensure a smooth transition. You will need to have two folders created. One folder will be for your older MDT files. The other folder will be for the Inventor proxy files.
What happens when you use this option is you will place a MDT part or assembly into an Inventor iam/assembly. When doing so Inventor will take the MDT file and create an Inventor file (base solid, no browser history) that will be placed into the Inventor assembly file. This allows you to use existing MDT file in Inventor.
Folder Creation
The two directories will be created outside of the workspace of your Inventor project file. If you have company libraries file and folder or a folder where your Inventor Content Center components are located creating a folder at the same level will work out well. This keeps all your Inventor library files under one folder (See Fig.1).
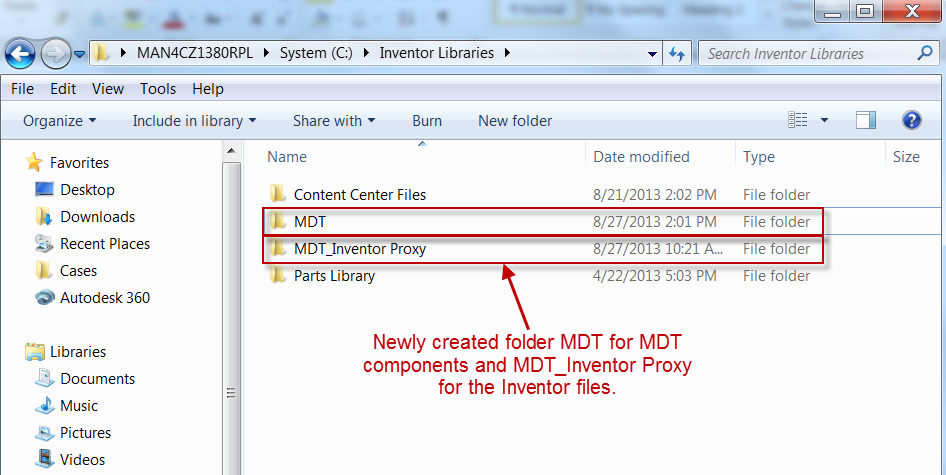
Fig.1
With the two directories create you will want to move your existing MDT models to the folder marked MDT (or whatever name you use). The other folder will be for models created later when you place the MDT models in an Inventor assembly.
Project File edits
With the folder created and MDT models moved to the newly created MDT folder you will need to add these folders to your Inventor Project file as library folders (See Fig. 2). If using a Vaulted project file you will need to first check the project file out so you can edit it. The first folder will be a standard library folder this is for the folder that contains your MDT files. The second library folder, you will need to create a proxy path for the location of the Inventor files created. To do this all you need to do is highlight the library (this works for Libraries only and not workspaces) you created that holds the MDT files and select the Add Proxy Path command (See Fig. 2). This will ask for a folder location select the folder location you have determined for the Inventor files to be located in. When completed it will have the same name as the library you created it from with the one exception of an underscore in front of the name and the path location being where you directed it to.
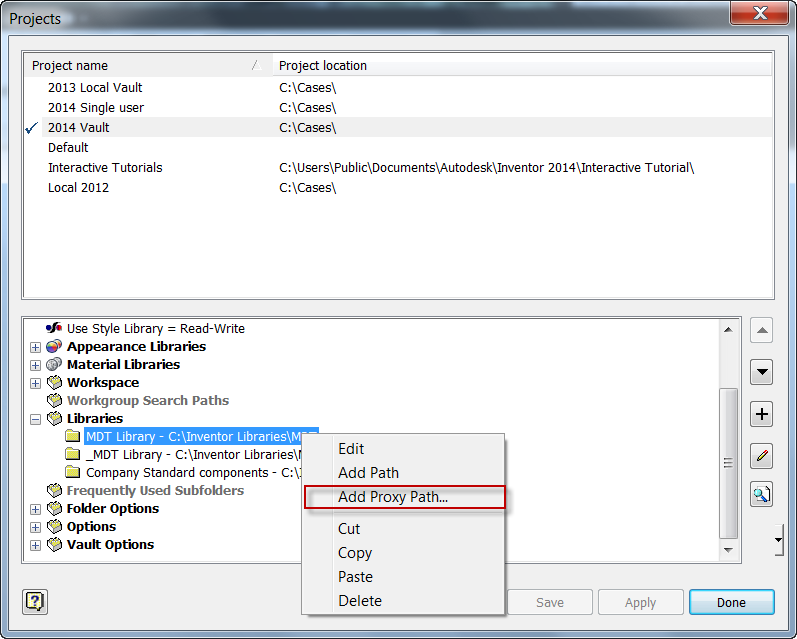
Fig.2
With your folders created and your project file adding those folders to the libraries section of the project file you’re ready to use MDT files in Inventor assemblies.
One further note: Files in folder under the heading of Libraries will not be editable in Inventor these are considered read only.
Vault users
For Vault user there will be more configurations needed. The folders can be located in library folder on a server and not within the Vault themselves but external to the vault with the metadata being added to the vault.
To do so you will need to use a vault project file and open Inventor file. It should be still checked out from your earlier edits. Once a file is opened you will need to go to the Vault tab in your ribbon menu. In the Vault menu you will need to expand the Access option and select the Map Folders command (See Fig.3).
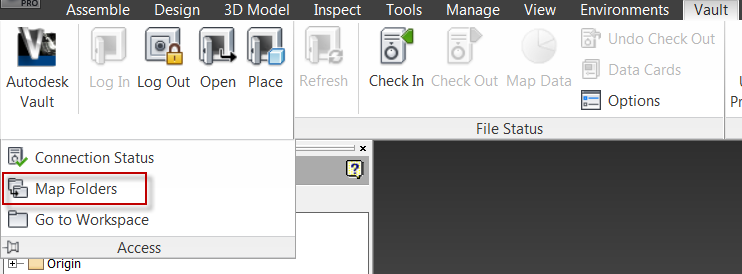
Fig. 3
In the Project Folder Mapping you will see that it has picked up on the added library files. You will need to create new folders in the vault for the folders you created earlier in Windows Explorer. Naming these the same will cut down on the confusion. If you have any doubts on editing the project file or mapping the folder paths please see your Vault Administrator for assistances. Once finished it should look like Fig. 4 for before and after images.

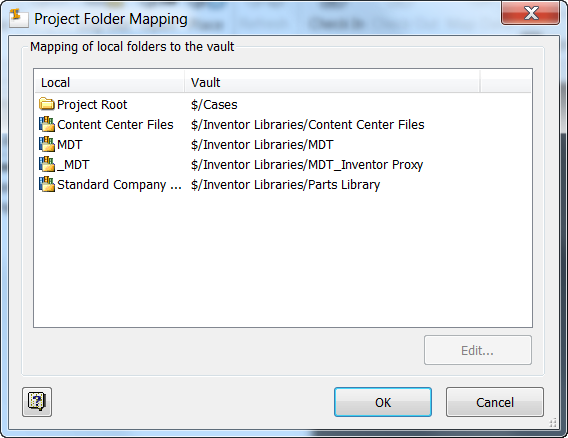
Fig. 4
Now you are ready to bring in MDT files to Inventor. We will outline the differences you will see if using a single folder and a dual folder configuration.
Using MDT files in Inventor
Open a new or existing Inventor assembly. With an assembly file open use the Place command and In the Place Component dialog box browse or use the short cuts to your MDT file folder. You may need to change the Files of type from Component Files (*.ipt *.iam) to AutoCAD dwg Files (*.dwg). Then select the MDT file you want to import to Inventor and select Open (See Fig. 5).
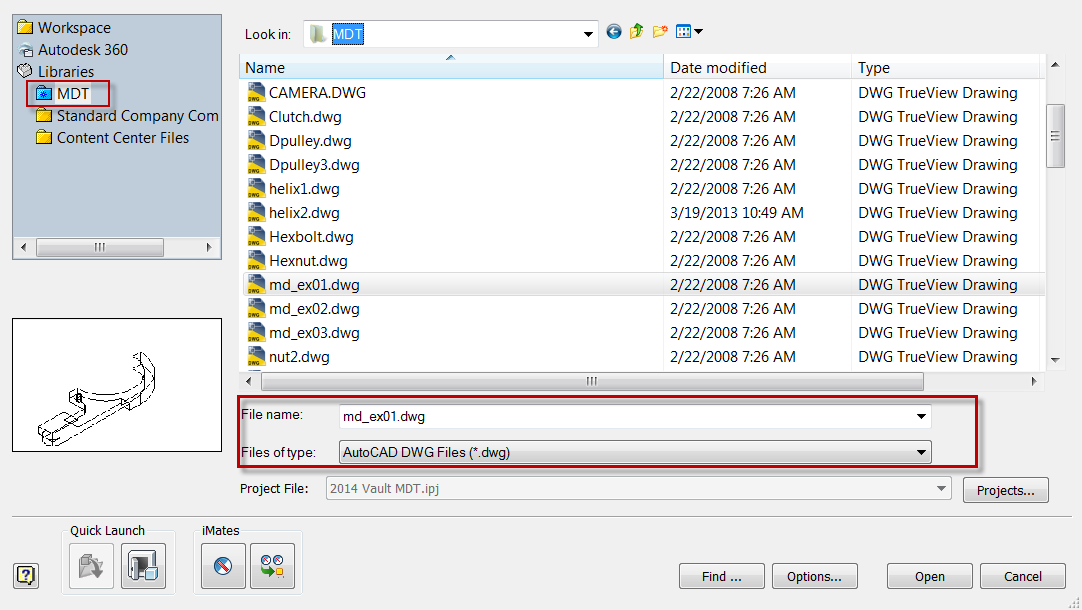
Fig. 5
After selecting the Open button you will get a Link MDT File Option dialog box. This a dialog box that gives you an option to change the unit of measurement if you know it is different than the units the file was drawn in. It will give you also the option of changing the template use for Inventor if you suspect a different unit of measurement (See Fig.6). Please remember AutoCAD & MDT are basically unitless vs. Inventor which has units of measurement. If satisfied you can select Ok.
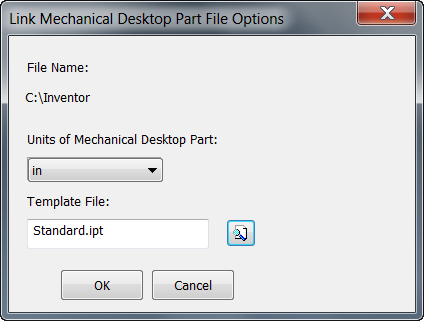
Fig. 6
If everything is set up then you should now have a proxy file (ipt) of your MDT file in the assembly.
Possible issues
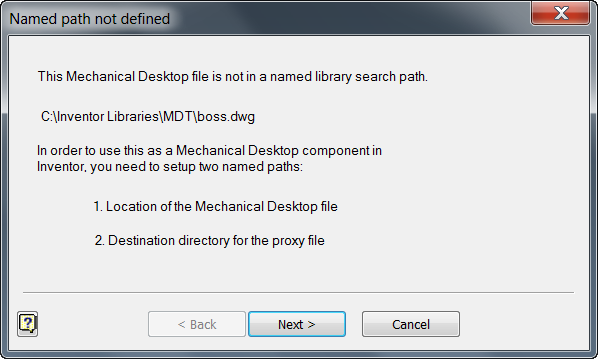
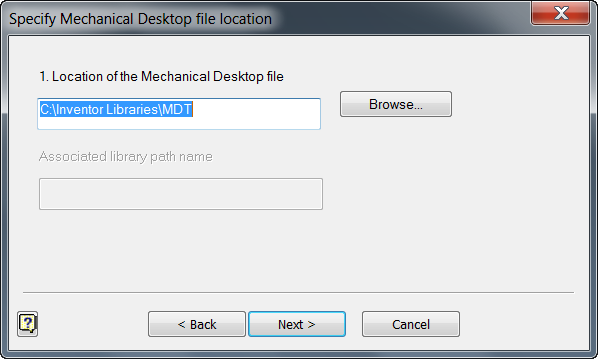
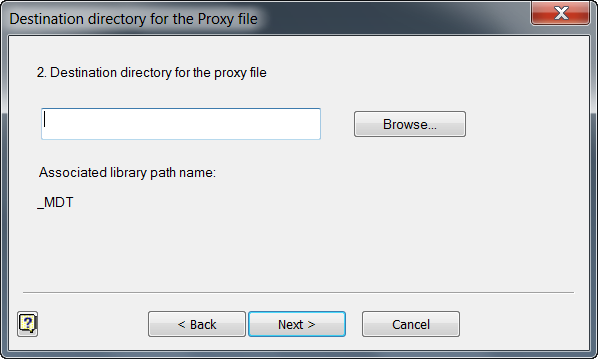
If some of the earlier set is not correct or you’re not using the project file you set up to use MDT proxy files you may get the following dialog boxes. These dialogs are asking for the library folder we set up earlier. If see any of the following please review Folder creation section and Project File edits.
If you see any of the above dialog box’s you can set up source and destination folder there and it will edit the project file but it’s just as easy to set it up ahead of time.