How to work with the Autodesk Nastran Editor

Autodesk Support

Dec 15, 2023


Products and versions covered

Issue:

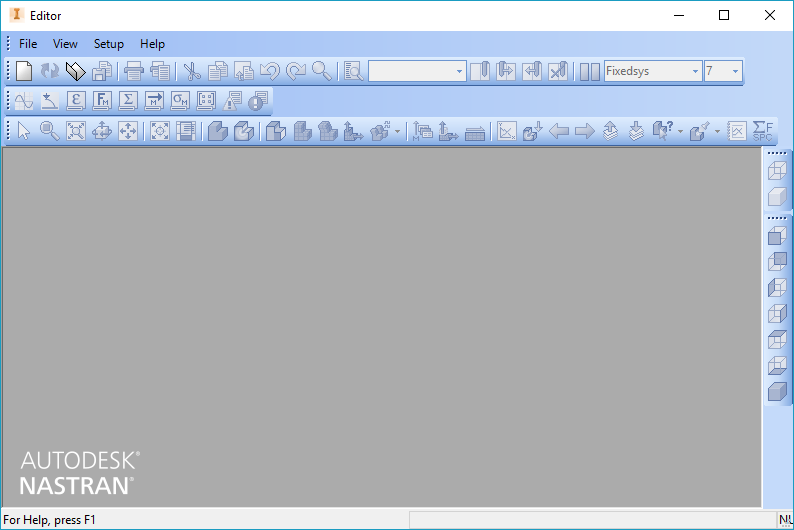
The Nastran Editor is used to edit the Nastran deck file (the .nas file). There are formatting issues that need to be maintained in the Nastran file. The Editor can also be used to visualize the model and view the results.
Nastran Editor app UI

Solution:

Note that the Nastran Editor is not a preprocessor and cannot mesh the model. It is a text editor and all input needs to be entered manually.

Edit the Nastran File

The deck file (.nas file) is broken up into three segments:

Executive Control

  • Everything above the line CEND is the executive control.
  • In the help, commands that are referred to as Directives are added here and they must start with the preface NASTRAN.

Case Control

  • Case Control is between the lines CEND and BEGIN BULK.
  • This is where output results are requested and Subcases are defined.

Bulk Data

  • Everything below BEGIN BULK.
  • Most of the model is defined here: mesh, loads, constraints, contacts, material properties, etc.
  • In the help, commands that are referred to as Parameters are entered here.
    • All parameters begin with PARAM,
    • Inputs are comma separated,
  • All data (excluding Parameters) is entered in either column delimited or comma separated.
  • For column delimited input:
    • Columns are either 8 or 16 characters wide
    • Default column with is 8 characters, 9 columns of data per line. Also known as 'narrow' field.
    • Cards that end with an asterisk next to the name are denoting 16 character widths.
      • Inventor Nastran uses 16 characters to define the position of nodes referred to as GRID on the deck file.
      • It will be denoted as GRID*.
      • The overall width is maintained and the extra width is rolled over to a new line with the first column being skipped.
      • The help only visualizes narrow column positioning of inputs to a Card.
    • NOTE that with column delimited, there is no visual separation and numbers can appear to run on to the next column. In the Editor, use the command "View > Field Marker (Narrow)" or "Field Marker (Wide)" to show lines for each column.
    • Values need to fit within the column but do not have to fill it or be aligned to either edge of the column.
  • For comma separated input:
    • Each line is limited to 9 fields.
    • For commands that use more than 9 fields, the line does not end with a comma. The next line begins with a comma. For example, this is the proper syntax for a command that requires 11 values (12 fields including the command):
COMMAND,2,3,4,5,6,7,8,9
,10,11,12
For more information on the format of the Nastran file, refer to the online Help and the "Inventor Nastran Solver Manual", section 2.1.2 on the offline help page. (Access the online Help from the "Nastran Support > Help" command in Inventor.  Access the offline help page from the Editor's "Help >  Nastran User's Manual".)
 

Definitions and other things to note

  • Integer
    • When a card is asking for an Integer for the input, it is asking for a whole number. 1, 2, 3, etc.
    • These are generally used as a ID number for reference. Note that node numbers (GRID cards) and element numbers do not need to be sequential.
    • Examples would be node and element numbers, or the ID number of materials, local coordinate systems, contact definitions, etc.
    • They are sometimes used as ON/OFF values.
  • Real
    • When a Real number is asked for, the number must be entered with a decimal point, even if it is a whole number. 1., 2., 3., etc
    • These are numbers that can represent material properties, load magnitude, stiffness values, coordinates, etc.
  • Scientific notation
    • Nastran handles scientific notation with a plus or minus sign ("+","-"). The letter 'E' generally used for scientific notation like in Excel is not necessary. Scientific notation is a real number and must have a decimal point.
    • 10 = 1.+1
    • 0.001 = 1.-3
  • Card
    • This is the term for a command in Nastran and is in reference to when Nastran used to be on physical medial (Punch Card).
  • Column 10
    • Is not generally used with the exception of some preprocessors. This column is a relic of physical media. A variable could be added there that linked it to the next physical card when a command was more than 1 card. This allowed the physical cards to not have to be read in exact order. The variable at the end of the card would be the same as the first column of the next related card.

Third-party App

When many commands need to be changed, it may be beneficial to use another program such as Excel. Some commands in the Nastran file will not transfer easily to other program. In these situations, use the third-party app FNO Reader to convert the Nastran commands between the .nas format and .csv format and back.


View Model and Results

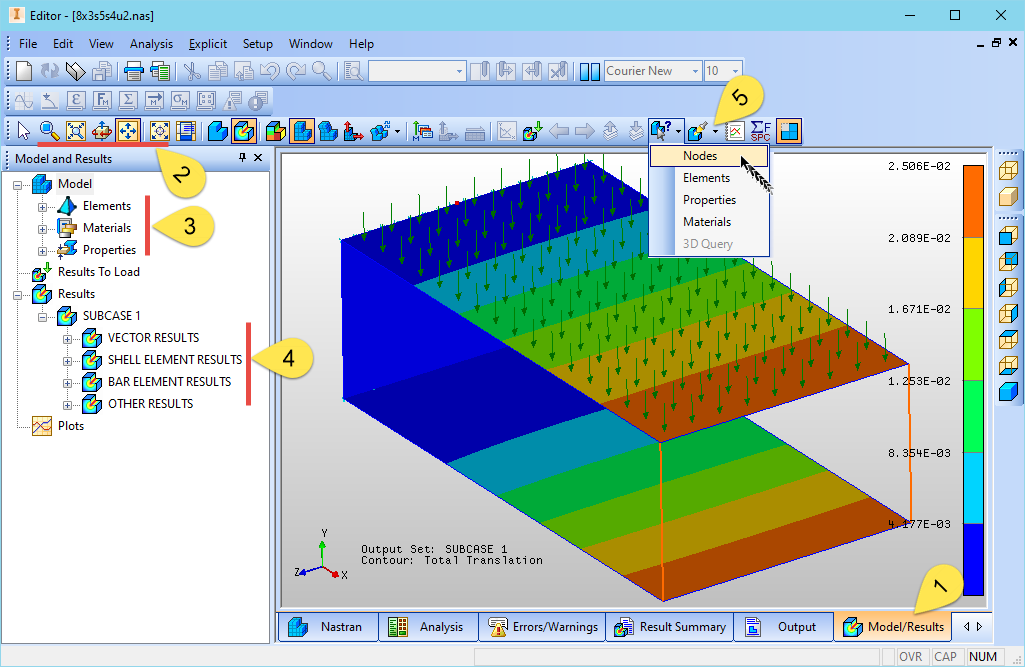
Nastran Editor view and probe results
  1. Click the "Model/Results" tab to view the model. To load the results, right-click in the graphics window and choose "Load Results".
  2. Tools to enclose the view, rotate the model, pan, and so on.
  3. Choose to hide parts of the model based on the element type, material, or Nastran property ID.
  4. Choose the type of result to display. Right-click on the appropriate branch and choose "Contour".
  5. Probe the result or property. Use the down-arrow to choose what to query (nodes, elements, and so on).

Products:

Nastran; Inventor Nastran;


Was this information helpful?


Need help? Ask the Autodesk Assistant!

The Assistant can help you find answers or contact an agent.


What level of support do you have?

Different subscription plans provide distinct categories of support. Find out the level of support for your plan.

View levels of support