
This is part three of Rebar detailing and fabrication, which includes: Shop drawings: rebar annotations
Part one includes: Rebar modeling, Placing rebar by two points
Part two includes: Modeling rebar by sketch, Propagating rebar
Part four includes: Shop drawings: bending schedules
Shop drawings: rebar annotations
In this topic, you will learn how to use multi-rebar annotations to tag each bar in a rebar set with a detailed annotation for fabrication and construction. By using the Multi-Rebar annotation tool
Exercise files:
rst_advanced_sample_project.rvt
Estimated time to complete:
15 minutes
Total steps:
8
1. On the Annotate tab in the Tag panel, select the Multi-Rebar annotation tool.
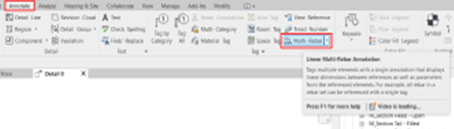
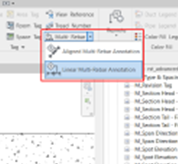
2. From the Multi-Rebar annotation tool drop-down, you can choose Aligned Multi-Rebar Annotation to tag a set of rebar or Linear Multi-Rebar Annotation to tag individual rebar. Select Linear Multi-Rebar Annotation.
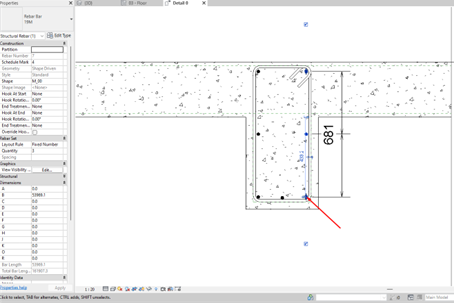
3. In the drawing area, select the rebar elements to place and display the dimensions.
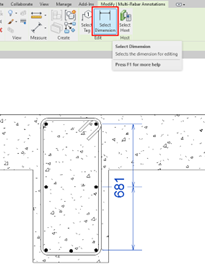
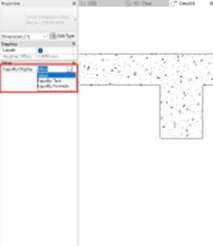
4. Select the multi-rebar annotation. Then, on the Modify | Structural Rebar tab in the Edit panel, click Select Dimension. On the Properties palette for Equality Display, select Value to display the bar-to-bar spacing.
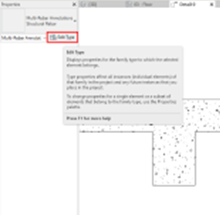
5. In the drawing area, select the multi-rebar annotation. Then in the Properties palette, click Edit Type.
6. The Type Properties dialog box displays, allowing you to adjust the display style for multi-rebar annotations. In the Tag Family drop-down, select M_Rebar Tag : Quantity & Type. Click OK.
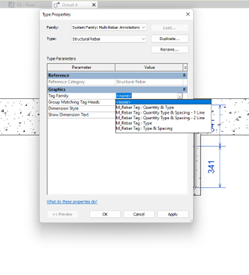
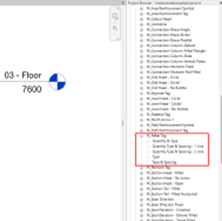
If <none> is the only option visible in the Tag Family drop-down, you will need to load the Rebar Tag Family from the default Revit family library.
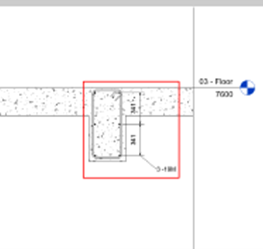
7. In the drawing area, select a rebar set. Because the Tag Family is set to M_Rebar Tag : Quantity & Type, the annotation will display as shown below.
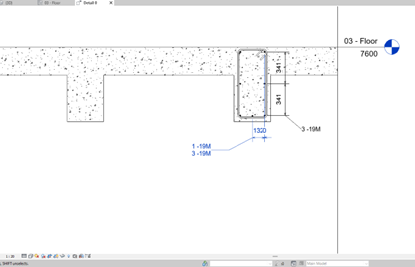
8. Press and hold CTRL to select another rebar set. The bar size and quantities for both sets will display.
Ready for more? Head to Rebar detailing and fabrication part four for: Shop drawings: bending schedules
Or go back to the AEC Collection Quick Start Guide for Contractors


