AU Class
AU Class
class - AU

Plan for Space Programming

이 강의 공유하기

설명

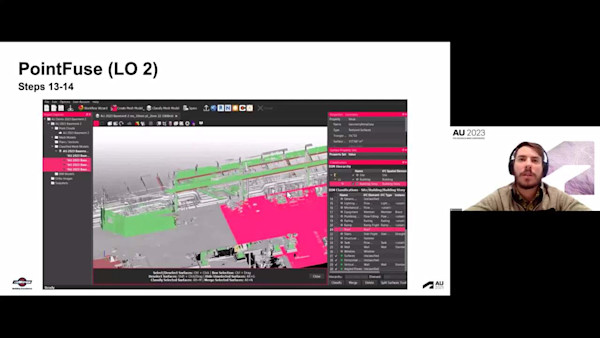
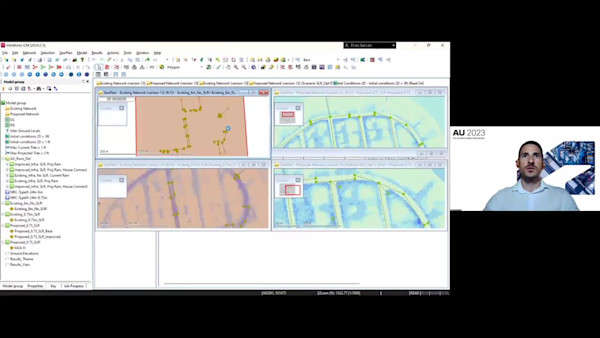
Space programming isn't a one-size-fits-all approach for DLR Group. Each project brings a different set of challenges with a different set of solutions. This presentation will discuss the different approaches that DLR Group uses for space programming in Revit software from campus planning to small-scale, tenant-fit projects. We'll provide actual project examples and talk about the challenges of the projects and the approaches that we used. You’ll see examples of custom software, paid subscriptions, and freely available resources as we talk about building, room, and FFE data.

주요 학습

  • Learn methods of using Revit and supporting tools for multibuilding space programming projects.
  • Learn methods of using Revit and supporting tools for single-building space programming projects.
  • Learn methods of using Revit and supporting tools for renovation of space programming projects.
  • Learn strategies for managing data at varied scales of projects.

발표자

  • William Carney
    William Carney is the BIM director at BSA LifeStructures where he is responsible for overseeing the firm’s use and implementation of design technologies. He obtained his Bachelor of Science degree in architectural studies from Southern Illinois University Carbondale and his master’s degree in architecture from the NewSchool of Architecture and Design in San Diego. He is also an Author for Lynda.com and is actively involved with the St. Louis Revit User Group as one of its steering committee member.
  • Ju Hui Chia
    Ju-Hui Chia is a Design Technology Manage at DLR Group. Focus on Revit Development. She is passionate about design technology, and programming that enables a more efficient process.
Video Player is loading.
Current Time 0:00
Duration 0:00
Loaded: 0%
Stream Type LIVE
Remaining Time 0:00
 
1x
  • Chapters
  • descriptions off, selected
  • en (Main), selected
    Transcript

    BILL CARNEY: Hello, and welcome to Plan for Space Programming. I'm Bill Carney, design technology leader for DLR Group, where I get to lead a team of BIM, reality capture, computational design, and GIS specialists to help our design teams best utilize technology to design buildings. We're a group of technology enthusiasts that love what we do and love enabling good design through the use of tools.

    I sit in our Minneapolis office, where I teach virtually for Washington University in my former home of St. Louis. I'm also a content author for LinkedIn Learning. And finally, I'm one of our three R&D studio leaders, where I help focus the lens of DLR group's use of funding for research and development for new and innovative technology that we can leverage for design or that we need to be aware of for its impact on design.

    I love what I do. I do what I love. My co-presenter today is one of our rock stars from our DLR Group's design technology team, Ju-Hui Chia, who can introduce herself.

    JU-HUI CHIA: Hello. I'm Ju-Hui Chia, design technology manager at DLR Group, where I mainly focus on automation programming and developing our own custom-ready roads. I sit in our Chicago office, and thanks, Bill, for having me here as a speaker today. And I'm really excited to share what we did for the company.

    BILL CARNEY: DLR Group is a global integrated design firm specializing in architecture, engineering, interior design, and planning as our core disciplines. We have offices in most major US cities, as well as Shanghai and Dubai.

    JU-HUI CHIA: We started in 1966 with Irv Dana, Bill Larson, and Jim Roubal and two architects and engineering in Omaha. Grew a firm out of their basement into the employee-owned design firm we are today.

    BILL CARNEY: We practice in 10 primary sectors. The diversity in sectors and region are really why we're here today. Ju-Hui and I, we've been working across disciplines and sectors to develop new tools and processes, and this collection of sectors creates diversity and the types of buildings that we designed. So we could work the exact same way on every single project, but we do take a right-size approach to tools, and not every project type benefits from the same approach.

    If you've ever used the Revit schedule key to fill out finish information, you've run into a scenario where it works great on a project with similar room types, but when you find a room type that requires slightly different similar information, you might find yourself doing stupid workarounds that continue using the schedule key.

    I almost wanted to try and coin something like the three dimensions of programming and have a cube with all the options, but I thought it was a little cheesy. It does require a bit of a matrix to determine what tools and how to use them. So part of doing this presentation was for us to consolidate the many disparate tools and processes that we have across the firm into something we could guide a team on what to use from something like a project startup form or BIM execution plan.

    So we could ask questions like, is it a renovation? Does this project have multiple levels or buildings? By adding just a few questions about the space program, we can suggest a few options for tools that will support the project best. So we do have a few more questions that we do ask in the third dimension.

    So when we ask what additional information our teams have to start the project, we end up with a cube, and the 3-D's of programming! Sorry, I really can't help myself in using things when I present. It's all about my own entertainment. But in all seriousness, when we pair the building type, the working style, and find out what the team has for a starting point, so what is the site like?

    Does it have a lot of topography? Do they have CAD? Do they have Revit? Do they have client standards, regulated standards for building program? All of these things help us pick out what we need to do. So Ju-Hui and I will talk about some of the projects and approaches that we've used around these terms and options.

    So with that, let's set some expectations for the presentation. I find it's best to give an overview of where we'll go so you can know what to expect. So here's a road map to paint a very clear expectation. We're currently in the introduction phase of our presentation. So right here, right on time. Great work, Ju-Hui. Really, we'll talk about projects and details.

    So as we move into the 3D's of programming, we're going to look at projects. We're going to talk about a lot of tools. It's not a linear start to finish, how we did the whole project, it's the random collection of tools that we've used. Then we'll give some future thoughts as far as where we see ourselves going at DLR Group, and we'll try to put a bow on it and wrap it up, and then maybe some Q&A.

    Ju-Hui, do you want to take us home with the learning objectives?

    JU-HUI CHIA: Of course. So for today's learning objectives, we would like to learn methods of using Revit and supporting tools for multi-building space programming projects. We also want to learn methods of using Revit and supporting tools for single-building space programming projects as well as the renovation of space programming projects.

    We will highlight in specific projects. Data strategies will be covered throughout each project example. We will try to highlight how we manage space-related information for the project. It's not all strategies, just some strategies.

    BILL CARNEY: Well said.

    JU-HUI CHIA: And now, the introduction are out of the way, let's get into the meat of presentation, our 3D space programming project examples.

    BILL CARNEY: So we kind of just lumped workplace as a bunch of our building type scenarios. And this is where we have a whole building program. We have tenant bit projects. We have renovations. We have a single floor layout. These projects always seem to be fast, so once you start, you're stuck with the method that you have, and there isn't a lot of room for error.

    What would fit in the space is the game that we play on these projects. If you like Tetris, you might like a tenant fit project. Many of our workplace clients send us these quick, small exercises to test what will fit in the space. You're basically making the space program for the project, and it's not overly designing anything but seeing what can reasonably fit. So that we can knock out some of the learning objectives, this isn't a whole building project. You're working within a boundary. The size of the boundary should guide your approach.

    So common, for me, has always been a lot of health care projects, and this project, you'd have some of this to it, where it's a renovation in a small suite area. So in a size of an area like this, you usually only have one person working in it. So Revit design options do work, and they work well at this scale of a project. And this is about the size limit that I recommend for using design options.

    When the scope is bigger, like the whole floor, I recommend saving the whole floor as a separate file. So if the file is already one giant model with multiple levels, what you can do is select all the things on a floor, make that a model group, and then turn that group into a link. And then if there is additional design options, you can copy that file and rename it.

    The benefit of this is that often, on a floor plan of this size, you may have multiple people working on it. And even if it's just one additional person that's doing annotations and detailing, the ability to turn that into a central model allows for this. So this is more often a strategy for health care or higher education, but basically, anything with a campus will have a base plan file. And you have the existing buildings, you pull that file out, you do your project, and then you simply just bind it back into the project. And with all your new drawings combined, you have what the new existing building is, and then you wait for the next call and the next tenant bit project.

    Specifically for this project, I know this isn't sexy, but it's a screenshot of an Excel calculator that had the rules for the spaces of the client. So we use this with some square footage estimates and number of people to create space program scenarios of what would fit inside of this building. When we were initially engaged in this project, we were given this list, and we did our typical thing and make a whole bunch of boxes. The team was immediately overwhelmed. They had to fit these boxes into small areas, and it was just too much.

    So because these are quick burn projects, we did work with the team to really listen and hear what they were trying to do. And what we found is that for them, often, it was just having the pre-loaded room types is what they were needing because they had to let the room drive the calculation for the additional spaces. So they're able to just pick day office and array it along this line, and that should drive the number of additional huddle rooms and spaces that they need from this calculator.

    So the designer can just copy their room along and then go ahead and change the type to a different type because they know what they need inside of the space, and they're just making it quickly fit. It works well enough. A tip from us is, if you have a whole bunch of boxes and you do have to lay them out, use an Align tool of some sort. There's a lot out there, and what I'm doing here is taking one of the boxes and aligning it into a corner, and that box represents an office. And then what I can do is use the Revit add-in to just select all the boxes and align them from a click of a button.

    So here, I can click on the Add Ins tab, click Align Top. They all move. I didn't have to individually click each box to move it, and then I got them to condense with another click of a button.

    So something that we did make with our test fit projects, so much of this is about just finding seat counts that can fit inside of an area. So we built a tool that allowed us to select a region, and that could be a room-- it could be a filled region, it could be a floor-- and then pick the furniture item, and then you can pick the pattern that you want the furniture to lay out in. So what they did is click the furniture, the desk and chair, and it laid it out in rows. But then we can pick a different furniture pattern and adjust that very quickly.

    So this one, it's been pretty perfect for this style of project. We just serrated around the outside edges of the room. These videos show this a little more in detail. On the left is different patterns and groupings, and you can see we're selecting circles and chairs and different groups of furniture, so you can just work in layout like a little pod and lay that out in a space based on patterns. And then the video on the right, what we're doing is some manual override.

    So we set it that you can set a detail line style that represents something like circulation. It could be primary circulation or secondary circulation. And you can give that a dimensional offset. And as you draw that over these spaces, it automatically adjusts the furniture inside of it. So you can really quickly layout FF&E items with some manual oversight.

    Once you've done all of your layouts, the other part of this is they need to quickly create counts, and we found our teams were manually counting items inside of spaces. They were highlighting plans, so we did build a tool that you can just select the whole area, and it will give you counts as far as how many of these furniture items are by room or just the furniture family itself that you can populate into the calculator and drive your required box list.

    So these projects often come with options, and when you have options, you need to compare them. Our workplace team created a benchmarking method called workplace elevated. So it's common metrics for workplace to categorize room types and look at them in the same way. Initially, this was something that required our designers to draw an area plan of every single one of these super quick burn test fit projects. It's really tedious, and then when they make updates they're chasing their changes with this and changing that all the time.

    What you're seeing on the screen, we had built a tool that what it does is reads the room name and the bounding conditions and the size and guesses what that elevated category is. And then the user can go through a properties palette and click on each room and check to see that it's the correct type. And you may notice that some of the area boundary lines are on the inside of the wall, center of the wall, or the outside of the wall, and that's it's a modified BOMA calc based on the adjacent room type.

    So this really sped up the process for them, and then they could take it into additional tools like Power BI and calculate out other metrics like staff per collaboration areas, the number of workstations, total staff. It's a way for them to compare one design to another with metrics and actually, make some data-driven decisions.

    All in all, workplace stuff has been very successful for us. We're able to help teams speed up what they were doing. The tools we've been building continue on into other tools. The workplace elevated is actually morphing into the way that we're doing life safety. Nothing is perfect, but it's helping the teams that it can continue to improve.

    The one area that I would love to improve is something like that calculator having a way that it's not so client specific that we could write to really easily. And then a very weird thing for us is that these small-scale projects tend to show a lot of details, so they push the limits for what we can do graphically between boxes and rooms with furniture inside of them.

    So with that, Ju-Hui, do you want to take the next project?

    JU-HUI CHIA: Sure. Thanks, Bill. So the next project I would like to share is a J+C civic project, roughly 110,000 square feet, two stories. In this project, we used the imaginary clarity space programming tool to help the design team. With the typical deliverables folder criteria document process, we would have normally done within five months. But for this project, we were able to do in a matter of weeks, as we were asked by our client to have our preliminary criteria document to help them with their procurement process.

    We had our basic departments laid out, and then we were able to use this process to populate the two floors of the building with even more than we expected, followed deliverable furniture and equipment items, because we were able to lay out the spaces so quickly and have them be on the square footage targets.

    We started from taking the program list from an Excel sheet, which has the type of the room department component number, area, et cetera, and then we use imaginary space programming tool to import the programs, then populate all the spaces in Revit. We will have a short video to show the whole process in a few minutes.

    But the idea is to quickly populate all the programs with the square footage targets, and the design team can easily lay out their space, depends on their relationships, then convert them to actual walls and rooms in Revit.

    So the team also used KRT for room data sheets, which can grab all the data from Revit, including the amounts of the FAV items. Since all the data was tied into the rooms in Revit, they did not have to constantly go back to the room data sheets. They could just look at the room's properties and know that, hey, this space is high security level, and this one is a little bit lower, so this made their process much more streamlined. The challenge here was that the team was hoping that they could edit the data sheets graphically, but since these were in a beta version, they were OK with them.

    So this is the interface of the KRT space programming tool. As you can see here, these are older programs we imported from the Excel sheet, which have all the data for the room types. And then in here, we can pick what furniture or equipment we will have for this room type and set up some color coding for the department.

    Then we can go into Revit to pair the KRT field to Revit parameters and payload levels and set up the family folder location, where we stored all the families. Then we generate all the spaces by clicking the spaces from generic model. We can either Create all at once or only select a portion of them.

    Then after that, we got all our space boxes in Revit, and they can be shown as bubble diagrams or solid lines with the department's colors, and they have text on them. So the design team don't need to reference their program list back and forth. Because they have all the target square footage on the end of program data in the model.

    So they can quickly put them into the desired location. Then we have ability to convert them to actual walls or rooms by keeping all the data. Then we can even check if they have the proper FAVE items placed in the room. If not, we will know, and we can place them by using the FAVE button. And then we could either praise them or at once, which will place all the missing families in the center of the room, then we can check them to the correct location, or we could praise them individually.

    BILL CARNEY: One thing we have been trying similar to the workplace metric is the tool called Space Geometric. So you can analyze the spaces very quickly in a spatial syntax sort of way. It does some things great, but we did find our limitations with this as a justice and civic project, where a space may be limited privacy and visible in areas by partial walls or doors that are half doors.

    So those are things that we have challenges if we're trying to analyze visibility in two dimensions. But otherwise, it's a really good tool for us of trying to introduce more evidence-based design calculations. We think it's a slam dunk for our health care teams, and we've been finding it helpful in other locations.

    JU-HUI CHIA: So we were using KRT space programming in beta, so we didn't have our glitches, but we had enough bigger plans for how to do this process from other tools that we were able to make what we needed on the fly when things didn't work, while driving software development. We had a big project with repeatable information and fairly static data to the point where the team just needed something to help them manage requirements.

    So this was perfect for that, being beta, every hurdle we met, we seem to have a solution for with the exception of live editing the graphic version of the room data sheets. We have been exploring spatial metrics for our justice and civic projects and think there will be a fit, but run into a lot of challenges. It's worth mentioning that our justice and civic team has aspirations of working out of a common database for their projects. We will touch on it more, but we list that as room for improvement. Our data was still heavily developed in Excel and used KRT to connect to Revit and audit ourselves, but can improve.

    So next Bill is going to show a core project in Alaska.

    BILL CARNEY: I don't know if cool is the word. I always say this is one of the weird ones. So this was one of our planning projects, but normally planning, you're looking at very large scale, but they were getting down to the granular level of the programmatic rooms of each one of these buildings. So University of Alaska's master plan, we're looking at several buildings on several campuses across Alaska. Lots of topography.

    So the team, they wanted everything. They wanted to generate building masses, stacking diagrams, sight maps and floor plans that could all dynamically reflect information to make graphics for the master plan report. What we had to start with is CAD plans of each building. So we did use a Dynamo script that placed room bounding lines on all the CAD lines and then placed a room at the text of the room tag that it could spot inside of each room.

    And then that room, we picked up what the text was and assigned the room name and room number to that room. And then we could use that to make the color fill plan. On this project, we also use Dynamo to read the CAD site map and take the boundaries of the buildings, and we use that to make our masses that the team used to convey their master plan. But what we'll show here is where we've evolved to with that script from all the complexities that we've learned. Ju-Hui, do you want to explain this one? Because you can do it way better than I can.

    JU-HUI CHIA: Sure. So we build up these tools in a way that reads the building outlines in CAD, group and clean up duplicated or redundant lines and sort them to make sure all the buildings are enclosed and are closed loop. So then we can take the curved loop to create extrusion for each methods. And the exclusions will allow the person to set a parameter for building height and extrude the mass to represent the building height.

    Then you can split the mess into floors and plan case message to assign materials and split up to represent how the building is being used or in the case of planning should be used. So Bill, you want to tell us what other cool stuff we did for the project?

    BILL CARNEY: Absolutely. Although I was just watching because I'm so amazed by this every time it runs. With the topography, we had to take into account views across this site. So there were things that we need to take into consideration that a flat site in Florida is not as easy to analyze. So we did need to actually deal with the topography and look at it in ways, so that pushed us into InfraWorks to be able to select the site, look at what features are there. A lot of it was coastal, but some of the sites were just flat out on the side of a mountain.

    So we exported the InfraWorks model to FBX and we're DLR Group. We're a global design firm. We care about our graphics, so we took it into Twinmotion. And so here you can see the InfraWorks model exported in the Twin motion and then the Revit model brought in there.

    What I love about this is we build these masses on a floor plan or on a building level inside of Revit, and it doesn't exactly match the topography when you're going building the building like this. And so what Twinmotion does is lets me select that individual component of the model and move it, but it keeps its relation. And I can also reassign materials, so I can graphically convey some additional information inside of this and really polish up a presentation.

    And what you're seeing in the background, that actually picked up the map of the FBX, and it's pretty good. But there, I could apply some better-looking water that can move and give some additional information or put in things like boats and trees. You can even override the map, and there you're seeing buildings. It actually swaps out the InfraWorks buildings with better-looking bad buildings. So I think it's fantastic, and it's a good way for us to tell the story, combining all of these different data types.

    Speaking of combining data types, a benefit of converting the CAD rooms is that we can export TopoJSON files that can be read in Power BI. So at a campus level, it's pretty easy to see these things in context. So what you're seeing with these bubbles, this is one of my favorite things. It's called a network diagram.

    And so it will show interconnections between hierarchical information. So something like building department and room, I can see how these spaces relate to each other, and I can click and compare building A to Building B. I can see it graphically in the floor plan, and I can see how the spaces are similar or where my overlaps are between buildings. So it's a really good way for me to make informed decision about the building that I may not be able to see in just looking at it in a spreadsheet.

    So this project was great in that we were working with our team to build out a workflow, and we really put it all together finally. We'd run into enough complexity with the need to analyze space at a portfolio, campus, building, and individual room level, that we were able to iron out all of our wrinkles and dynamo and eventually build a button that Ju-Hui showed, which was amazing.

    We automated image exports. It's something that I throw out at every project ever as just a possibility of something we could do. And it always falls under that seeing is believing and having not seen it, the teams are never interested in, and we finally had a project that set that up. A big challenge with that, though, is that we had automated images exporting, and the idea is that you annotate your image inside of Revit and clarity export the image, and then it updates inside of your InDesign file.

    The problem is the team did their annotations in InDesign, so they still were updating their information in two places. We didn't really reap those benefits. Topography in Revit was a challenge. There not much needs to be said other than I am excited for the future. Our planners, they tend to pull down data and work out scenarios in Excel because it's quick and easy.

    This is a challenge that I just throw out for everybody to be aware. It's hard to keep track of when you do this, and make sure that, which is the correct current version. Or if they don't pull down all of the information like the building key, that may be like the building code name that you're tying it back to Power BI with, these things aren't impossible to overcome, but they're challenging.

    All in all, this was one of my favorite projects from a tool exploration perspective, but now, Ju-Hui is going to tell us about my favorite project.

    JU-HUI CHIA: Awesome So the next project is an educational for CRT master plan project, which is in Illinois' second largest district, U46. They have at least 55 plus buildings, which means 55 plus models, absolutely. And the materials, all we have are a bunch of the components for the projects. Before, the design team had to open individual CAD files, export them to Adobe Illustrator to color code them, and identify undersized rooms and capacities.

    Additionally, they manually calculate the capacity and label the rooms by use. This would take approximately 7 hours per building in the manual process. With the automation tools, it took about 1 and 5 hours to get you to a place where they can use the prints. Then these models can be used for all the five phases of the master plan efforts.

    We all have a couple of videos showing a series of scripts we made and run for this project. With these amounts of the models, KRT was a huge help and need because we let the test machine run or a bunch of the scripts and all the 55 models.

    Something to note about this project, K-12 is public, so we provide a lot of information that needs to be digested by the public. We had CAD files and needed to create diagrams, that list of each floor of each building. So the first video is showing us how to copy and then all the models. We had an Excel file that list all the score names, and we created a starter file, let Dynamo copy and rename all the files based on this name list. Then we used KRT to help batch uploading all the models and to bring this to you.

    And the second video is showing us how we set up the Dynamo script to link all the CAD files from Autodesk Desktop Connector onto their corresponding levels and buildings based on the CAD file name and the models name. Once we have the script set up correctly, we use KRT machines to run the rest of the models.

    The last one will be the one we generate rooms based on the CAD background. Seems the design team needed to quickly calculate all the problem areas and use these to do their research. So we built up another Dynamo script that we grab the data from, some specific CAD layers, walls, doors, windows and room text to grid the room separation lines and rooms. Then it sets their room names and numbers based on the room text in the CAD background.

    BILL CARNEY: So because a school is woven into the fabric of a community, our planning teams offer a huge level of technology and data analysis support through GAF for our teams to really look at the context of that building as part of the neighborhoods and communities that they actually reside in. So in these master-planning projects, they compare this information with our space program level information to make informed decisions beyond just the cost of repair for an individual building, but which site is going to have the biggest impact made throughout the entire school district.

    Power BI let their teams connect the BIM room information, this GIS information, and additional district requirements, and so much more. What's nice about the program is that our designers can learn this quickly. This actually was the first dashboard made by somebody learning on this project. So they never made this, and they put this together. It was great. This one, made from one of our more advanced Power BI users, they were looking at broader data. You can see there's acoustic, lighting, air quality. But you can go in and you can pick the different building types. You can see the information that you need to across these buildings and really help to connect the dots in a meaningful way.

    So although this project later in our presentation, it was actually one of our earlier successes as a team. Ju-Hui is too modest to take all the praise on this, but she was the rock star. This was one of the early successes of the DLR Group design technology teams for automation. So I have this phrase of build the myth where you want to have some events that are known for what your team's superpowers are.

    But really, myths are fake, and legends are built from something real, and this is one of those projects that Ju-Hui really became a legend of automation because the amount of time she was able to save for these teams. When there's 55 plus building sites, that team was going to manually set up Revit models for and trace to make color-fill plans. That's a lot of time that you can take a risk trying to automate something that you haven't done before.

    So even at one hour per building to set up a model and trace one to three floors, that's a real low guess for time saving. But that would still give you more than a week's worth of time to write script, where you would be better off spending all your time figuring out if you can do this without being better off doing it manually.

    So another benefit of this project is that it also brought a larger group of the firm into using Power BI just from seeing the examples of what we could do and the learning on the project. The only real area for improvement by the end of this project was that Dynamo was just fast enough that you could manually run some things on it, but it was low enough that it would require a lot of extra steps.

    We had to run several different scripts within it, and you could start to see the difference in performance between Dynamo and C#, so we've since programmed in our Revit add ins to handle that portion of work, but it's still fantastic. I can't say enough great about this project.

    So another one, the FIU project, this was an interesting one in that we got an existing site with detailed Revit models on it. And the team wanted us to create their typical massing block deliverables, so we needed to dumb down data, and we use Dynamo to basically shrink wrap the buildings to make masses.

    So we had three different sites, and they looked like this, and we wanted to turn them into this. So how we did that to dumb down BIM, we took Dynamo and we would select the linked model, and we would find the bounding box around the geometry of that model. And then once we had the bounding box, we could take the bottom face of it and draw room separation lines from that.

    And then once we had the room separation line, we could place a room inside of the box outside of the link and so we put it in a corner. And because the link was room bounding, all of a sudden, the room is going around the Revit model. So we shrunk wrapped that Revit model.

    Then with Dynamo, we could read the geometry of the room, and we could take the geometry of the bounding box cube and select the inverse. And so from that inverse, we could actually just find what the shrink wrap masses are and convert that into masses. Then we use CPC's spreadsheet link to let the team set data about the masses, like number of levels. We added the floors, the spaces inside of it, the building number, all the information that they needed to connect to. So they could start analyzing the information. We could run scripts to copy the levels out of the links and put it into the mass and then set the building levels at those same masses so they could start to slice and dice the buildings by department percentages and things like that.

    One of the hardest things was the overhang. So spotting something like this, there's lots of reasons this is hard. The biggest one is that these sorts of features are inconsistently modeled. Sometimes they're room bounding, sometimes they're not, but where Dynamo was fantastic is that you could visually see the geometry of what the computer has seen.

    And so we could look at it, and whenever we saw a weird shape mass that came out, we could look at the geometry in Dynamo and fix our script so that we could actually put the right shape inside of there. I had mentioned that we made levels inside of these masses, and we copied them out of the linked models so they were named the way they were named. And Power BI was really fantastic for us overriding level names and associating the first floor across all of these models so that we could look at these spaces in an even way.

    This project was similar to the Alaska project, but it was a little different in that we got to connect more information because we had more. We didn't do a site map because they were pretty large scale, and it didn't work out as well. But we were able to start to look at business unit, department, when the buildings were built, and we made a very big hierarchy that we could drill down into and see all these spaces across three different campuses graphically and just numerically and answer questions as we're trying to do a master plan.

    So we did also do the network diagram on this, and you can see it's pretty legible right here. And what was cool is you could filter through and look at connections of things. And we connect it by campus, building, business unit, department, and room use. So you can really see how these spaces are interrelated to each other, and you could compare individual business units and see the trail. But when you do this, it's horrible to look at, and the team runs away. So you have to be strategic in what you show them.

    This was a Power BI dashboard not used for this project, but it is another application of power BI that we've been using of analyzing time series data. And so this was culture and performing arts, and they were looking at theater spaces. And what they wanted to do is tag spaces, and you can see it in these colors by basically, noisy and not noisy. And then they're looking at events inside of the same theater to make sure that we don't have a loud event happening in the same area next to a not loud event, so that they're impacting each other or vise versa.

    So what you're seeing in this awesomely dynamic graphic is called the Time Storyteller, and it's a custom visual that you can download. And what I love about it is you can pick things like today and adjust whether you're looking at this linearly, radially, individually by one theater or three theaters, and you can dynamically look at this for patterns that your eyes can spot. I've completely fallen in love with this because on the fly, I can look at really complex data that I can't understand in Excel.

    Each Revit model had its own level. I think the most common question we answered on the project was, how do I schedule everything on the first floor across the building? Power BI made this really easy for us to take our schedules, and even though first floor wasn't named consistently, we could override that in Power BI and start to show the information as the same. So we did have a lot of trouble making those shrink-wrapped buildings, especially in buildings with courtyards or that were modeled weirdly.

    We found that some of the links had one building in it, and some had many. And being able to see that allowed us to do it. And from a personal point of view, it always saddens me to dumb down BIM, but there is a point. We're getting a graphic output, but really, our designers are getting to work consistently in the way that they're trained to work. So they just jump in and know what to do.

    Not every designer is a power Revit user, so I try to take my BIM utopian hat off and make sure that we're doing something that helps the designers. A huge benefit in shrink wrapping the link is that it made a campus of pretty heavy buildings go from a terribly slow Revit model to a functioning usable file that the team could graphically convey what was really a math problem in Excel.

    So some future thoughts of what lies ahead for DLR Group. This is an example of a seeding tool that we used for our culture and performing arts teams. It was born out of a Grasshopper script that one of our designers built, and we had some requests to stabilize it a little more. The idea is, if you have a cube and you need to fit a theater inside of it and the size of the theater, the focal points, that sort of thing, how many seats can fit inside of the space, length and width, as well as height.

    So the tool will generate the balconies. It allows the design team, though, to have some manual oversight. So they can adjust and move the balconies, they can copy them, but it's always making sure that the seats have the correct view to the stage and are laid out well. You can see the chairs have different widths, and so I learned a lot. All the colored chairs that you're seeing there are different widths, and they use different sized chairs to evenly spread the aisles as you have different number of seats that can fit as the theater tapers down to the stage.

    We also allowed for manual override of something like those aisles, where you could just graphically change them, and then what it's doing is giving you the number of seats and outputting them into this calculator that is going to drive the requirement of back of house spaces. So that's one of the things that we're trying to do is, how do you do the free form high design and then push that out to calculate the back of house spaces that are programmatically required.

    The other big R&D project is machine learning for space programming. So when I started DLR Group, there were several requests for R&D of an urban design tool, building level boxes tool, room level furniture and equipment tool, a data warehouse, pre and post occupancy evaluation, and data science to figure it out. So I put this way overly complicated diagram together to explain how the urban tool should feed requirements of what should be at a site into a building, and then those requirements should know what things go inside of the room. And you should feed this into a data warehouse and use machine learning to start to better understand your buildings and inject that from the planning stages in audit and on the design stage as a suggestion.

    So then the next year, we had gone through and we framed up what these tools could be and started building. And so I had to put together another terrible diagram. I'm notorious at over animated diagrams. And this one, we had this K-12 calculator that we've been working on. It's going to be rolling out at the end of the year. What it does is calculates the number of spaces that are required for a school and pushes it into clarity. And then clarity takes that and we can go to Rhino or Revit and design inside of them.

    And it's at these points that we want to inject machine learning into an audit on that list of rooms coming from the calculator or anything else that's getting uploaded and then in the design process. So I put together yet another terribly complicated diagram to try to explain what this new process would be like. But basically, today, or yesterday, we had a planner that had their own knowledge in Excel for a project, and it was pretty siloed to their circle of friends.

    So now, because we have this data warehouse, we are looking at projects across the firm and getting better averages to make better decisions on projects. So we're right here, and we're right on the edge of what I'm hoping to come back and tell everybody about the amazing ways that machine learning is impacting our design process. So we did an R&D project last year, and we wanted to set out to answer three questions, can we learn from our past projects, can we make suggestions in space programming, and can we predict placement of furniture?

    And it turns out that we could figure this out. Revit users don't fill out all the room parameters, and they don't call things the same way, and they like to abbreviate to make a name fit on a floor plan. So we have these incomplete lists, but with a list of the furniture items inside of a room, could we guess what the rest of those remaining things were And it turns out that we could do this with machine learning by reclassifying and using text analysis on these items.

    And so there's some cool data science stuff that we got into, and these are awesome charts and diagrams that we were looking at-- offices and bathrooms-- to see if we could spot common trends. And what you're seeing here is that we found that upper cabinet and base cabinet show up by each other. No kidding. These were things, we were spotting the patterns, which is great.

    And then what we did is, we have this tool. It's called Smart Copy, and I showed the W benchmarking tool. It's using machine learning. This one is not. It's using heavy computation. But what it's doing is let you lay out a room, and then it reads the center of the room, the door, and features like windows and the general shape of it and tries to take a best guess of what that orientation should be.

    So it could be mirrored, it could be a rectangle, and it goes and places those. And so here, we can stop having the conversation of, is it a super group or a model group or a superfamily or whatever we want to do, because we're just managing the data. So with this sort of process, because we can start to spot common rooms and the common things inside of rooms and the relationship between those things, what we want to do is start to have it that you can select the room, know what type it is, and push in the commonly suggested furniture items.

    And this is a really bad proof of concept. You can see that the stuff laid out not great, but what we wanted to do is see, could we take the machine learning information about a room and then push it into the room and copy it around just like we did with that Smart Copy, and we were able to. So it's only a proof of concept, but we are going to continue on this research this fall.

    So let's tie a bow on this thing and wrap this up. Just to recap, if it's part of a floor, use a design option. If it's the whole floor, save it out as a link. If you have a space program, space planning blocks are great. If you have to create a program, use a type-based block with room sizes into it. It helps you out, and you can place things, and you can use calculators behind to generate your program. Beyond that, use data analysis, computational tools, and help figure out what you need inside your building, and automate everything you reasonably should.

    So our approach throughout. This is a bit of a chest and stairs. So we've had a long-term strategy, which I showed with those R&D diagrams. We look out, but what we do is keep a close eye on adoption, and we don't try to do it all at once. We've worked with our teams for constant impactful improvement on each project, and we make each move with the strategy of chess and the incremental climb of a stair step by step.

    So with that, thank you for listening. We really appreciate you listening to this course. If you have questions that you want to follow up, you can connect with myself or Ju-Hui on LinkedIn. We'd be more than happy to talk to you.

    태그

    제품
    산업 분야
    ______
    icon-svg-close-thick

    쿠기 기본 설정

    오토데스크는 고객의 개인 정보와 최상의 경험을 중요시합니다. 오토데스크는 정보를 사용자화하고 응용프로그램을 만들기 위해 고객의 본 사이트 사용에 관한 데이터를 수집합니다.

    오토데스크에서 고객의 데이터를 수집하고 사용하도록 허용하시겠습니까?

    오토데스크에서 사용하는타사 서비스개인정보 처리방침 정책을 자세히 알아보십시오.

    반드시 필요 - 사이트가 제대로 작동하고 사용자에게 서비스를 원활하게 제공하기 위해 필수적임

    이 쿠키는 오토데스크에서 사용자 기본 설정 또는 로그인 정보를 저장하거나, 사용자 요청에 응답하거나, 장바구니의 품목을 처리하기 위해 필요합니다.

    사용자 경험 향상 – 사용자와 관련된 항목을 표시할 수 있게 해 줌

    이 쿠키는 오토데스크가 보다 향상된 기능을 제공하고 사용자에게 맞는 정보를 제공할 수 있게 해 줍니다. 사용자에게 맞는 정보 및 환경을 제공하기 위해 오토데스크 또는 서비스를 제공하는 협력업체에서 이 쿠키를 설정할 수 있습니다. 이 쿠키를 허용하지 않을 경우 이러한 서비스 중 일부 또는 전체를 이용하지 못하게 될 수 있습니다.

    광고 수신 설정 – 사용자에게 타겟팅된 광고를 제공할 수 있게 해 줌

    이 쿠키는 사용자와 관련성이 높은 광고를 표시하고 그 효과를 추적하기 위해 사용자 활동 및 관심 사항에 대한 데이터를 수집합니다. 이렇게 데이터를 수집함으로써 사용자의 관심 사항에 더 적합한 광고를 표시할 수 있습니다. 이 쿠키를 허용하지 않을 경우 관심 분야에 해당되지 않는 광고가 표시될 수 있습니다.

    icon-svg-close-thick

    타사 서비스

    각 범주에서 오토데스크가 사용하는 타사 서비스와 온라인에서 고객으로부터 수집하는 데이터를 사용하는 방식에 대해 자세히 알아보십시오.

    icon-svg-hide-thick

    icon-svg-show-thick

    반드시 필요 - 사이트가 제대로 작동하고 사용자에게 서비스를 원활하게 제공하기 위해 필수적임

    Qualtrics
    오토데스크는 고객에게 더욱 시의적절하며 관련 있는 이메일 컨텐츠를 제공하기 위해 Qualtrics를 이용합니다. 이를 위해, 고객의 온라인 행동 및 오토데스크에서 전송하는 이메일과의 상호 작용에 관한 데이터를 수집합니다. 수집하는 데이터에는 고객이 방문한 페이지, 시작한 체험판, 재생한 동영상, 구매 내역, IP 주소 또는 장치 ID, 이메일 확인율, 클릭한 링크 등이 포함될 수 있습니다. 오토데스크는 이 데이터를 다른 소스에서 수집된 데이터와 결합하여 고객의 판매 또는 고객 서비스 경험을 개선하며, 고급 분석 처리에 기초하여 보다 관련 있는 컨텐츠를 제공합니다. Qualtrics 개인정보취급방침
    Akamai mPulse
    오토데스크 사이트에서 고객의 행동에 관한 데이터를 수집하기 위해 Akamai mPulse를 이용합니다. 여기에는 고객이 방문한 페이지, 시작한 체험판, 재생한 동영상, 구매 내역, IP 주소 또는 장치 ID 및 오토데스크 ID가 포함될 수 있습니다. 오토데스크는 사이트 성과를 측정하고 고객의 온라인 경험의 편리함을 평가하여 기능을 개선하기 위해 이러한 데이터를 이용합니다. 또한, 이메일, 고객 지원 및 판매와 관련된 고객 경험을 최적화하기 위해 고급 분석 방법도 사용하고 있습니다. Akamai mPulse 개인정보취급방침
    Digital River
    오토데스크 사이트에서 고객의 행동에 관한 데이터를 수집하기 위해 Digital River를 이용합니다. 여기에는 고객이 방문한 페이지, 시작한 체험판, 재생한 동영상, 구매 내역, IP 주소 또는 장치 ID 및 오토데스크 ID가 포함될 수 있습니다. 오토데스크는 사이트 성과를 측정하고 고객의 온라인 경험의 편리함을 평가하여 기능을 개선하기 위해 이러한 데이터를 이용합니다. 또한, 이메일, 고객 지원 및 판매와 관련된 고객 경험을 최적화하기 위해 고급 분석 방법도 사용하고 있습니다. Digital River 개인정보취급방침
    Dynatrace
    오토데스크 사이트에서 고객의 행동에 관한 데이터를 수집하기 위해 Dynatrace를 이용합니다. 여기에는 고객이 방문한 페이지, 시작한 체험판, 재생한 동영상, 구매 내역, IP 주소 또는 장치 ID 및 오토데스크 ID가 포함될 수 있습니다. 오토데스크는 사이트 성과를 측정하고 고객의 온라인 경험의 편리함을 평가하여 기능을 개선하기 위해 이러한 데이터를 이용합니다. 또한, 이메일, 고객 지원 및 판매와 관련된 고객 경험을 최적화하기 위해 고급 분석 방법도 사용하고 있습니다. Dynatrace 개인정보취급방침
    Khoros
    오토데스크 사이트에서 고객의 행동에 관한 데이터를 수집하기 위해 Khoros를 이용합니다. 여기에는 고객이 방문한 페이지, 시작한 체험판, 재생한 동영상, 구매 내역, IP 주소 또는 장치 ID 및 오토데스크 ID가 포함될 수 있습니다. 오토데스크는 사이트 성과를 측정하고 고객의 온라인 경험의 편리함을 평가하여 기능을 개선하기 위해 이러한 데이터를 이용합니다. 또한, 이메일, 고객 지원 및 판매와 관련된 고객 경험을 최적화하기 위해 고급 분석 방법도 사용하고 있습니다. Khoros 개인정보취급방침
    Launch Darkly
    오토데스크 사이트에서 고객의 행동에 관한 데이터를 수집하기 위해 Launch Darkly를 이용합니다. 여기에는 고객이 방문한 페이지, 시작한 체험판, 재생한 동영상, 구매 내역, IP 주소 또는 장치 ID 및 오토데스크 ID가 포함될 수 있습니다. 오토데스크는 사이트 성과를 측정하고 고객의 온라인 경험의 편리함을 평가하여 기능을 개선하기 위해 이러한 데이터를 이용합니다. 또한, 이메일, 고객 지원 및 판매와 관련된 고객 경험을 최적화하기 위해 고급 분석 방법도 사용하고 있습니다. Launch Darkly 개인정보취급방침
    New Relic
    오토데스크 사이트에서 고객의 행동에 관한 데이터를 수집하기 위해 New Relic를 이용합니다. 여기에는 고객이 방문한 페이지, 시작한 체험판, 재생한 동영상, 구매 내역, IP 주소 또는 장치 ID 및 오토데스크 ID가 포함될 수 있습니다. 오토데스크는 사이트 성과를 측정하고 고객의 온라인 경험의 편리함을 평가하여 기능을 개선하기 위해 이러한 데이터를 이용합니다. 또한, 이메일, 고객 지원 및 판매와 관련된 고객 경험을 최적화하기 위해 고급 분석 방법도 사용하고 있습니다. New Relic 개인정보취급방침
    Salesforce Live Agent
    오토데스크 사이트에서 고객의 행동에 관한 데이터를 수집하기 위해 Salesforce Live Agent를 이용합니다. 여기에는 고객이 방문한 페이지, 시작한 체험판, 재생한 동영상, 구매 내역, IP 주소 또는 장치 ID 및 오토데스크 ID가 포함될 수 있습니다. 오토데스크는 사이트 성과를 측정하고 고객의 온라인 경험의 편리함을 평가하여 기능을 개선하기 위해 이러한 데이터를 이용합니다. 또한, 이메일, 고객 지원 및 판매와 관련된 고객 경험을 최적화하기 위해 고급 분석 방법도 사용하고 있습니다. Salesforce Live Agent 개인정보취급방침
    Wistia
    오토데스크 사이트에서 고객의 행동에 관한 데이터를 수집하기 위해 Wistia를 이용합니다. 여기에는 고객이 방문한 페이지, 시작한 체험판, 재생한 동영상, 구매 내역, IP 주소 또는 장치 ID 및 오토데스크 ID가 포함될 수 있습니다. 오토데스크는 사이트 성과를 측정하고 고객의 온라인 경험의 편리함을 평가하여 기능을 개선하기 위해 이러한 데이터를 이용합니다. 또한, 이메일, 고객 지원 및 판매와 관련된 고객 경험을 최적화하기 위해 고급 분석 방법도 사용하고 있습니다. Wistia 개인정보취급방침
    Tealium
    오토데스크 사이트에서 고객의 행동에 관한 데이터를 수집하기 위해 Tealium를 이용합니다. 여기에는 고객이 방문한 페이지, 시작한 체험판, 재생한 동영상, 구매 내역 및 IP 주소 또는 장치 ID가 포함될 수 있습니다. 오토데스크는 사이트 성과를 측정하고 고객의 온라인 경험의 편리함을 평가하여 기능을 개선하기 위해 이러한 데이터를 이용합니다. 또한, 이메일, 고객 지원 및 판매와 관련된 고객 경험을 최적화하기 위해 고급 분석 방법도 사용하고 있습니다. Upsellit
    오토데스크 사이트에서 고객의 행동에 관한 데이터를 수집하기 위해 Upsellit를 이용합니다. 여기에는 고객이 방문한 페이지, 시작한 체험판, 재생한 동영상, 구매 내역 및 IP 주소 또는 장치 ID가 포함될 수 있습니다. 오토데스크는 사이트 성과를 측정하고 고객의 온라인 경험의 편리함을 평가하여 기능을 개선하기 위해 이러한 데이터를 이용합니다. 또한, 이메일, 고객 지원 및 판매와 관련된 고객 경험을 최적화하기 위해 고급 분석 방법도 사용하고 있습니다. CJ Affiliates
    오토데스크 사이트에서 고객의 행동에 관한 데이터를 수집하기 위해 CJ Affiliates를 이용합니다. 여기에는 고객이 방문한 페이지, 시작한 체험판, 재생한 동영상, 구매 내역 및 IP 주소 또는 장치 ID가 포함될 수 있습니다. 오토데스크는 사이트 성과를 측정하고 고객의 온라인 경험의 편리함을 평가하여 기능을 개선하기 위해 이러한 데이터를 이용합니다. 또한, 이메일, 고객 지원 및 판매와 관련된 고객 경험을 최적화하기 위해 고급 분석 방법도 사용하고 있습니다. Commission Factory
    Typepad Stats
    오토데스크 사이트에서 고객의 행동에 관한 데이터를 수집하기 위해 Typepad Stats를 이용합니다. 여기에는 고객이 방문한 페이지, 시작한 체험판, 재생한 동영상, 구매 내역, IP 주소 또는 장치 ID 및 오토데스크 ID가 포함될 수 있습니다. 오토데스크는 사이트 성과를 측정하고 고객의 온라인 경험의 편리함을 평가하여 기능을 개선하기 위해 이러한 데이터를 이용합니다. 또한, 이메일, 고객 지원 및 판매와 관련된 고객 경험을 최적화하기 위해 고급 분석 방법도 사용하고 있습니다. Typepad Stats 개인정보취급방침
    Geo Targetly
    Autodesk는 Geo Targetly를 사용하여 웹 사이트 방문자를 가장 적합한 웹 페이지로 안내하거나 위치를 기반으로 맞춤형 콘텐츠를 제공합니다. Geo Targetly는 웹 사이트 방문자의 IP 주소를 사용하여 방문자 장치의 대략적인 위치를 파악합니다. 이렇게 하면 방문자가 (대부분의 경우) 현지 언어로 된 콘텐츠를 볼 수 있습니다.Geo Targetly 개인정보취급방침
    SpeedCurve
    Autodesk에서는 SpeedCurve를 사용하여 웹 페이지 로드 시간과 이미지, 스크립트, 텍스트 등의 후속 요소 응답성을 측정하여 웹 사이트 환경의 성능을 모니터링하고 측정합니다. SpeedCurve 개인정보취급방침
    Qualified
    Qualified is the Autodesk Live Chat agent platform. This platform provides services to allow our customers to communicate in real-time with Autodesk support. We may collect unique ID for specific browser sessions during a chat. Qualified Privacy Policy

    icon-svg-hide-thick

    icon-svg-show-thick

    사용자 경험 향상 – 사용자와 관련된 항목을 표시할 수 있게 해 줌

    Google Optimize
    오토데스크는 사이트의 새 기능을 테스트하고 이러한 기능의 고객 경험을 사용자화하기 위해 Google Optimize을 이용합니다. 이를 위해, 고객이 사이트를 방문해 있는 동안 행동 데이터를 수집합니다. 이 데이터에는 고객이 방문한 페이지, 시작한 체험판, 재생한 동영상, 구매 내역, IP 주소 또는 장치 ID, 오토데스크 ID 등이 포함될 수 있습니다. 고객은 기능 테스트를 바탕으로 여러 버전의 오토데스크 사이트를 경험하거나 방문자 특성을 바탕으로 개인화된 컨텐츠를 보게 될 수 있습니다. Google Optimize 개인정보취급방침
    ClickTale
    오토데스크는 고객이 사이트에서 겪을 수 있는 어려움을 더 잘 파악하기 위해 ClickTale을 이용합니다. 페이지의 모든 요소를 포함해 고객이 오토데스크 사이트와 상호 작용하는 방식을 이해하기 위해 세션 녹화를 사용합니다. 개인적으로 식별 가능한 정보는 가려지며 수집되지 않습니다. ClickTale 개인정보취급방침
    OneSignal
    오토데스크는 OneSignal가 지원하는 사이트에 디지털 광고를 배포하기 위해 OneSignal를 이용합니다. 광고는 OneSignal 데이터와 고객이 사이트를 방문하는 동안 오토데스크가 수집하는 행동 데이터 모두에 기초하여 제공됩니다. 오토데스크가 수집하는 데이터에는 고객이 방문한 페이지, 시작한 체험판, 재생한 동영상, 구매 내역 및 IP 주소 또는 장치 ID가 포함될 수 있습니다. 이 정보는 OneSignal에서 고객으로부터 수집한 데이터와 결합될 수 있습니다. 오토데스크는 디지털 광고 경험에 대한 사용자화를 개선하고 고객에게 더욱 관련 있는 광고를 제시하기 위해 OneSignal에 제공하는 데이터를 사용합니다. OneSignal 개인정보취급방침
    Optimizely
    오토데스크는 사이트의 새 기능을 테스트하고 이러한 기능의 고객 경험을 사용자화하기 위해 Optimizely을 이용합니다. 이를 위해, 고객이 사이트를 방문해 있는 동안 행동 데이터를 수집합니다. 이 데이터에는 고객이 방문한 페이지, 시작한 체험판, 재생한 동영상, 구매 내역, IP 주소 또는 장치 ID, 오토데스크 ID 등이 포함될 수 있습니다. 고객은 기능 테스트를 바탕으로 여러 버전의 오토데스크 사이트를 경험하거나 방문자 특성을 바탕으로 개인화된 컨텐츠를 보게 될 수 있습니다. Optimizely 개인정보취급방침
    Amplitude
    오토데스크는 사이트의 새 기능을 테스트하고 이러한 기능의 고객 경험을 사용자화하기 위해 Amplitude을 이용합니다. 이를 위해, 고객이 사이트를 방문해 있는 동안 행동 데이터를 수집합니다. 이 데이터에는 고객이 방문한 페이지, 시작한 체험판, 재생한 동영상, 구매 내역, IP 주소 또는 장치 ID, 오토데스크 ID 등이 포함될 수 있습니다. 고객은 기능 테스트를 바탕으로 여러 버전의 오토데스크 사이트를 경험하거나 방문자 특성을 바탕으로 개인화된 컨텐츠를 보게 될 수 있습니다. Amplitude 개인정보취급방침
    Snowplow
    오토데스크 사이트에서 고객의 행동에 관한 데이터를 수집하기 위해 Snowplow를 이용합니다. 여기에는 고객이 방문한 페이지, 시작한 체험판, 재생한 동영상, 구매 내역, IP 주소 또는 장치 ID 및 오토데스크 ID가 포함될 수 있습니다. 오토데스크는 사이트 성과를 측정하고 고객의 온라인 경험의 편리함을 평가하여 기능을 개선하기 위해 이러한 데이터를 이용합니다. 또한, 이메일, 고객 지원 및 판매와 관련된 고객 경험을 최적화하기 위해 고급 분석 방법도 사용하고 있습니다. Snowplow 개인정보취급방침
    UserVoice
    오토데스크 사이트에서 고객의 행동에 관한 데이터를 수집하기 위해 UserVoice를 이용합니다. 여기에는 고객이 방문한 페이지, 시작한 체험판, 재생한 동영상, 구매 내역, IP 주소 또는 장치 ID 및 오토데스크 ID가 포함될 수 있습니다. 오토데스크는 사이트 성과를 측정하고 고객의 온라인 경험의 편리함을 평가하여 기능을 개선하기 위해 이러한 데이터를 이용합니다. 또한, 이메일, 고객 지원 및 판매와 관련된 고객 경험을 최적화하기 위해 고급 분석 방법도 사용하고 있습니다. UserVoice 개인정보취급방침
    Clearbit
    Clearbit를 사용하면 실시간 데이터 보강 기능을 통해 고객에게 개인화되고 관련 있는 환경을 제공할 수 있습니다. Autodesk가 수집하는 데이터에는 고객이 방문한 페이지, 시작한 체험판, 재생한 동영상, 구매 내역 및 IP 주소 또는 장치 ID가 포함될 수 있습니다. Clearbit 개인정보취급방침
    YouTube
    YouTube는 사용자가 웹 사이트에 포함된 비디오를 보고 공유할 수 있도록 해주는 비디오 공유 플랫폼입니다. YouTube는 비디오 성능에 대한 시청 지표를 제공합니다. YouTube 개인정보보호 정책

    icon-svg-hide-thick

    icon-svg-show-thick

    광고 수신 설정 – 사용자에게 타겟팅된 광고를 제공할 수 있게 해 줌

    Adobe Analytics
    오토데스크 사이트에서 고객의 행동에 관한 데이터를 수집하기 위해 Adobe Analytics를 이용합니다. 여기에는 고객이 방문한 페이지, 시작한 체험판, 재생한 동영상, 구매 내역, IP 주소 또는 장치 ID 및 오토데스크 ID가 포함될 수 있습니다. 오토데스크는 사이트 성과를 측정하고 고객의 온라인 경험의 편리함을 평가하여 기능을 개선하기 위해 이러한 데이터를 이용합니다. 또한, 이메일, 고객 지원 및 판매와 관련된 고객 경험을 최적화하기 위해 고급 분석 방법도 사용하고 있습니다. Adobe Analytics 개인정보취급방침
    Google Analytics (Web Analytics)
    오토데스크 사이트에서 고객의 행동에 관한 데이터를 수집하기 위해 Google Analytics (Web Analytics)를 이용합니다. 여기에는 고객이 방문한 페이지, 시작한 체험판, 재생한 동영상, 구매 내역 및 IP 주소 또는 장치 ID가 포함될 수 있습니다. 오토데스크는 사이트 성과를 측정하고 고객의 온라인 경험의 편리함을 평가하여 기능을 개선하기 위해 이러한 데이터를 이용합니다. 또한, 이메일, 고객 지원 및 판매와 관련된 고객 경험을 최적화하기 위해 고급 분석 방법도 사용하고 있습니다. AdWords
    Marketo
    오토데스크는 고객에게 더욱 시의적절하며 관련 있는 이메일 컨텐츠를 제공하기 위해 Marketo를 이용합니다. 이를 위해, 고객의 온라인 행동 및 오토데스크에서 전송하는 이메일과의 상호 작용에 관한 데이터를 수집합니다. 수집하는 데이터에는 고객이 방문한 페이지, 시작한 체험판, 재생한 동영상, 구매 내역, IP 주소 또는 장치 ID, 이메일 확인율, 클릭한 링크 등이 포함될 수 있습니다. 오토데스크는 이 데이터를 다른 소스에서 수집된 데이터와 결합하여 고객의 판매 또는 고객 서비스 경험을 개선하며, 고급 분석 처리에 기초하여 보다 관련 있는 컨텐츠를 제공합니다. Marketo 개인정보취급방침
    Doubleclick
    오토데스크는 Doubleclick가 지원하는 사이트에 디지털 광고를 배포하기 위해 Doubleclick를 이용합니다. 광고는 Doubleclick 데이터와 고객이 사이트를 방문하는 동안 오토데스크가 수집하는 행동 데이터 모두에 기초하여 제공됩니다. 오토데스크가 수집하는 데이터에는 고객이 방문한 페이지, 시작한 체험판, 재생한 동영상, 구매 내역 및 IP 주소 또는 장치 ID가 포함될 수 있습니다. 이 정보는 Doubleclick에서 고객으로부터 수집한 데이터와 결합될 수 있습니다. 오토데스크는 디지털 광고 경험에 대한 사용자화를 개선하고 고객에게 더욱 관련 있는 광고를 제시하기 위해 Doubleclick에 제공하는 데이터를 사용합니다. Doubleclick 개인정보취급방침
    HubSpot
    오토데스크는 고객에게 더욱 시의적절하며 관련 있는 이메일 컨텐츠를 제공하기 위해 HubSpot을 이용합니다. 이를 위해, 고객의 온라인 행동 및 오토데스크에서 전송하는 이메일과의 상호 작용에 관한 데이터를 수집합니다. 수집하는 데이터에는 고객이 방문한 페이지, 시작한 체험판, 재생한 동영상, 구매 내역, IP 주소 또는 장치 ID, 이메일 확인율, 클릭한 링크 등이 포함될 수 있습니다. HubSpot 개인정보취급방침
    Twitter
    오토데스크는 Twitter가 지원하는 사이트에 디지털 광고를 배포하기 위해 Twitter를 이용합니다. 광고는 Twitter 데이터와 고객이 사이트를 방문하는 동안 오토데스크가 수집하는 행동 데이터 모두에 기초하여 제공됩니다. 오토데스크가 수집하는 데이터에는 고객이 방문한 페이지, 시작한 체험판, 재생한 동영상, 구매 내역 및 IP 주소 또는 장치 ID가 포함될 수 있습니다. 이 정보는 Twitter에서 고객으로부터 수집한 데이터와 결합될 수 있습니다. 오토데스크는 디지털 광고 경험에 대한 사용자화를 개선하고 고객에게 더욱 관련 있는 광고를 제시하기 위해 Twitter에 제공하는 데이터를 사용합니다. Twitter 개인정보취급방침
    Facebook
    오토데스크는 Facebook가 지원하는 사이트에 디지털 광고를 배포하기 위해 Facebook를 이용합니다. 광고는 Facebook 데이터와 고객이 사이트를 방문하는 동안 오토데스크가 수집하는 행동 데이터 모두에 기초하여 제공됩니다. 오토데스크가 수집하는 데이터에는 고객이 방문한 페이지, 시작한 체험판, 재생한 동영상, 구매 내역 및 IP 주소 또는 장치 ID가 포함될 수 있습니다. 이 정보는 Facebook에서 고객으로부터 수집한 데이터와 결합될 수 있습니다. 오토데스크는 디지털 광고 경험에 대한 사용자화를 개선하고 고객에게 더욱 관련 있는 광고를 제시하기 위해 Facebook에 제공하는 데이터를 사용합니다. Facebook 개인정보취급방침
    LinkedIn
    오토데스크는 LinkedIn가 지원하는 사이트에 디지털 광고를 배포하기 위해 LinkedIn를 이용합니다. 광고는 LinkedIn 데이터와 고객이 사이트를 방문하는 동안 오토데스크가 수집하는 행동 데이터 모두에 기초하여 제공됩니다. 오토데스크가 수집하는 데이터에는 고객이 방문한 페이지, 시작한 체험판, 재생한 동영상, 구매 내역 및 IP 주소 또는 장치 ID가 포함될 수 있습니다. 이 정보는 LinkedIn에서 고객으로부터 수집한 데이터와 결합될 수 있습니다. 오토데스크는 디지털 광고 경험에 대한 사용자화를 개선하고 고객에게 더욱 관련 있는 광고를 제시하기 위해 LinkedIn에 제공하는 데이터를 사용합니다. LinkedIn 개인정보취급방침
    Yahoo! Japan
    오토데스크는 Yahoo! Japan가 지원하는 사이트에 디지털 광고를 배포하기 위해 Yahoo! Japan를 이용합니다. 광고는 Yahoo! Japan 데이터와 고객이 사이트를 방문하는 동안 오토데스크가 수집하는 행동 데이터 모두에 기초하여 제공됩니다. 오토데스크가 수집하는 데이터에는 고객이 방문한 페이지, 시작한 체험판, 재생한 동영상, 구매 내역 및 IP 주소 또는 장치 ID가 포함될 수 있습니다. 이 정보는 Yahoo! Japan에서 고객으로부터 수집한 데이터와 결합될 수 있습니다. 오토데스크는 디지털 광고 경험에 대한 사용자화를 개선하고 고객에게 더욱 관련 있는 광고를 제시하기 위해 Yahoo! Japan에 제공하는 데이터를 사용합니다. Yahoo! Japan 개인정보취급방침
    Naver
    오토데스크는 Naver가 지원하는 사이트에 디지털 광고를 배포하기 위해 Naver를 이용합니다. 광고는 Naver 데이터와 고객이 사이트를 방문하는 동안 오토데스크가 수집하는 행동 데이터 모두에 기초하여 제공됩니다. 오토데스크가 수집하는 데이터에는 고객이 방문한 페이지, 시작한 체험판, 재생한 동영상, 구매 내역 및 IP 주소 또는 장치 ID가 포함될 수 있습니다. 이 정보는 Naver에서 고객으로부터 수집한 데이터와 결합될 수 있습니다. 오토데스크는 디지털 광고 경험에 대한 사용자화를 개선하고 고객에게 더욱 관련 있는 광고를 제시하기 위해 Naver에 제공하는 데이터를 사용합니다. Naver 개인정보취급방침
    Quantcast
    오토데스크는 Quantcast가 지원하는 사이트에 디지털 광고를 배포하기 위해 Quantcast를 이용합니다. 광고는 Quantcast 데이터와 고객이 사이트를 방문하는 동안 오토데스크가 수집하는 행동 데이터 모두에 기초하여 제공됩니다. 오토데스크가 수집하는 데이터에는 고객이 방문한 페이지, 시작한 체험판, 재생한 동영상, 구매 내역 및 IP 주소 또는 장치 ID가 포함될 수 있습니다. 이 정보는 Quantcast에서 고객으로부터 수집한 데이터와 결합될 수 있습니다. 오토데스크는 디지털 광고 경험에 대한 사용자화를 개선하고 고객에게 더욱 관련 있는 광고를 제시하기 위해 Quantcast에 제공하는 데이터를 사용합니다. Quantcast 개인정보취급방침
    Call Tracking
    오토데스크는 캠페인을 위해 사용자화된 전화번호를 제공하기 위하여 Call Tracking을 이용합니다. 그렇게 하면 고객이 오토데스크 담당자에게 더욱 빠르게 액세스할 수 있으며, 오토데스크의 성과를 더욱 정확하게 평가하는 데 도움이 됩니다. 제공된 전화번호를 기준으로 사이트에서 고객 행동에 관한 데이터를 수집할 수도 있습니다. Call Tracking 개인정보취급방침
    Wunderkind
    오토데스크는 Wunderkind가 지원하는 사이트에 디지털 광고를 배포하기 위해 Wunderkind를 이용합니다. 광고는 Wunderkind 데이터와 고객이 사이트를 방문하는 동안 오토데스크가 수집하는 행동 데이터 모두에 기초하여 제공됩니다. 오토데스크가 수집하는 데이터에는 고객이 방문한 페이지, 시작한 체험판, 재생한 동영상, 구매 내역 및 IP 주소 또는 장치 ID가 포함될 수 있습니다. 이 정보는 Wunderkind에서 고객으로부터 수집한 데이터와 결합될 수 있습니다. 오토데스크는 디지털 광고 경험에 대한 사용자화를 개선하고 고객에게 더욱 관련 있는 광고를 제시하기 위해 Wunderkind에 제공하는 데이터를 사용합니다. Wunderkind 개인정보취급방침
    ADC Media
    오토데스크는 ADC Media가 지원하는 사이트에 디지털 광고를 배포하기 위해 ADC Media를 이용합니다. 광고는 ADC Media 데이터와 고객이 사이트를 방문하는 동안 오토데스크가 수집하는 행동 데이터 모두에 기초하여 제공됩니다. 오토데스크가 수집하는 데이터에는 고객이 방문한 페이지, 시작한 체험판, 재생한 동영상, 구매 내역 및 IP 주소 또는 장치 ID가 포함될 수 있습니다. 이 정보는 ADC Media에서 고객으로부터 수집한 데이터와 결합될 수 있습니다. 오토데스크는 디지털 광고 경험에 대한 사용자화를 개선하고 고객에게 더욱 관련 있는 광고를 제시하기 위해 ADC Media에 제공하는 데이터를 사용합니다. ADC Media 개인정보취급방침
    AgrantSEM
    오토데스크는 AgrantSEM가 지원하는 사이트에 디지털 광고를 배포하기 위해 AgrantSEM를 이용합니다. 광고는 AgrantSEM 데이터와 고객이 사이트를 방문하는 동안 오토데스크가 수집하는 행동 데이터 모두에 기초하여 제공됩니다. 오토데스크가 수집하는 데이터에는 고객이 방문한 페이지, 시작한 체험판, 재생한 동영상, 구매 내역 및 IP 주소 또는 장치 ID가 포함될 수 있습니다. 이 정보는 AgrantSEM에서 고객으로부터 수집한 데이터와 결합될 수 있습니다. 오토데스크는 디지털 광고 경험에 대한 사용자화를 개선하고 고객에게 더욱 관련 있는 광고를 제시하기 위해 AgrantSEM에 제공하는 데이터를 사용합니다. AgrantSEM 개인정보취급방침
    Bidtellect
    오토데스크는 Bidtellect가 지원하는 사이트에 디지털 광고를 배포하기 위해 Bidtellect를 이용합니다. 광고는 Bidtellect 데이터와 고객이 사이트를 방문하는 동안 오토데스크가 수집하는 행동 데이터 모두에 기초하여 제공됩니다. 오토데스크가 수집하는 데이터에는 고객이 방문한 페이지, 시작한 체험판, 재생한 동영상, 구매 내역 및 IP 주소 또는 장치 ID가 포함될 수 있습니다. 이 정보는 Bidtellect에서 고객으로부터 수집한 데이터와 결합될 수 있습니다. 오토데스크는 디지털 광고 경험에 대한 사용자화를 개선하고 고객에게 더욱 관련 있는 광고를 제시하기 위해 Bidtellect에 제공하는 데이터를 사용합니다. Bidtellect 개인정보취급방침
    Bing
    오토데스크는 Bing가 지원하는 사이트에 디지털 광고를 배포하기 위해 Bing를 이용합니다. 광고는 Bing 데이터와 고객이 사이트를 방문하는 동안 오토데스크가 수집하는 행동 데이터 모두에 기초하여 제공됩니다. 오토데스크가 수집하는 데이터에는 고객이 방문한 페이지, 시작한 체험판, 재생한 동영상, 구매 내역 및 IP 주소 또는 장치 ID가 포함될 수 있습니다. 이 정보는 Bing에서 고객으로부터 수집한 데이터와 결합될 수 있습니다. 오토데스크는 디지털 광고 경험에 대한 사용자화를 개선하고 고객에게 더욱 관련 있는 광고를 제시하기 위해 Bing에 제공하는 데이터를 사용합니다. Bing 개인정보취급방침
    G2Crowd
    오토데스크는 G2Crowd가 지원하는 사이트에 디지털 광고를 배포하기 위해 G2Crowd를 이용합니다. 광고는 G2Crowd 데이터와 고객이 사이트를 방문하는 동안 오토데스크가 수집하는 행동 데이터 모두에 기초하여 제공됩니다. 오토데스크가 수집하는 데이터에는 고객이 방문한 페이지, 시작한 체험판, 재생한 동영상, 구매 내역 및 IP 주소 또는 장치 ID가 포함될 수 있습니다. 이 정보는 G2Crowd에서 고객으로부터 수집한 데이터와 결합될 수 있습니다. 오토데스크는 디지털 광고 경험에 대한 사용자화를 개선하고 고객에게 더욱 관련 있는 광고를 제시하기 위해 G2Crowd에 제공하는 데이터를 사용합니다. G2Crowd 개인정보취급방침
    NMPI Display
    오토데스크는 NMPI Display가 지원하는 사이트에 디지털 광고를 배포하기 위해 NMPI Display를 이용합니다. 광고는 NMPI Display 데이터와 고객이 사이트를 방문하는 동안 오토데스크가 수집하는 행동 데이터 모두에 기초하여 제공됩니다. 오토데스크가 수집하는 데이터에는 고객이 방문한 페이지, 시작한 체험판, 재생한 동영상, 구매 내역 및 IP 주소 또는 장치 ID가 포함될 수 있습니다. 이 정보는 NMPI Display에서 고객으로부터 수집한 데이터와 결합될 수 있습니다. 오토데스크는 디지털 광고 경험에 대한 사용자화를 개선하고 고객에게 더욱 관련 있는 광고를 제시하기 위해 NMPI Display에 제공하는 데이터를 사용합니다. NMPI Display 개인정보취급방침
    VK
    오토데스크는 VK가 지원하는 사이트에 디지털 광고를 배포하기 위해 VK를 이용합니다. 광고는 VK 데이터와 고객이 사이트를 방문하는 동안 오토데스크가 수집하는 행동 데이터 모두에 기초하여 제공됩니다. 오토데스크가 수집하는 데이터에는 고객이 방문한 페이지, 시작한 체험판, 재생한 동영상, 구매 내역 및 IP 주소 또는 장치 ID가 포함될 수 있습니다. 이 정보는 VK에서 고객으로부터 수집한 데이터와 결합될 수 있습니다. 오토데스크는 디지털 광고 경험에 대한 사용자화를 개선하고 고객에게 더욱 관련 있는 광고를 제시하기 위해 VK에 제공하는 데이터를 사용합니다. VK 개인정보취급방침
    Adobe Target
    오토데스크는 사이트의 새 기능을 테스트하고 이러한 기능의 고객 경험을 사용자화하기 위해 Adobe Target을 이용합니다. 이를 위해, 고객이 사이트를 방문해 있는 동안 행동 데이터를 수집합니다. 이 데이터에는 고객이 방문한 페이지, 시작한 체험판, 재생한 동영상, 구매 내역, IP 주소 또는 장치 ID, 오토데스크 ID 등이 포함될 수 있습니다. 고객은 기능 테스트를 바탕으로 여러 버전의 오토데스크 사이트를 경험하거나 방문자 특성을 바탕으로 개인화된 컨텐츠를 보게 될 수 있습니다. Adobe Target 개인정보취급방침
    Google Analytics (Advertising)
    오토데스크는 Google Analytics (Advertising)가 지원하는 사이트에 디지털 광고를 배포하기 위해 Google Analytics (Advertising)를 이용합니다. 광고는 Google Analytics (Advertising) 데이터와 고객이 사이트를 방문하는 동안 오토데스크가 수집하는 행동 데이터 모두에 기초하여 제공됩니다. 오토데스크가 수집하는 데이터에는 고객이 방문한 페이지, 시작한 체험판, 재생한 동영상, 구매 내역 및 IP 주소 또는 장치 ID가 포함될 수 있습니다. 이 정보는 Google Analytics (Advertising)에서 고객으로부터 수집한 데이터와 결합될 수 있습니다. 오토데스크는 디지털 광고 경험에 대한 사용자화를 개선하고 고객에게 더욱 관련 있는 광고를 제시하기 위해 Google Analytics (Advertising)에 제공하는 데이터를 사용합니다. Google Analytics (Advertising) 개인정보취급방침
    Trendkite
    오토데스크는 Trendkite가 지원하는 사이트에 디지털 광고를 배포하기 위해 Trendkite를 이용합니다. 광고는 Trendkite 데이터와 고객이 사이트를 방문하는 동안 오토데스크가 수집하는 행동 데이터 모두에 기초하여 제공됩니다. 오토데스크가 수집하는 데이터에는 고객이 방문한 페이지, 시작한 체험판, 재생한 동영상, 구매 내역 및 IP 주소 또는 장치 ID가 포함될 수 있습니다. 이 정보는 Trendkite에서 고객으로부터 수집한 데이터와 결합될 수 있습니다. 오토데스크는 디지털 광고 경험에 대한 사용자화를 개선하고 고객에게 더욱 관련 있는 광고를 제시하기 위해 Trendkite에 제공하는 데이터를 사용합니다. Trendkite 개인정보취급방침
    Hotjar
    오토데스크는 Hotjar가 지원하는 사이트에 디지털 광고를 배포하기 위해 Hotjar를 이용합니다. 광고는 Hotjar 데이터와 고객이 사이트를 방문하는 동안 오토데스크가 수집하는 행동 데이터 모두에 기초하여 제공됩니다. 오토데스크가 수집하는 데이터에는 고객이 방문한 페이지, 시작한 체험판, 재생한 동영상, 구매 내역 및 IP 주소 또는 장치 ID가 포함될 수 있습니다. 이 정보는 Hotjar에서 고객으로부터 수집한 데이터와 결합될 수 있습니다. 오토데스크는 디지털 광고 경험에 대한 사용자화를 개선하고 고객에게 더욱 관련 있는 광고를 제시하기 위해 Hotjar에 제공하는 데이터를 사용합니다. Hotjar 개인정보취급방침
    6 Sense
    오토데스크는 6 Sense가 지원하는 사이트에 디지털 광고를 배포하기 위해 6 Sense를 이용합니다. 광고는 6 Sense 데이터와 고객이 사이트를 방문하는 동안 오토데스크가 수집하는 행동 데이터 모두에 기초하여 제공됩니다. 오토데스크가 수집하는 데이터에는 고객이 방문한 페이지, 시작한 체험판, 재생한 동영상, 구매 내역 및 IP 주소 또는 장치 ID가 포함될 수 있습니다. 이 정보는 6 Sense에서 고객으로부터 수집한 데이터와 결합될 수 있습니다. 오토데스크는 디지털 광고 경험에 대한 사용자화를 개선하고 고객에게 더욱 관련 있는 광고를 제시하기 위해 6 Sense에 제공하는 데이터를 사용합니다. 6 Sense 개인정보취급방침
    Terminus
    오토데스크는 Terminus가 지원하는 사이트에 디지털 광고를 배포하기 위해 Terminus를 이용합니다. 광고는 Terminus 데이터와 고객이 사이트를 방문하는 동안 오토데스크가 수집하는 행동 데이터 모두에 기초하여 제공됩니다. 오토데스크가 수집하는 데이터에는 고객이 방문한 페이지, 시작한 체험판, 재생한 동영상, 구매 내역 및 IP 주소 또는 장치 ID가 포함될 수 있습니다. 이 정보는 Terminus에서 고객으로부터 수집한 데이터와 결합될 수 있습니다. 오토데스크는 디지털 광고 경험에 대한 사용자화를 개선하고 고객에게 더욱 관련 있는 광고를 제시하기 위해 Terminus에 제공하는 데이터를 사용합니다. Terminus 개인정보취급방침
    StackAdapt
    오토데스크는 StackAdapt가 지원하는 사이트에 디지털 광고를 배포하기 위해 StackAdapt를 이용합니다. 광고는 StackAdapt 데이터와 고객이 사이트를 방문하는 동안 오토데스크가 수집하는 행동 데이터 모두에 기초하여 제공됩니다. 오토데스크가 수집하는 데이터에는 고객이 방문한 페이지, 시작한 체험판, 재생한 동영상, 구매 내역 및 IP 주소 또는 장치 ID가 포함될 수 있습니다. 이 정보는 StackAdapt에서 고객으로부터 수집한 데이터와 결합될 수 있습니다. 오토데스크는 디지털 광고 경험에 대한 사용자화를 개선하고 고객에게 더욱 관련 있는 광고를 제시하기 위해 StackAdapt에 제공하는 데이터를 사용합니다. StackAdapt 개인정보취급방침
    The Trade Desk
    오토데스크는 The Trade Desk가 지원하는 사이트에 디지털 광고를 배포하기 위해 The Trade Desk를 이용합니다. 광고는 The Trade Desk 데이터와 고객이 사이트를 방문하는 동안 오토데스크가 수집하는 행동 데이터 모두에 기초하여 제공됩니다. 오토데스크가 수집하는 데이터에는 고객이 방문한 페이지, 시작한 체험판, 재생한 동영상, 구매 내역 및 IP 주소 또는 장치 ID가 포함될 수 있습니다. 이 정보는 The Trade Desk에서 고객으로부터 수집한 데이터와 결합될 수 있습니다. 오토데스크는 디지털 광고 경험에 대한 사용자화를 개선하고 고객에게 더욱 관련 있는 광고를 제시하기 위해 The Trade Desk에 제공하는 데이터를 사용합니다. The Trade Desk 개인정보취급방침
    RollWorks
    We use RollWorks to deploy digital advertising on sites supported by RollWorks. Ads are based on both RollWorks data and behavioral data that we collect while you’re on our sites. The data we collect may include pages you’ve visited, trials you’ve initiated, videos you’ve played, purchases you’ve made, and your IP address or device ID. This information may be combined with data that RollWorks has collected from you. We use the data that we provide to RollWorks to better customize your digital advertising experience and present you with more relevant ads. RollWorks Privacy Policy

    정말 더 적은 온라인 경험을 원하십니까?

    오토데스크는 고객 여러분에게 좋은 경험을 드리고 싶습니다. 이전 화면의 범주에 대해 "예"를 선택하셨다면 오토데스크는 고객을 위해 고객 경험을 사용자화하고 향상된 응용프로그램을 제작하기 위해 귀하의 데이터를 수집하고 사용합니다. 언제든지 개인정보 처리방침을 방문해 설정을 변경할 수 있습니다.

    고객의 경험. 고객의 선택.

    오토데스크는 고객의 개인 정보 보호를 중요시합니다. 오토데스크에서 수집하는 정보는 오토데스크 제품 사용 방법, 고객이 관심을 가질 만한 정보, 오토데스크에서 더욱 뜻깊은 경험을 제공하기 위한 개선 사항을 이해하는 데 도움이 됩니다.

    오토데스크에서 고객님께 적합한 경험을 제공해 드리기 위해 고객님의 데이터를 수집하고 사용하도록 허용하시겠습니까?

    선택할 수 있는 옵션을 자세히 알아보려면 이 사이트의 개인 정보 설정을 관리해 사용자화된 경험으로 어떤 이점을 얻을 수 있는지 살펴보거나 오토데스크 개인정보 처리방침 정책을 확인해 보십시오.