• InfoWorks ICM

Working with the Toolbars and Toolbar Visibility

Display, hide, relocate, reorganize, and create InfoWorks ICM Toolbars.


Step-by-step guide

In InfoWorks ICM, by default, commonly used toolbars are displayed and anchored at the top of the main window. Based on the most-used commands, toolbar visibility, location, and content can be changed. User-defined toolbars can also be created.

For example, if the Grid windows drop-down is frequently used to create new grid windows, the Modelling grid windows toolbar can be displayed. This allows for creating new grid windows with one click.

To display this toolbar:
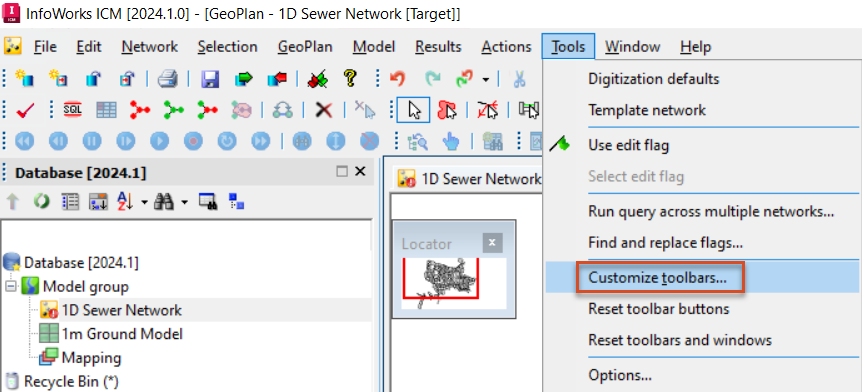
  1. From the menu, select Tools > Customize toolbars.

The ICM Tools menu with the Customize toolbars option selected and highlighted.

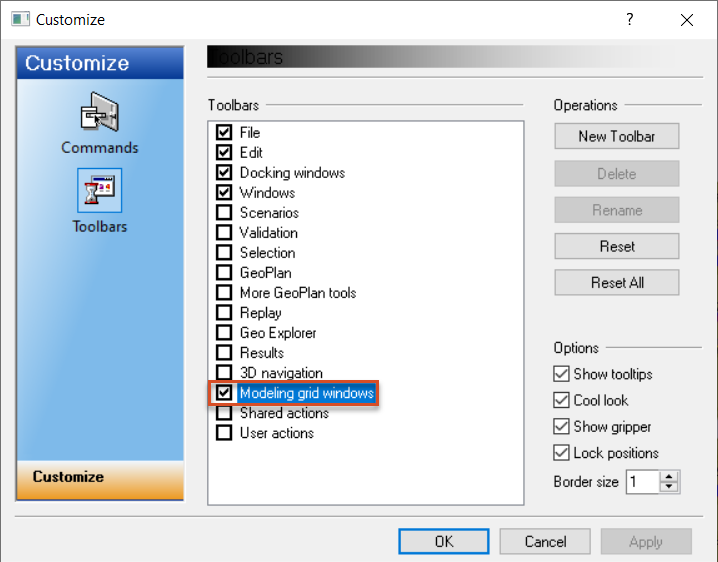
  1. In the Customize dialog box, on the Toolbars page, select Modelling grid windows.

The Customize dialog box displaying the Toolbars page with the Modeling grid windows toolbar selected.

  1. Click OK.

Above the ICM window, the new toolbar appears, with separate buttons for each grid window type.

To quickly enable or disable a toolbar group:

  1. Right-click anywhere on the toolbar and select the toolbar name.

To reposition this or any toolbar:

  1. Click its gripper barā€”the four "bullets" on the left edgeā€”and drag the toolbar to a new position.

ICM toolbars with a red arrow pointing to the gripper bar used to reposition toolbars.

Dragging the toolbar to the center of the ICM window creates a floating toolbar, while dragging a toolbar or floating toolbar to the side, bottom, or top of the ICM window docks it there.

To customize a toolbar by adding or removing commands:
  1. In the Customize dialog box, select the Commands page.
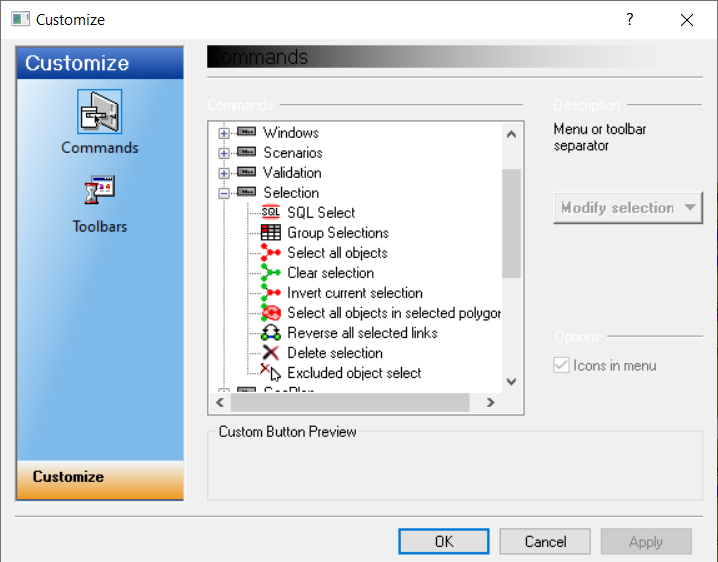
  2. In the Commands box, locate the button. If needed, click the plus (+) and minus (-) symbols to open and close toolbar groups.

The Customize dialog box displaying the Commands page, with the Selection toolbar group expanded to show the available buttons.

  1. Select the button, and then drag it out of the Customize dialog box to the desired location on the toolbar.

To remove a toolbar button:

  1. Open the Customize dialog box.
  2. In the ICM interface, on the toolbar, select the unwanted button.
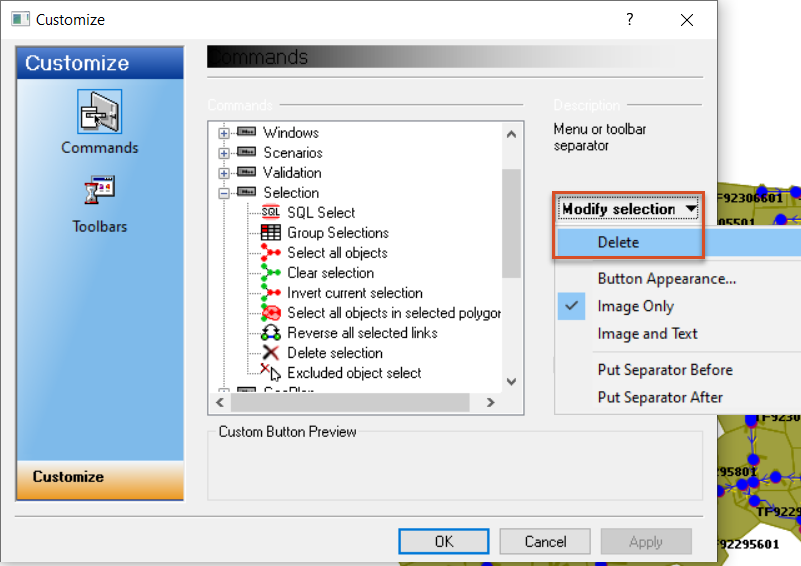
  3. In the Customize dialog box, expand the Modify Selection drop-down and select Delete.

The Customize dialog box, Commands page, with the Modify selection drop-down expanded and the Delete option selected.

To build a custom, user-defined toolbar:
  1. In the Customize dialog box, select the Toolbars page.
  2. Under Operations, click New Toolbar to create an empty floating toolbar.
  3. Select the Commands page to add the buttons.
  4. One at a time, from the Commands box, select a button, and then drag it from the dialog box onto the new toolbar.
  5. When finished, either leave the new toolbar floating or drag it to the top of the ICM main window to dock it there.
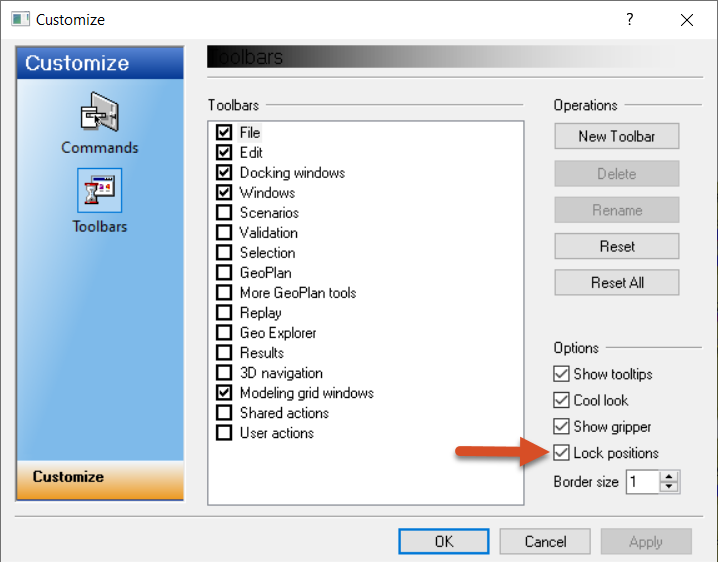
  6. Once you are finished adjusting toolbars, it is a good idea to enable the Lock positions option to prevent them from moving.

The Customize dialog box with the Lock positions option highlighted.

Ā