Step-by-step guide
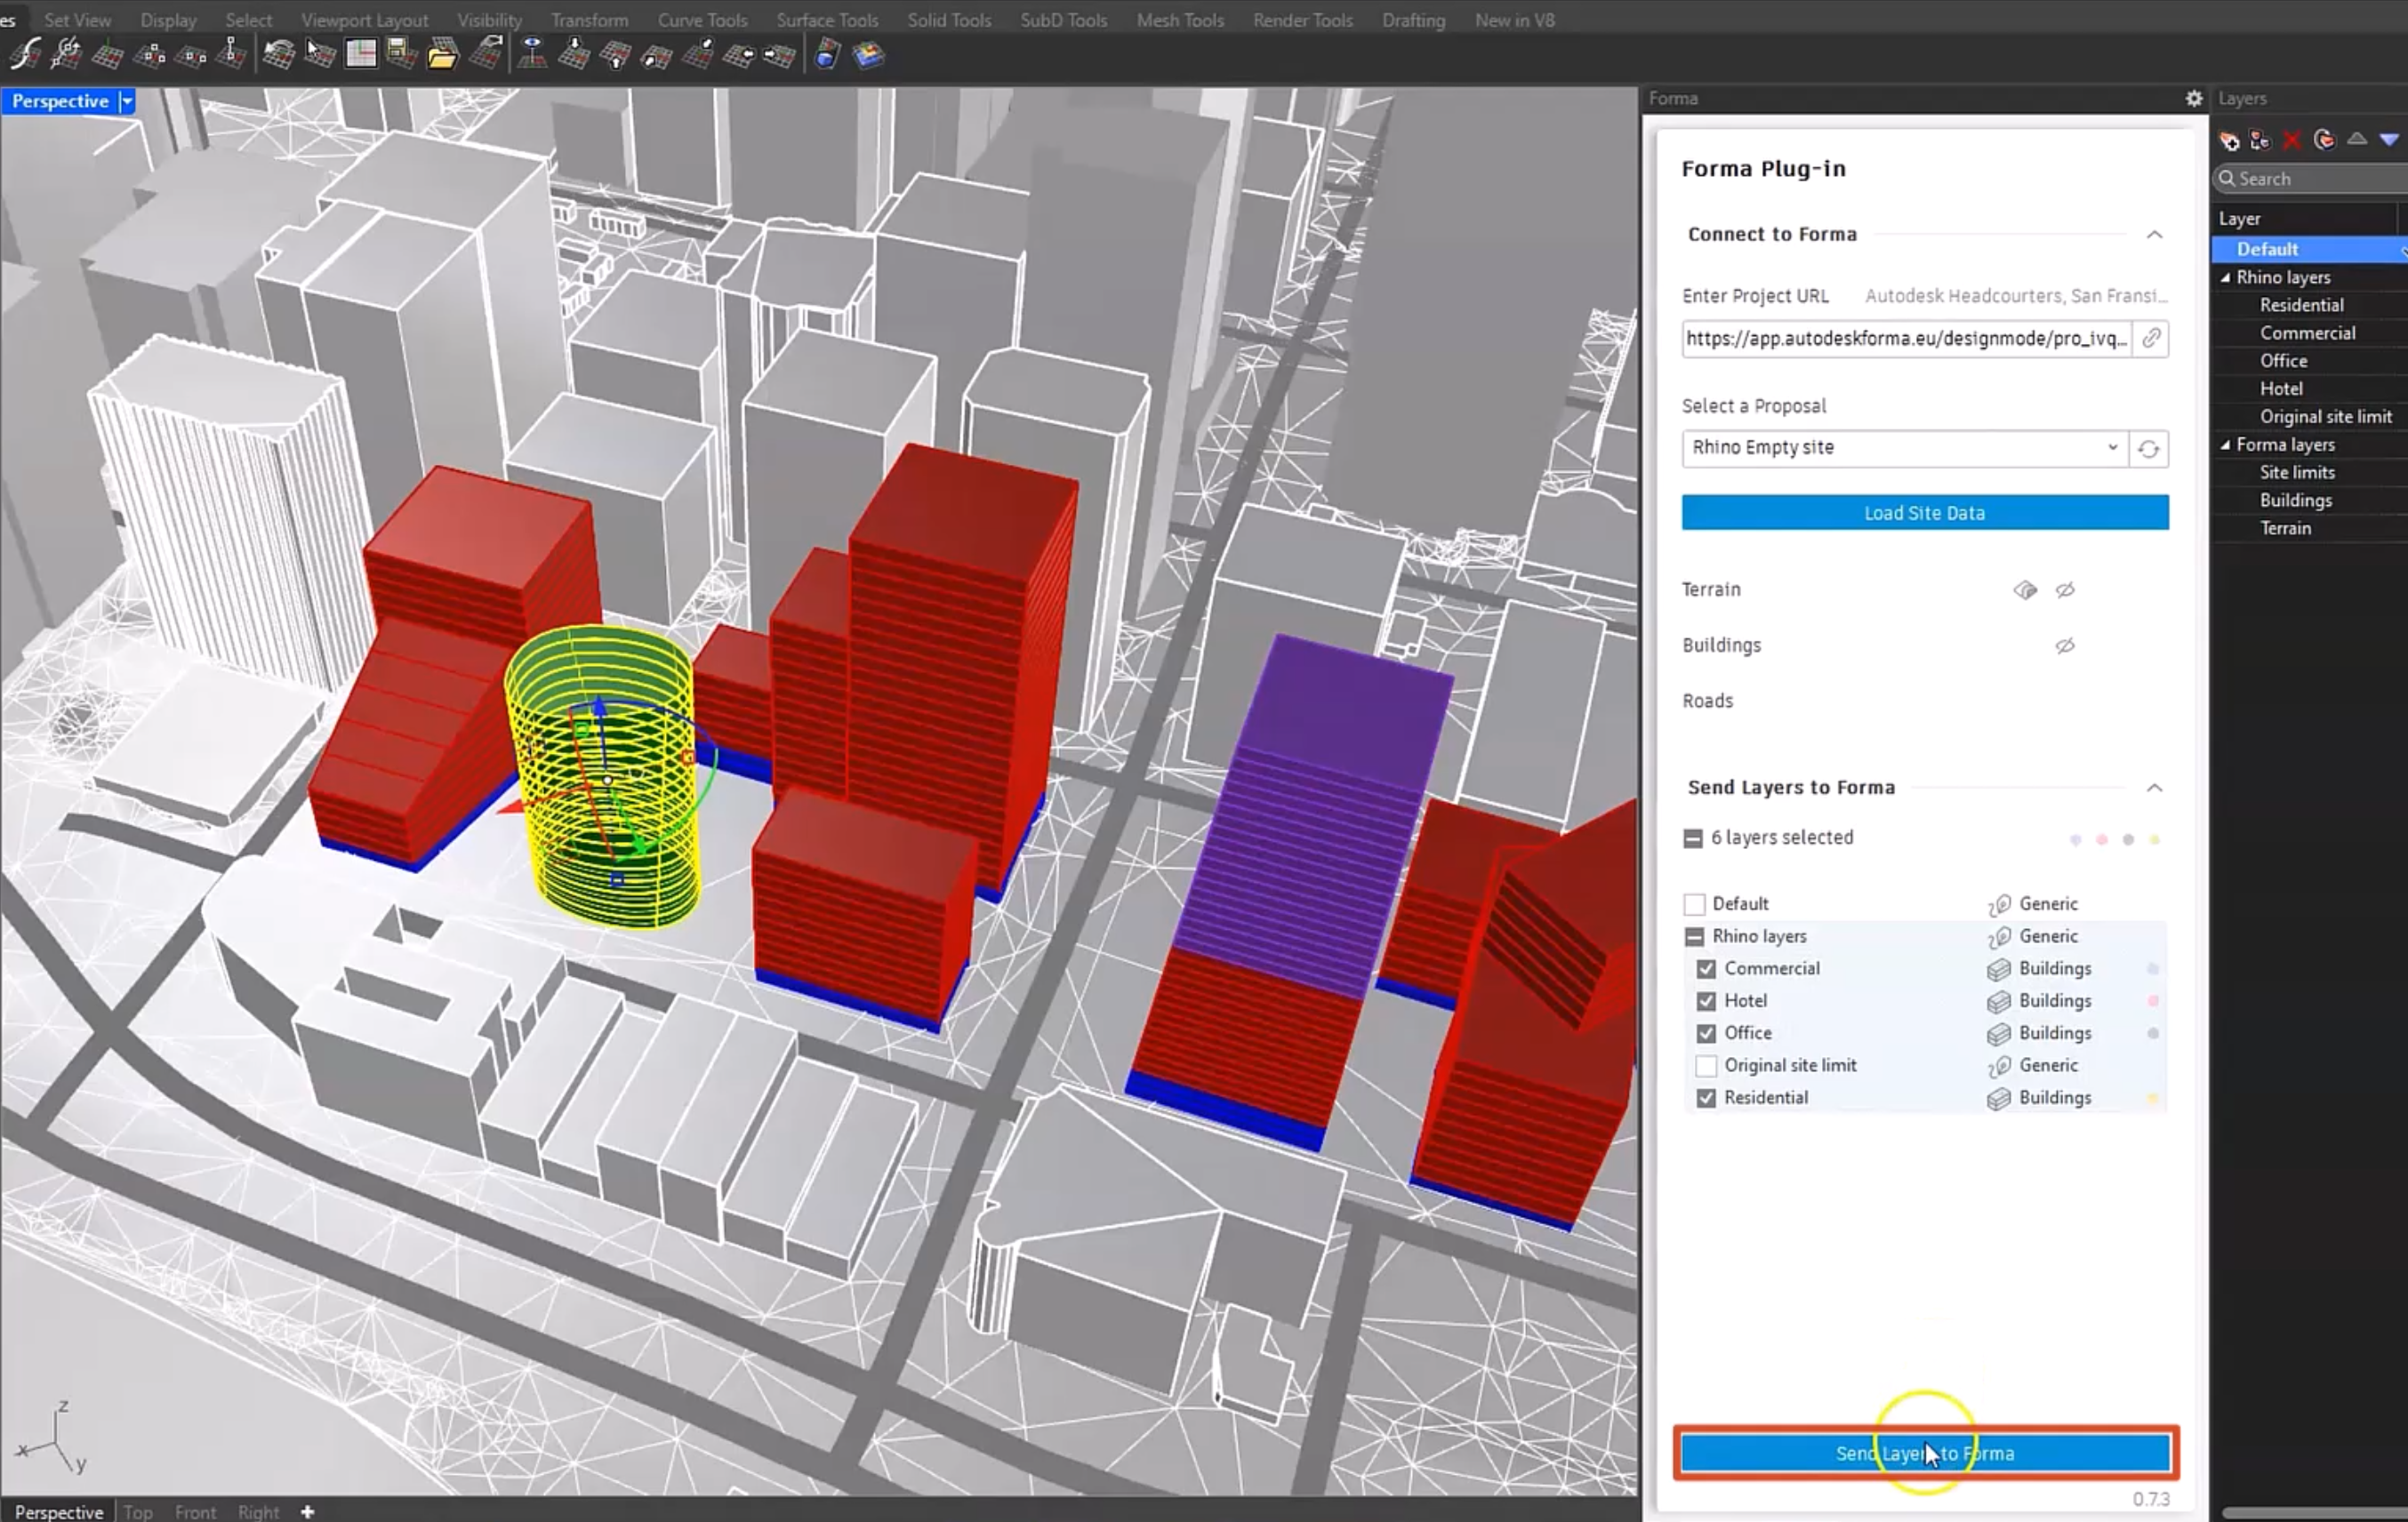
Through the Forma—Rhino connection, a Rhino proposal can be sent to Forma to leverage its capabilities. For example, area metrics for the Rhino proposal can be viewed and edited to perform detailed environmental analyses on it in Forma.
In this example, a Forma project is open in Rhino. All the Rhino model geometry has already been tagged, and all the layer information has been verified.
To send the proposal to Forma:
- In Rhino, in the Forma panel, click Send Layers to Forma.
- In Forma, in the Navigator, select the proposal just sent from Rhino—in this case, Rhino Empty site.
- If the data does not appear immediately, refresh the page.
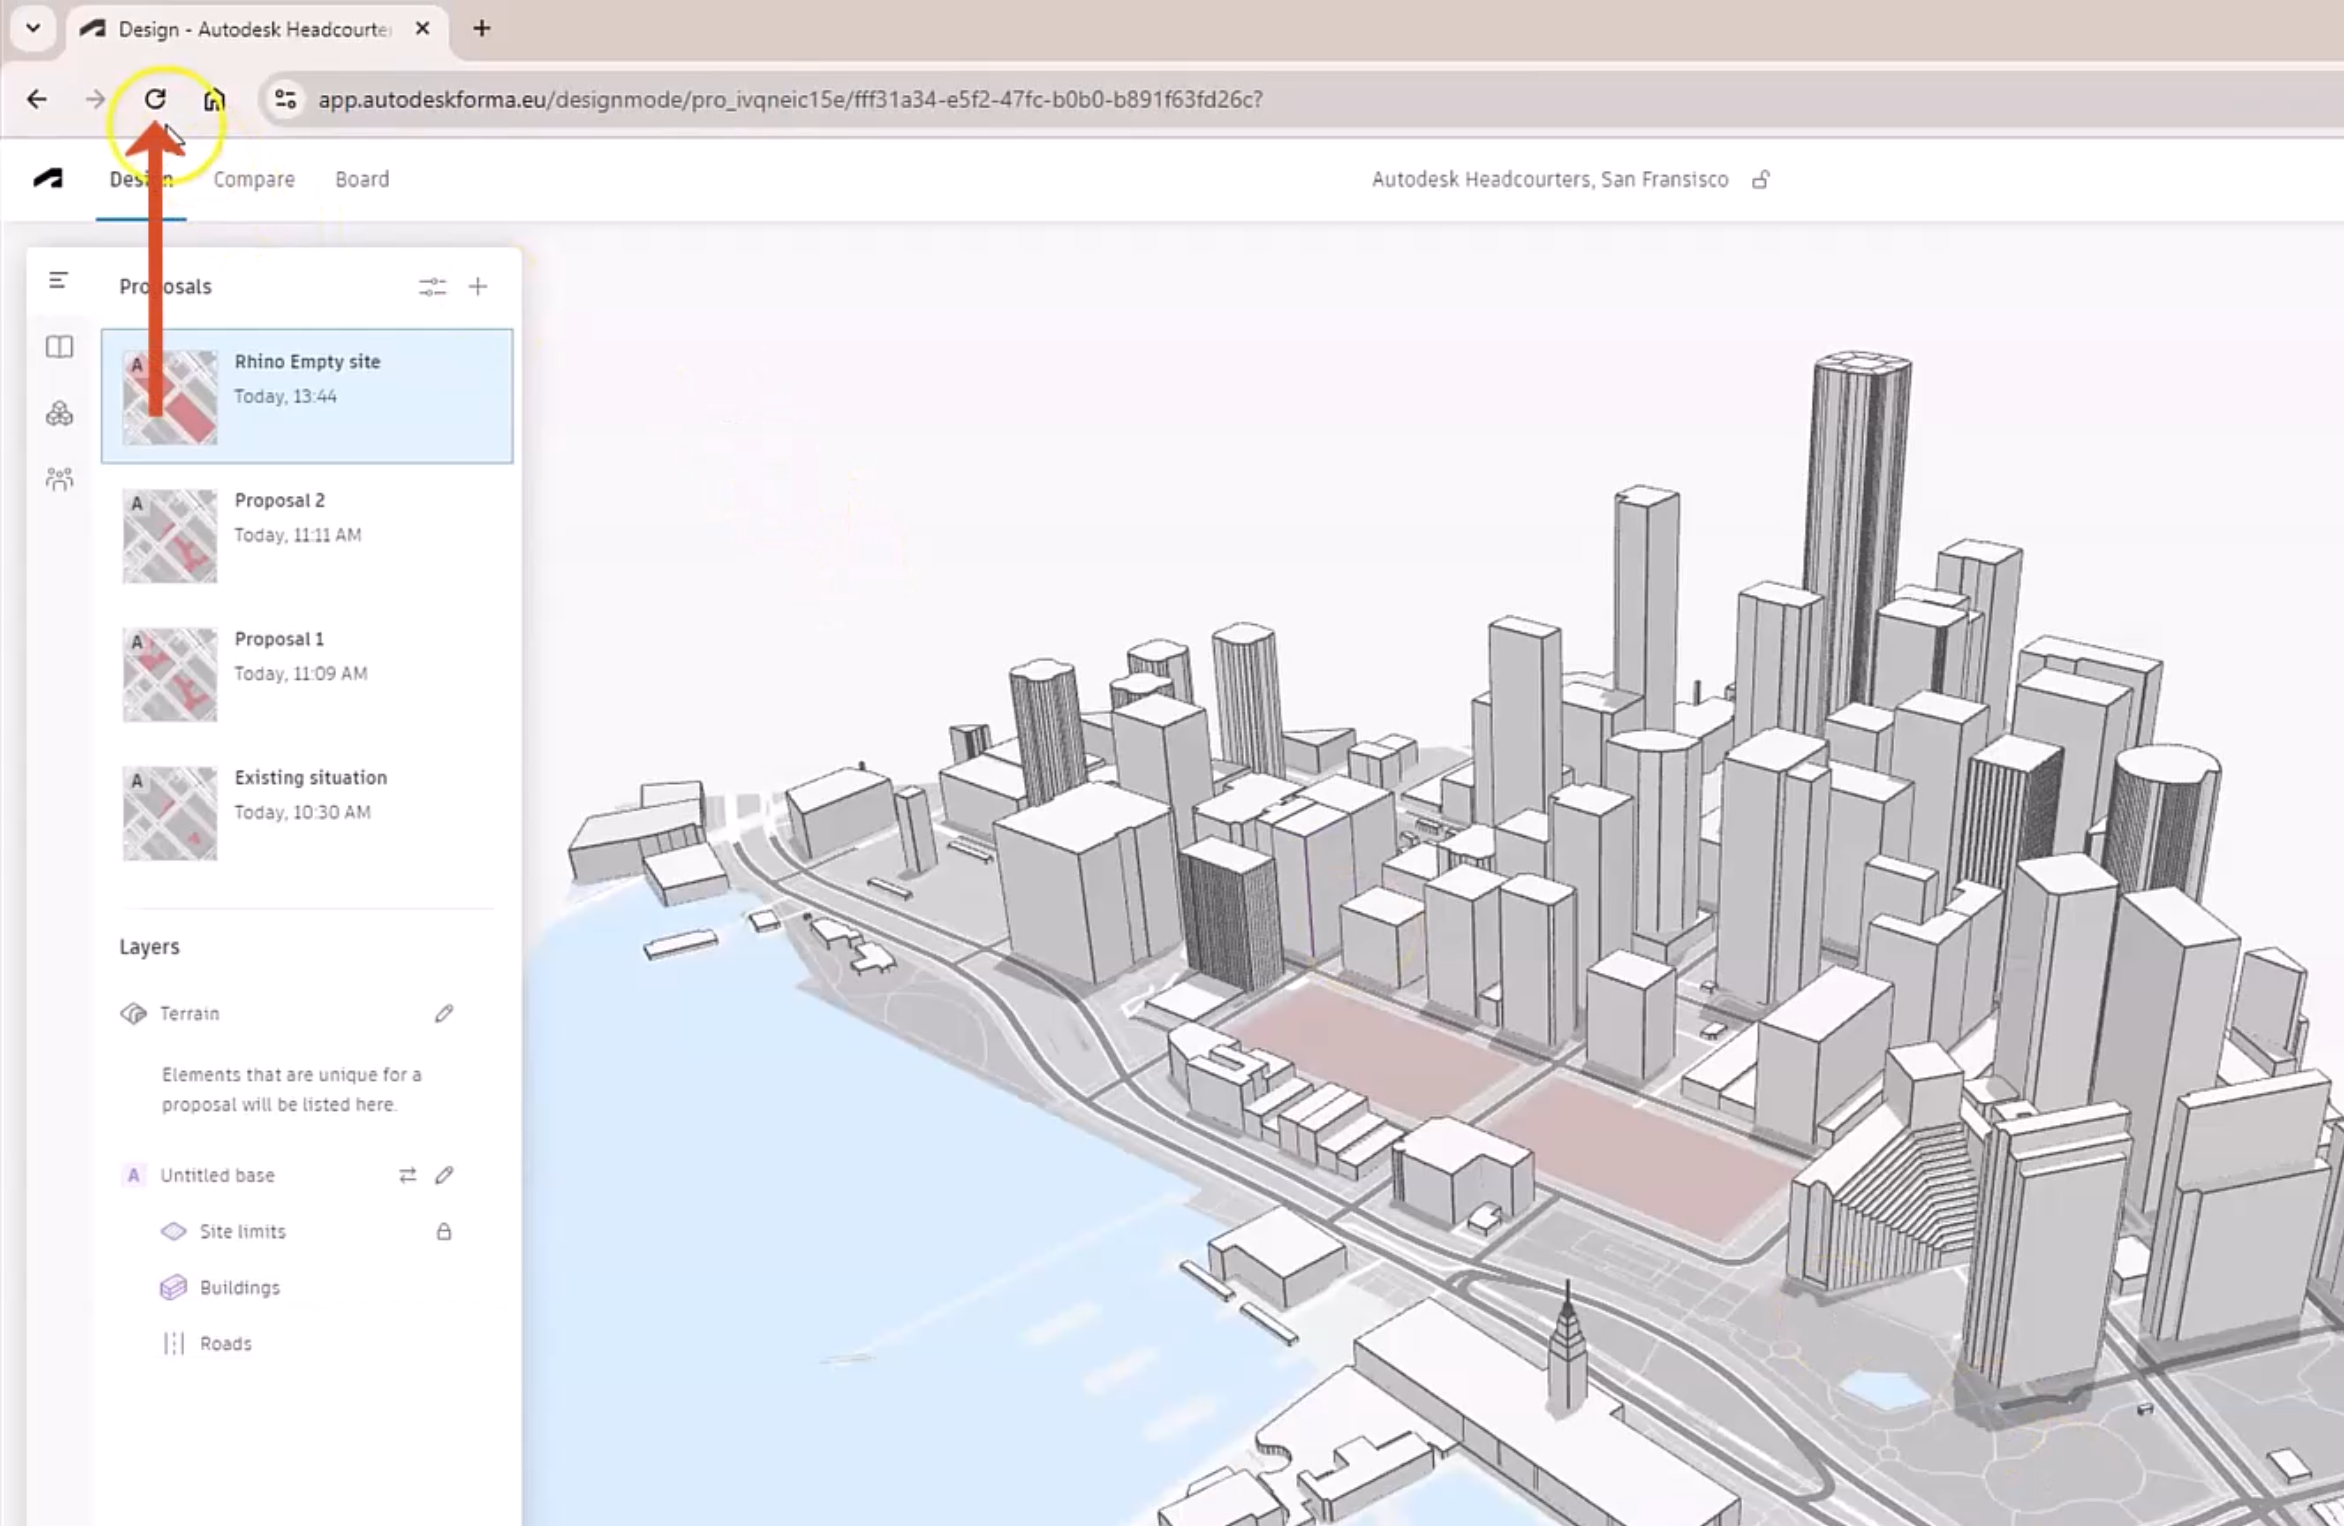
The Rhino model displays on the Forma canvas.
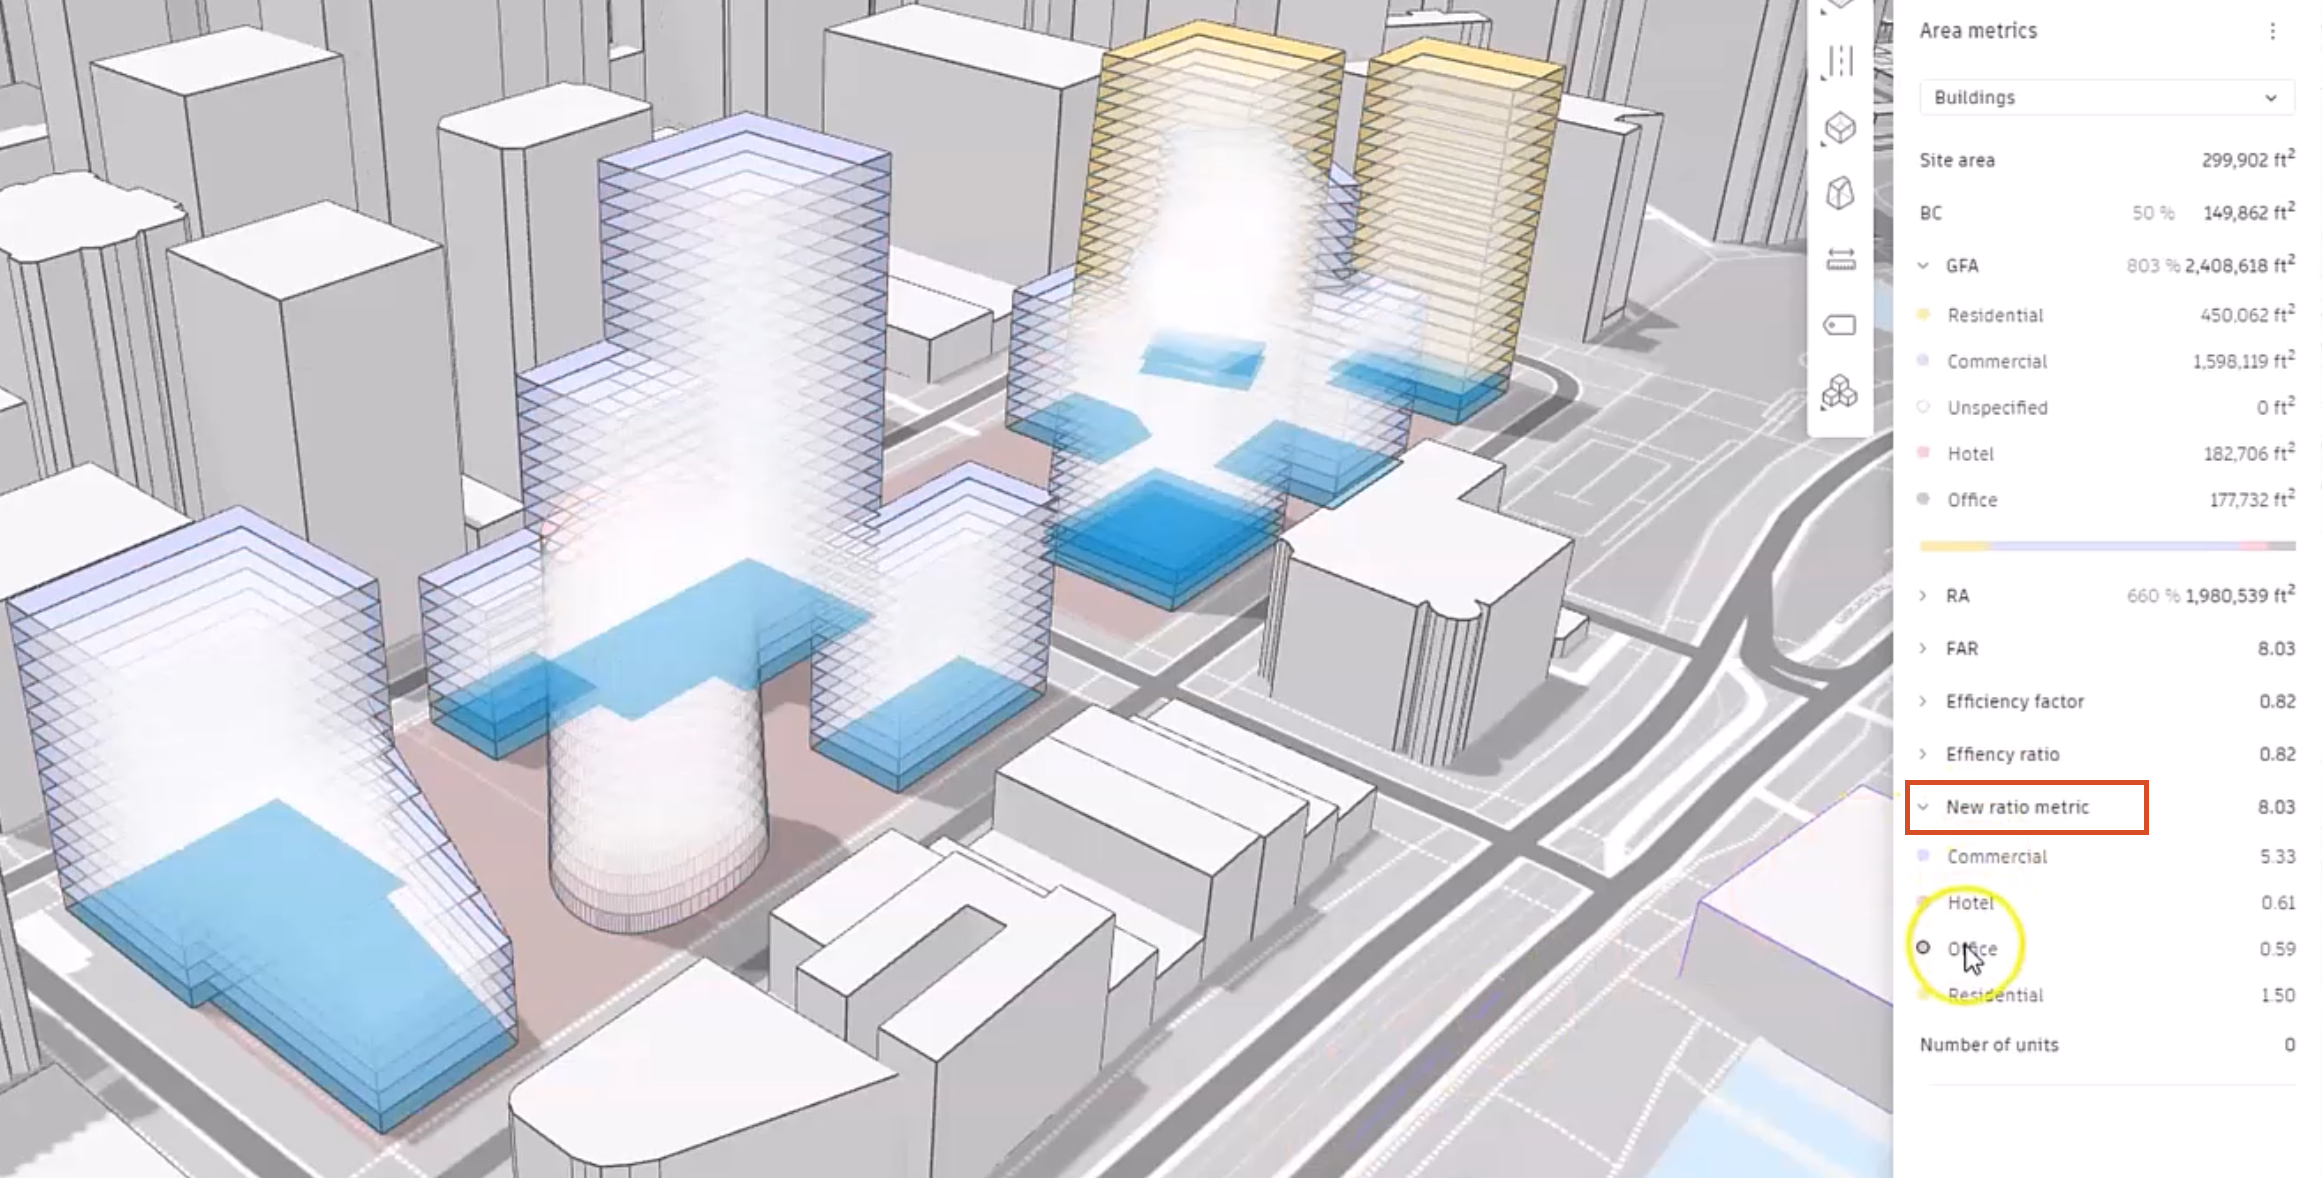
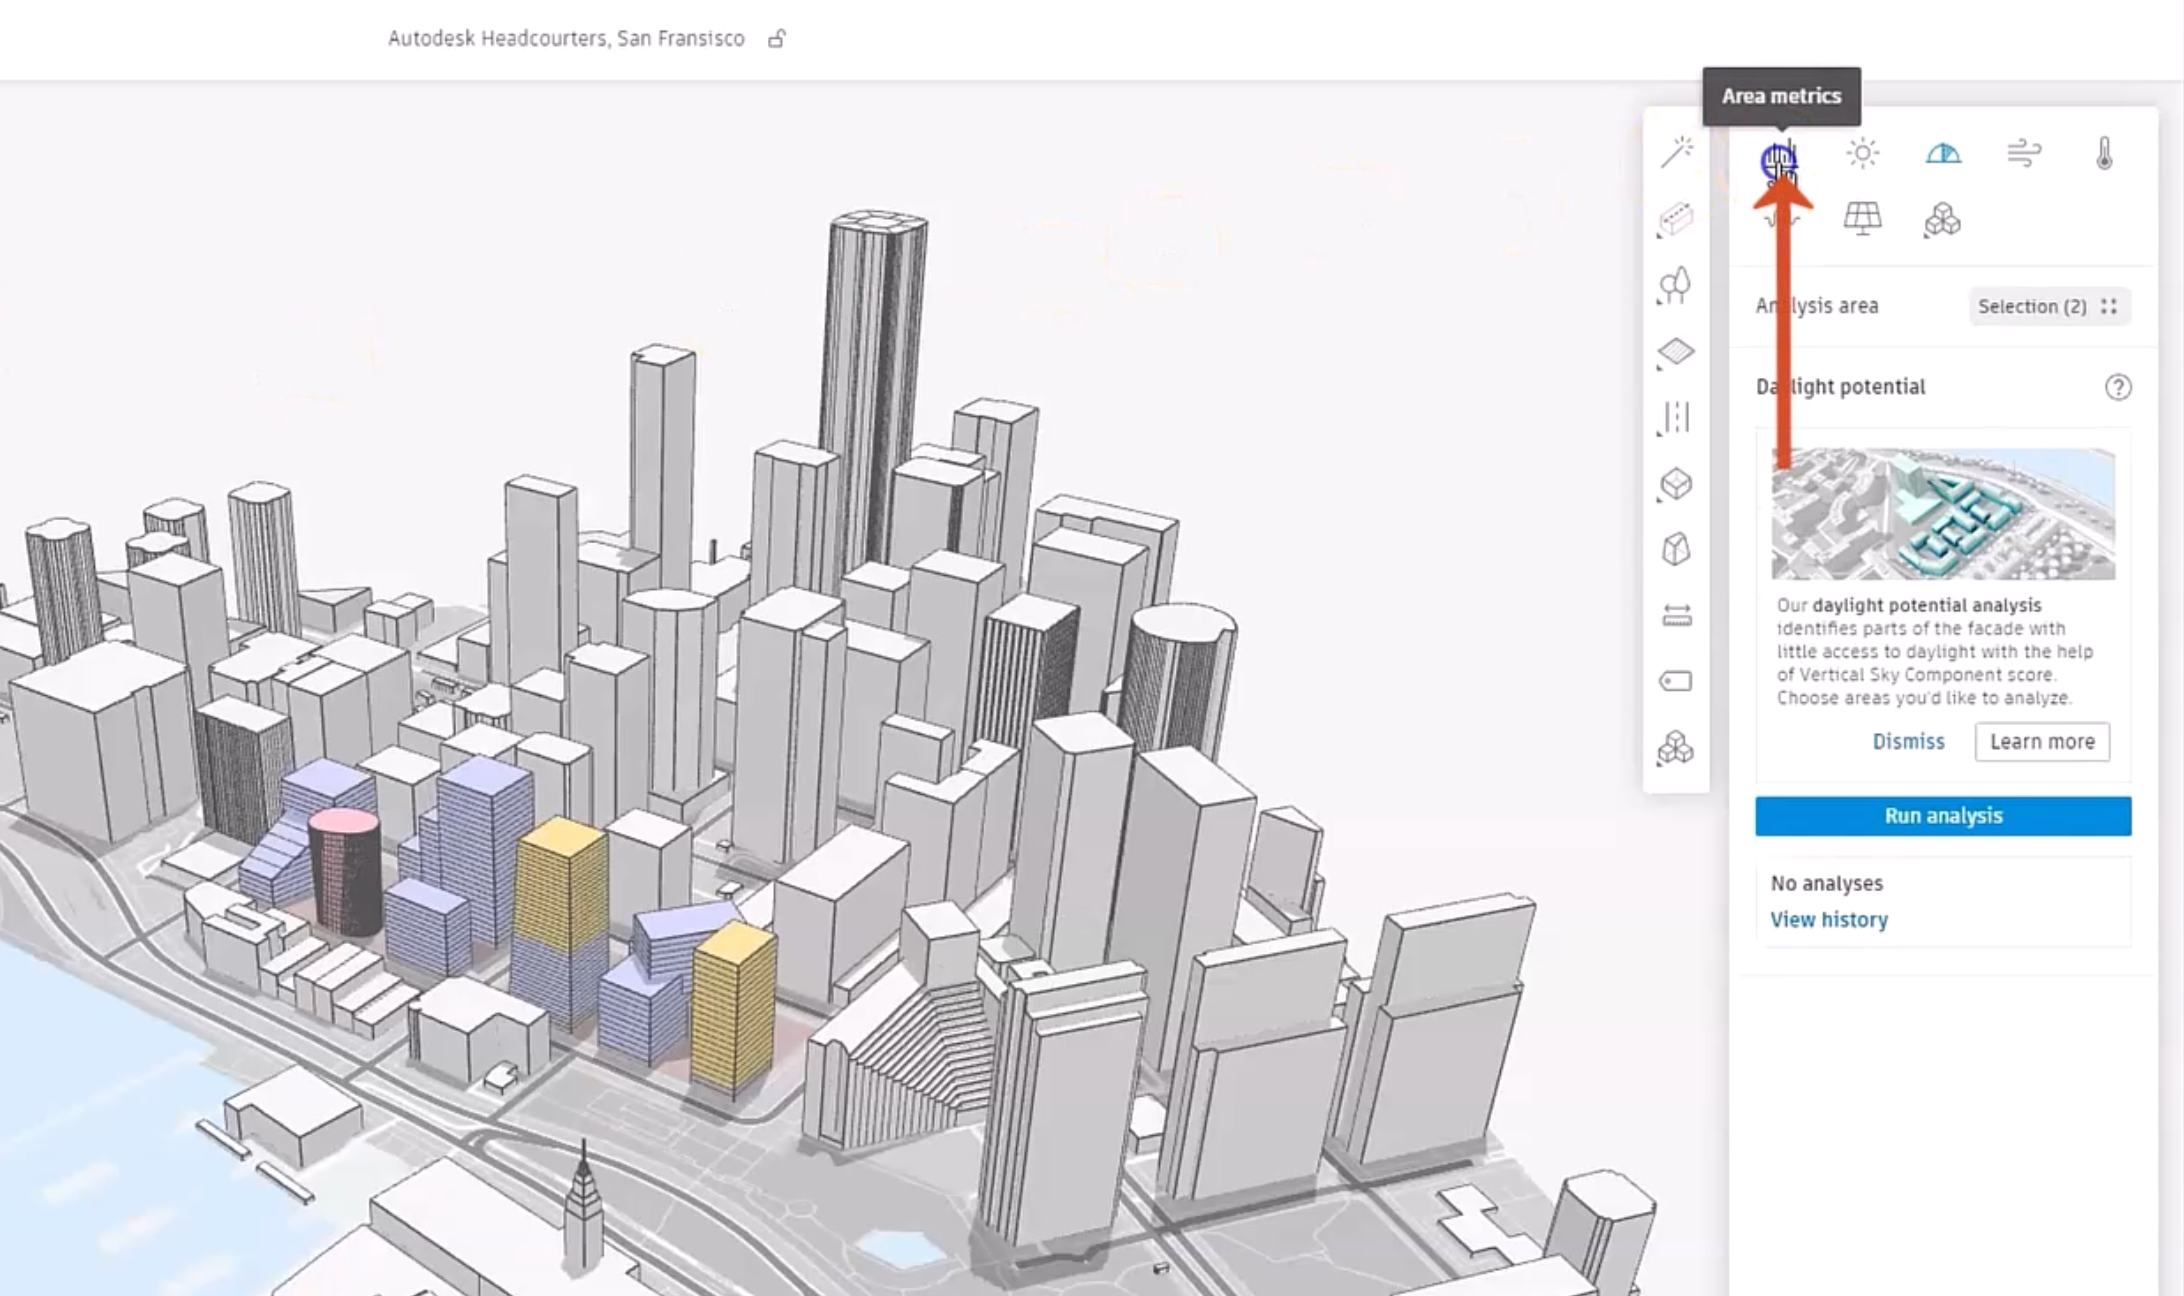
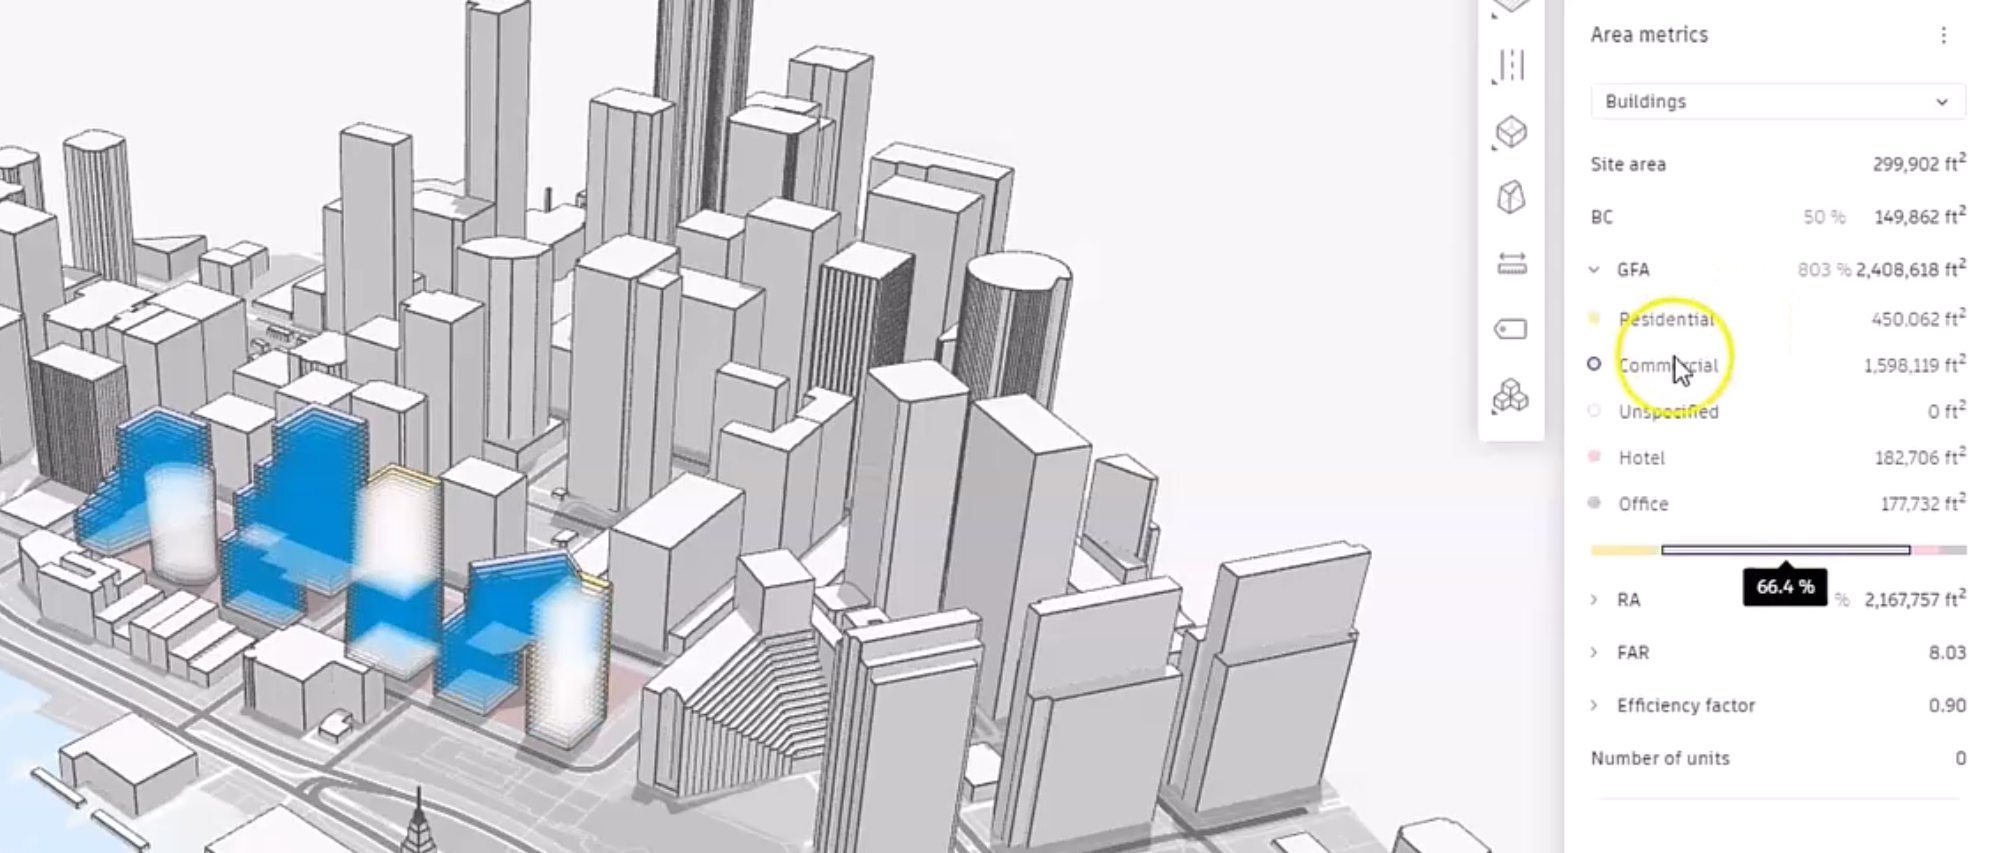
- In the right panel, click Area Metrics to see the site data, including the gross floor area, rentable area, and floor area ratio.
- For example, expand GFA to see the gross floor area data for each of the layers.
- Hover the cursor over each to see its percentage of the total GFA.
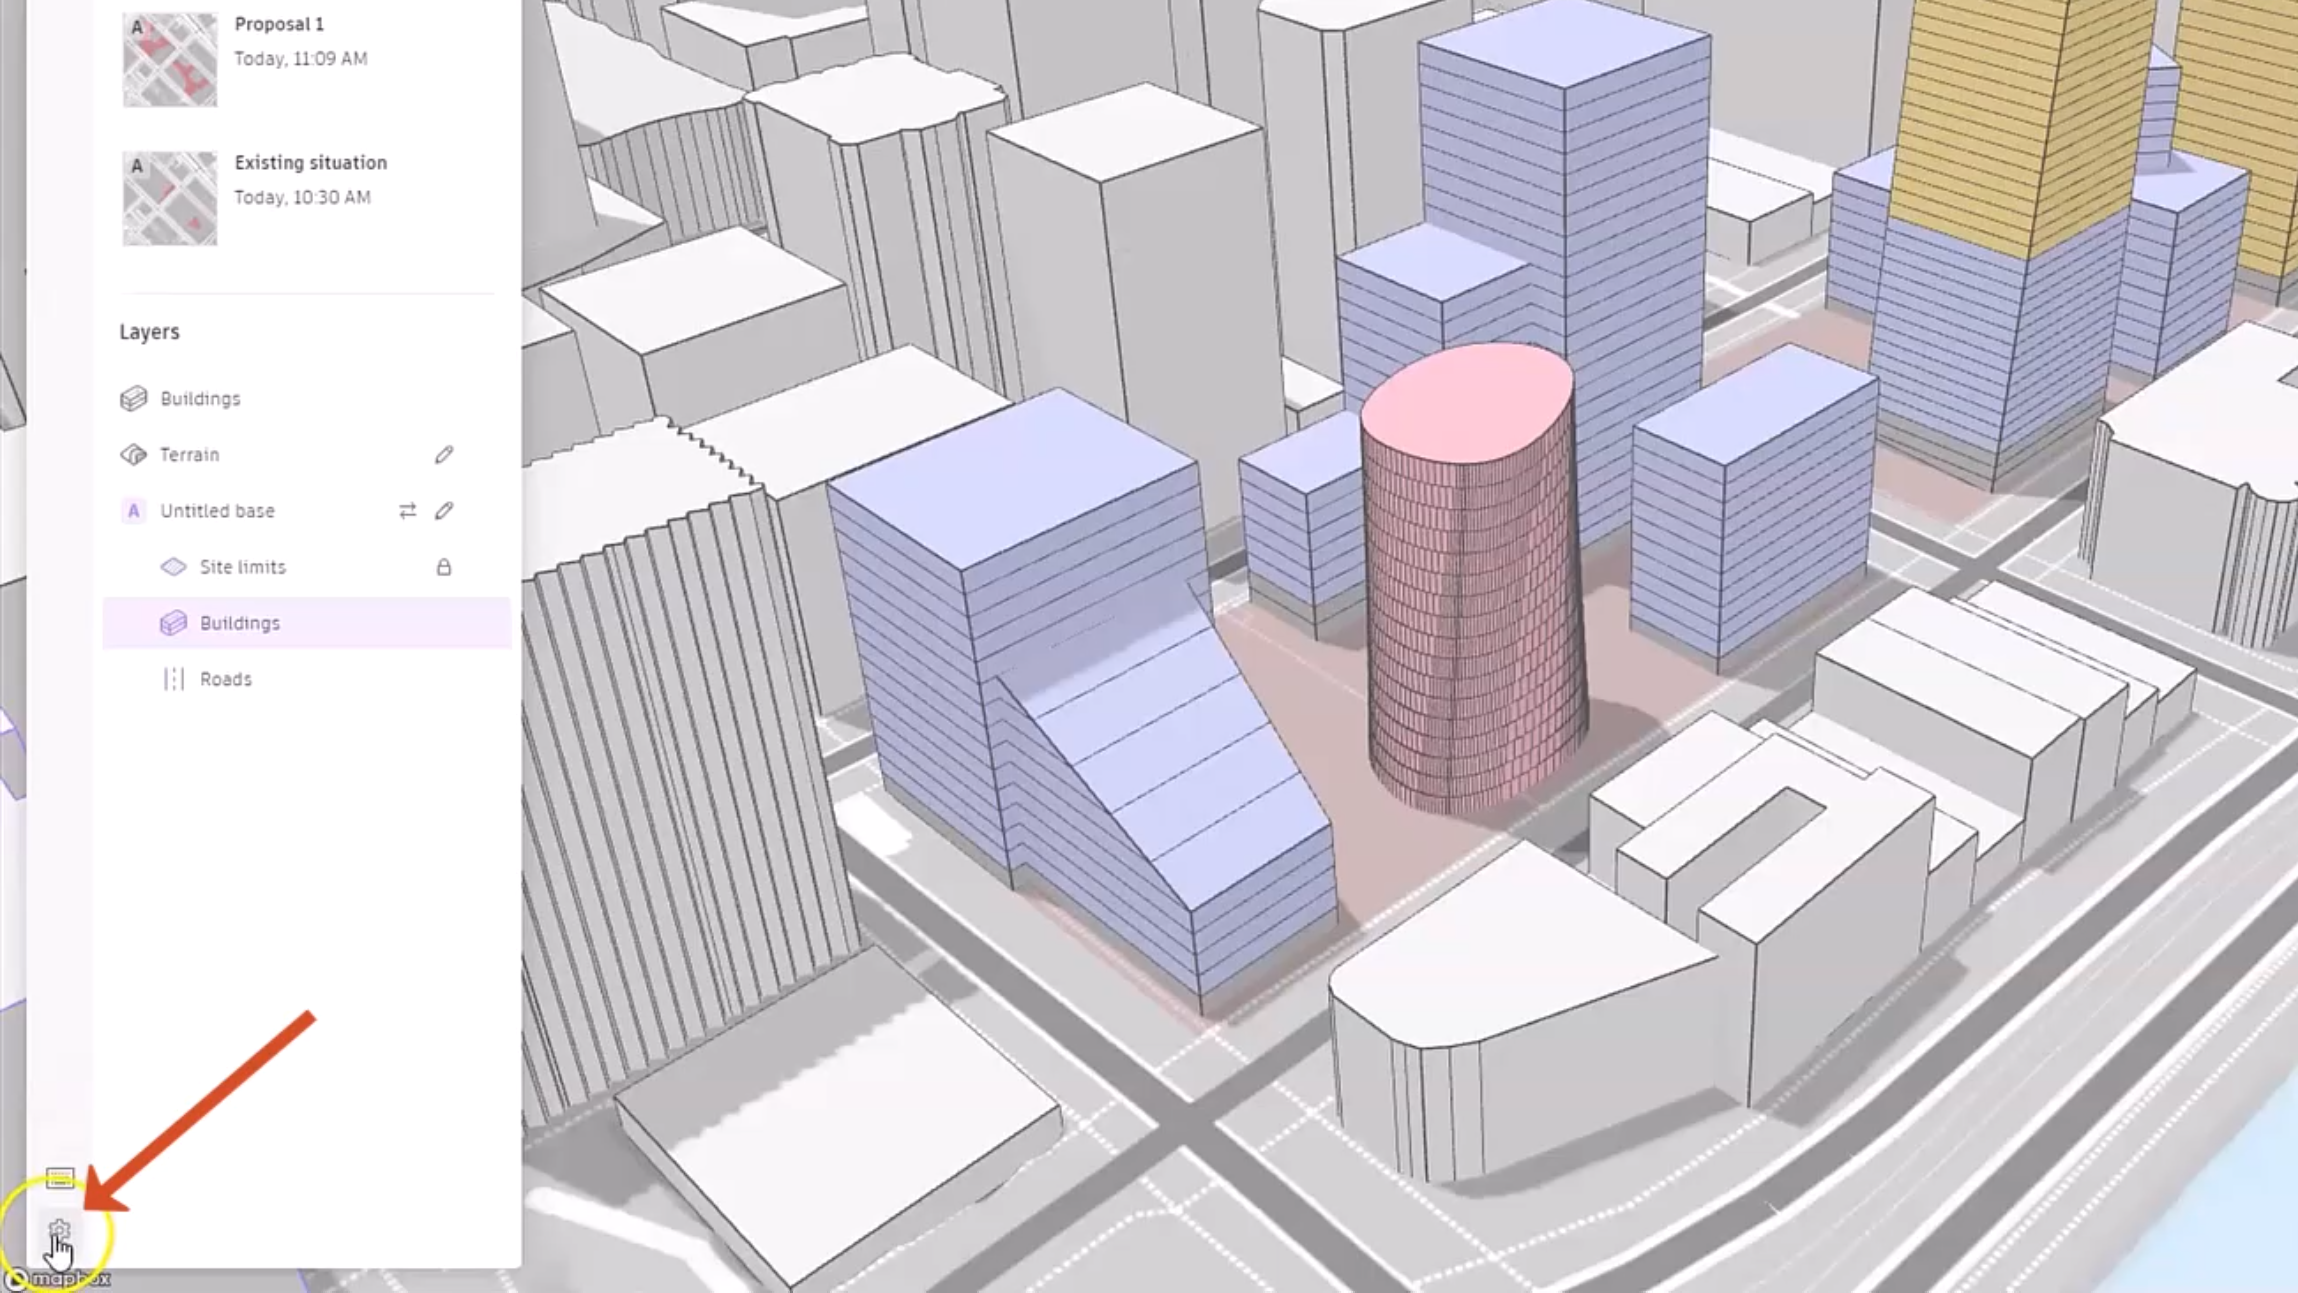
- Zoom in on the site and pan the model.
- From the Navigator, click Settings.
To customize the area metrics to suit the project:
- In the Settings dialog box, click Area metrics.
- Expand one of the panels, such as RA in this example.
To change the rentable area multiplier for each of these layers:
- Next to the Commercial layer, click Edit.
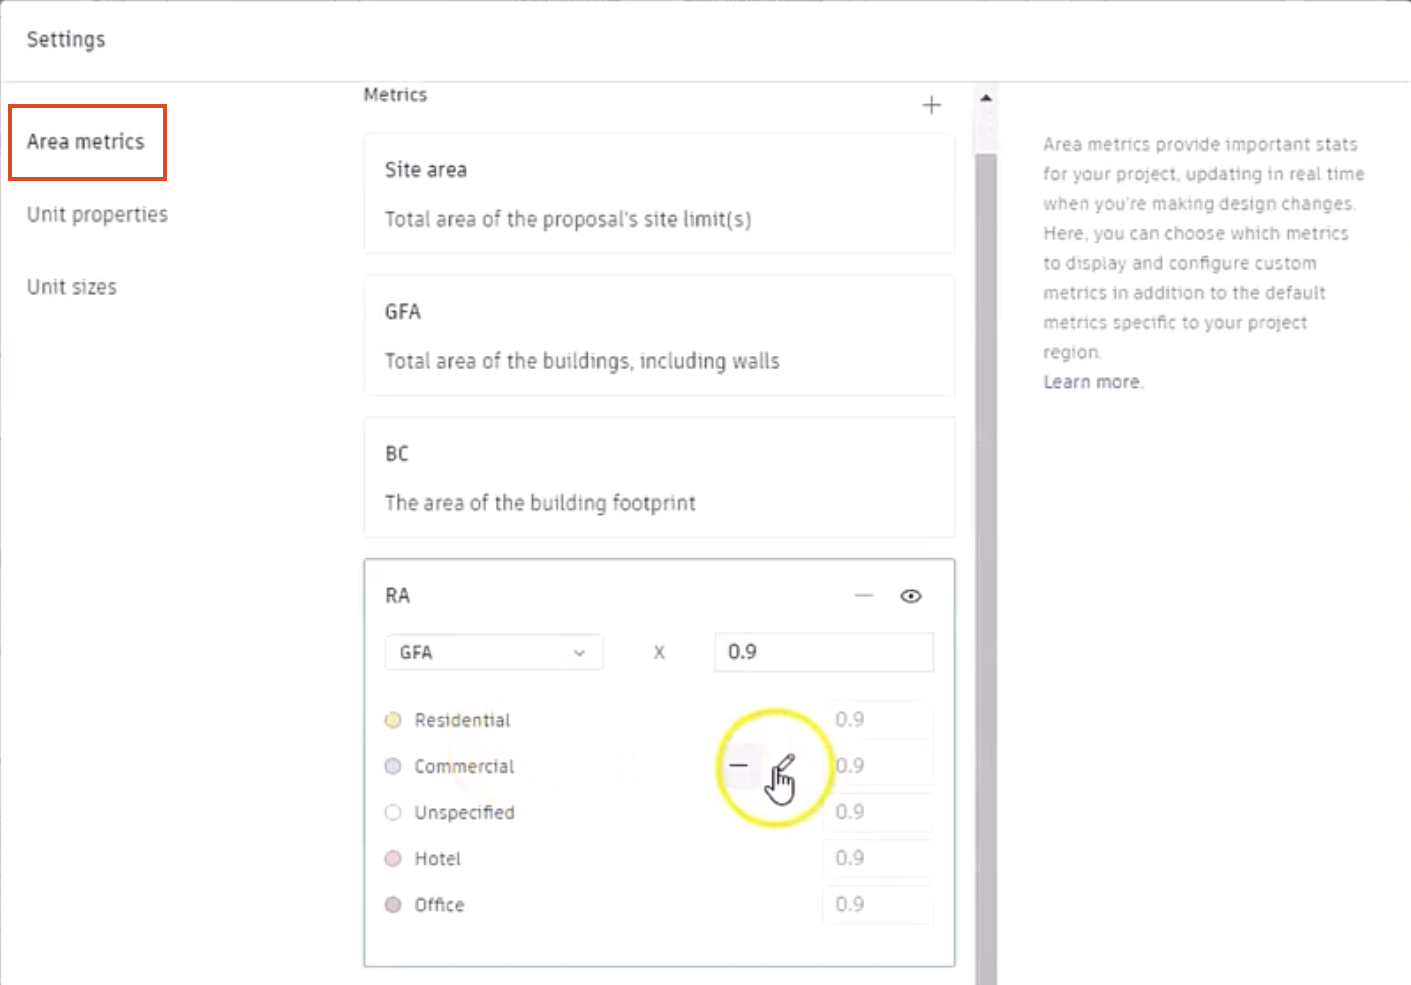
- Change the multiplier value to 0.8.
- Repeat this to change the value for the Hotel layer to 0.75.
- Click Apply changes.
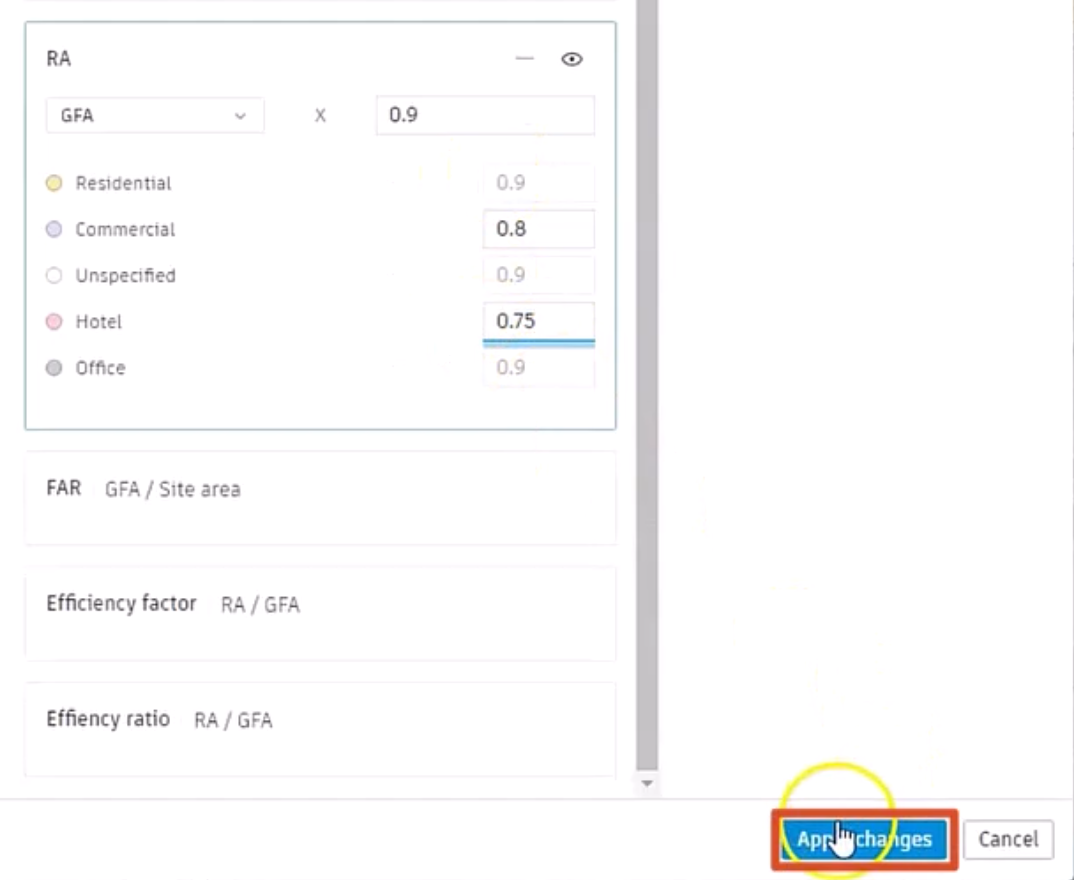
- Collapse the RA metric panel by clicking a different one.
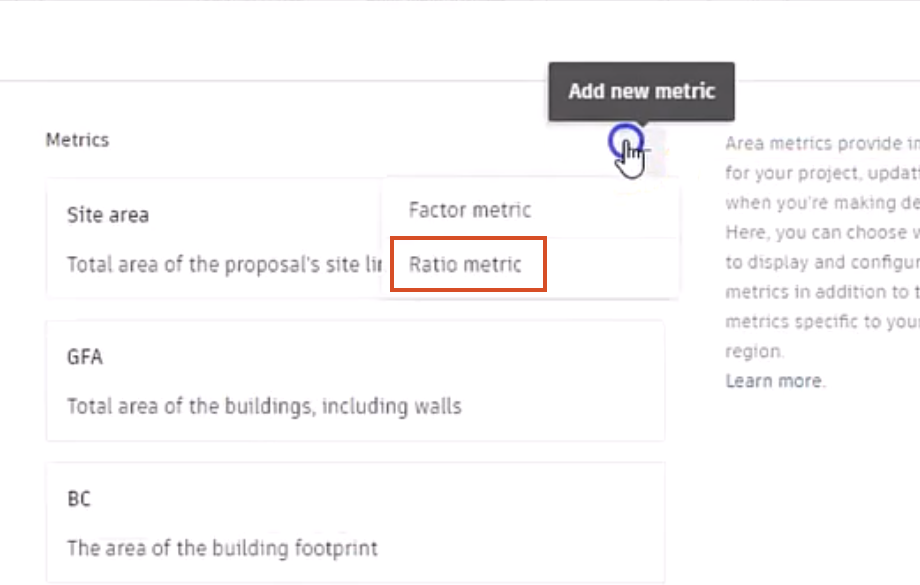
To create area metrics based on the defaults:
- Adjacent to the Metrics heading, click Add new metric (+).
- From the drop-down, select a Factor metric or a Ratio metric. In this example, Ratio metric is selected.
A New ratio metric panel is added to the list of metrics, with two drop-downs between a division slash.
To create the expression:
- Expand the left drop-down to set the first term, such as GFA.
- Set the second term to Site area.
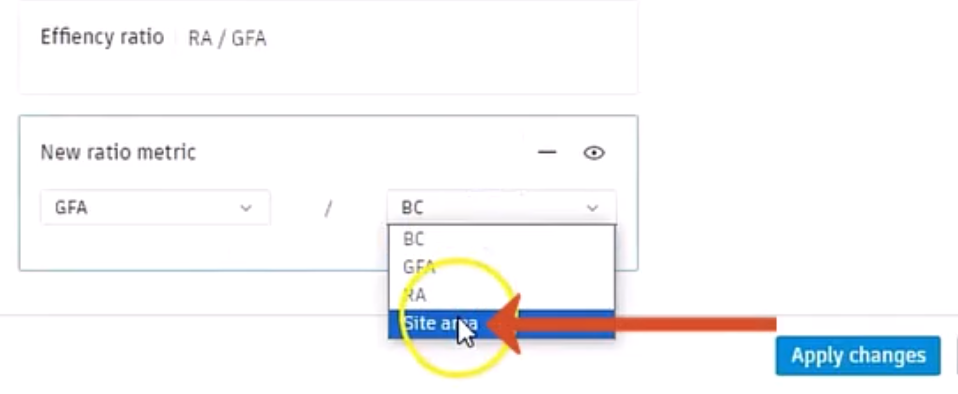
- Click Apply changes.
- Close the Settings dialog box.
In the right panel, the New ratio metric is now listed with the other metrics.
- Expand the new metric to see the Rhino layers, and that Forma has performed the ratio calculations.
- Pass the cursor over each to see that the corresponding geometry is highlighted on the canvas.