00:03
data can be imported into info drainage from
00:05
several different sources and in different orders,
00:08
allowing you to customize the process of building a drainage model.
00:12
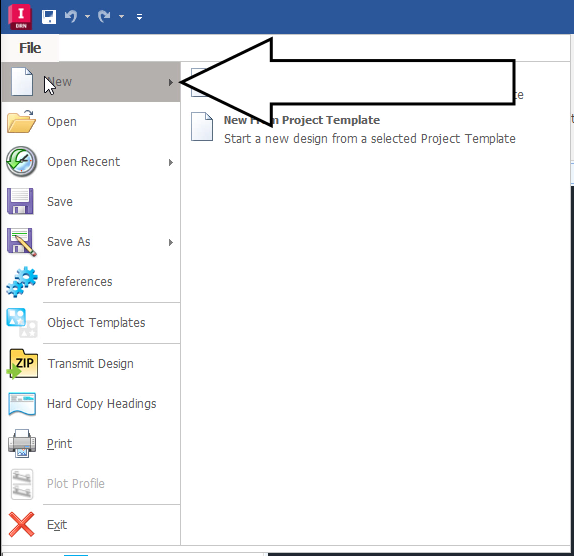
This exercise starts from a blank model
00:16
then new to start a new project.
00:20
Save this new project by selecting file again
00:23
and then click save ads
00:26
in the save dialog browse to the folder where you want to save your project
00:31
for this exercise, click the training folder,
00:34
then the info drainage introduction folder.
00:39
and enter exercise for as the project name,
00:42
click save to close the dialog.
00:45
There are a couple of different ways to view the data types.
00:48
You can import as well as their sources
00:52
In the ribbon, click the import tab.
00:55
This lists the different types of information available
00:57
to import as well as their sources.
01:01
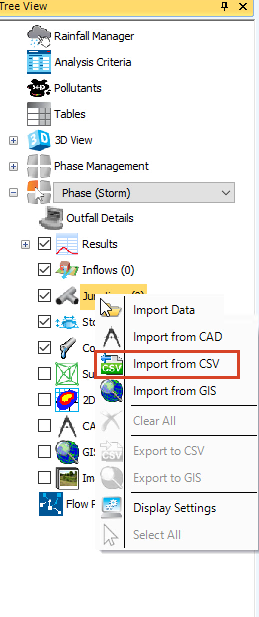
Another option is to use the tree view,
01:04
right click junctions
01:05
and select import from C S V.
01:08
To open the C S V import wizard
01:11
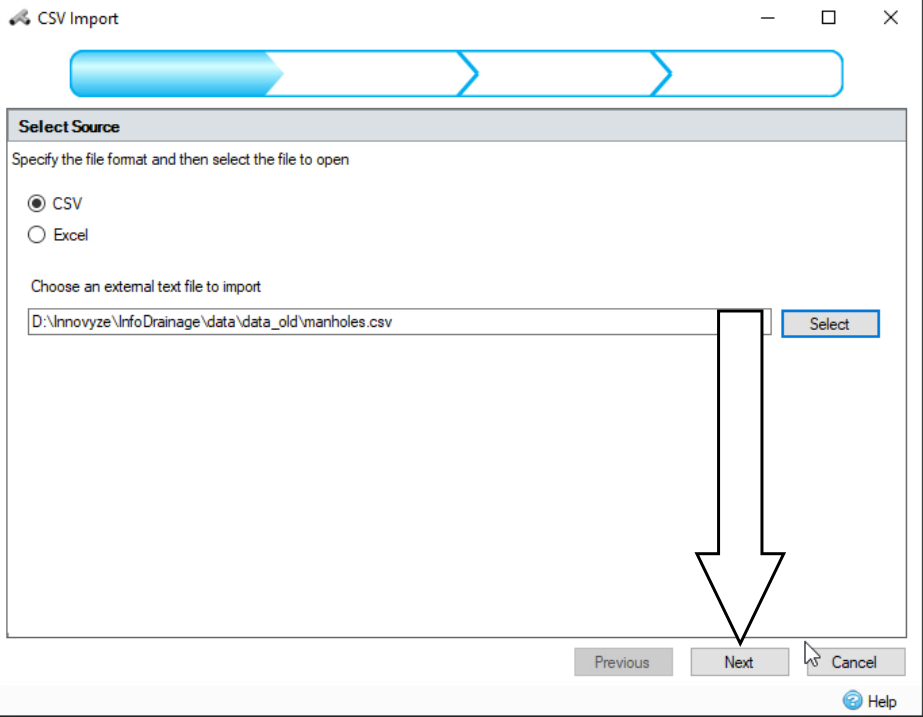
on the select source page. There are options for C S V and Excel file formats
01:19
make sure the C S V option is selected,
01:24
and navigate to the data folder.
01:26
In this example, only a file named Manholes exists
01:31
with the file highlighted, click open
01:33
then in the C. S. V. Import dialog, click next.
01:38
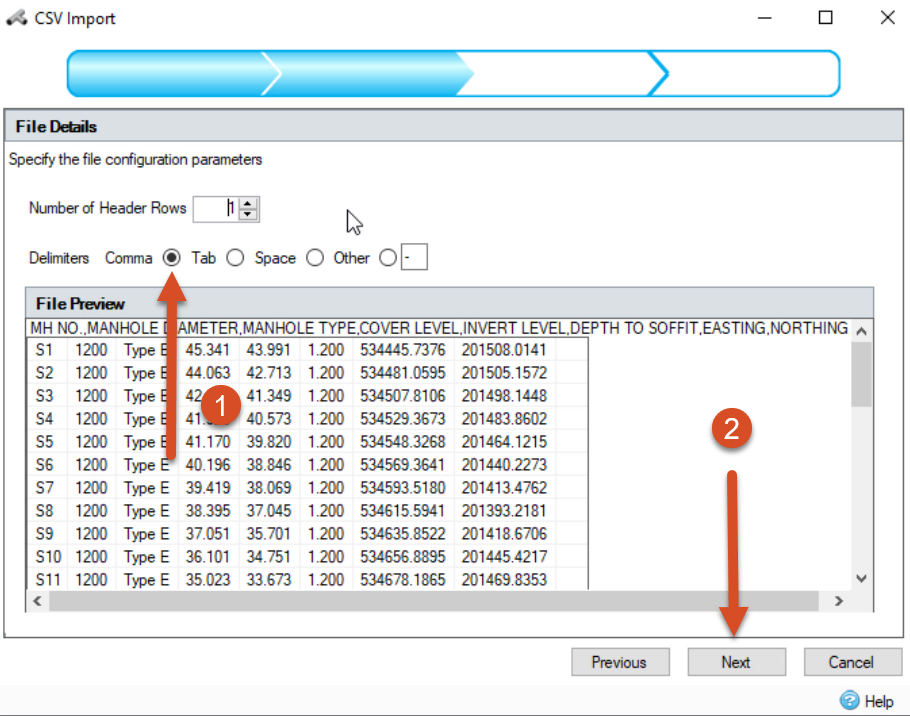
This opens the file details page where
01:41
you can configure the file configuration parameters.
01:45
Note that in the final preview area the data is shown in a table format
01:50
Next to number of hedgerows.
01:52
Use the up and down arrows or use the text box to enter a value of one.
01:58
Notice how the table in the file preview updates to reflect the change,
02:03
it means that the first row of the C. S. V.
02:05
File will be used to provide the data headings
02:08
and from row two it will be the data itself.
02:12
You also have options for how to separate different data values
02:15
in the table including a comma tab space or other,
02:20
which allows you to use a custom character,
02:24
make sure kama is active,
02:29
in the select template area you can select
02:31
a template on which to base your imported data
02:34
and there is a check box next to each option.
02:38
Make sure the manhole option is checked.
02:42
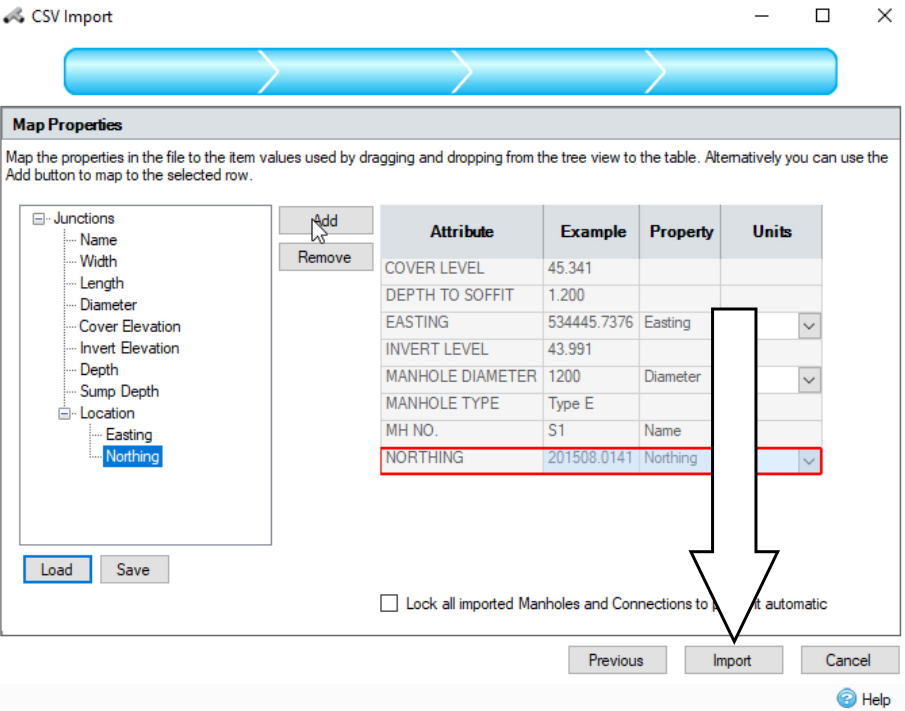
This opens the map properties page where you must map
02:45
the properties in the file to the item values being used
02:50
The tree view shows the information info drainage requires and on the right
02:55
is the information from the imported C S V. File.
02:59
The goal here is to fill in the required fields
03:02
on the left by pulling imported data from the right.
03:07
on the left click the item called name
03:11
and then on the right click the M H N O heading
03:15
which can provide that data,
03:18
note that the column heading does not need to
03:20
exactly match the junction information headings on the left.
03:25
the manhole number M H N O
03:28
Is essentially the manholes name.
03:30
So this satisfies the data requirement.
03:33
Keep in mind that this process can be repeated
03:35
with multiple data sources to give info drainage.
03:38
The needed information
03:40
follow the same process and match diameter on the left
03:44
with the man hole diameter heading on the right
03:49
You must set a unit value for the man hole
03:51
diameter by using the drop down under the units column
03:56
select millimeters as the unit type.
03:59
The only other pieces available from the imported data are feasting and northern
04:05
match up the eastern and northern headers from both areas and add them
04:10
setting the units to meters for both.
04:15
an import summary appears showing a brief
04:18
description of the import just completed.
04:23
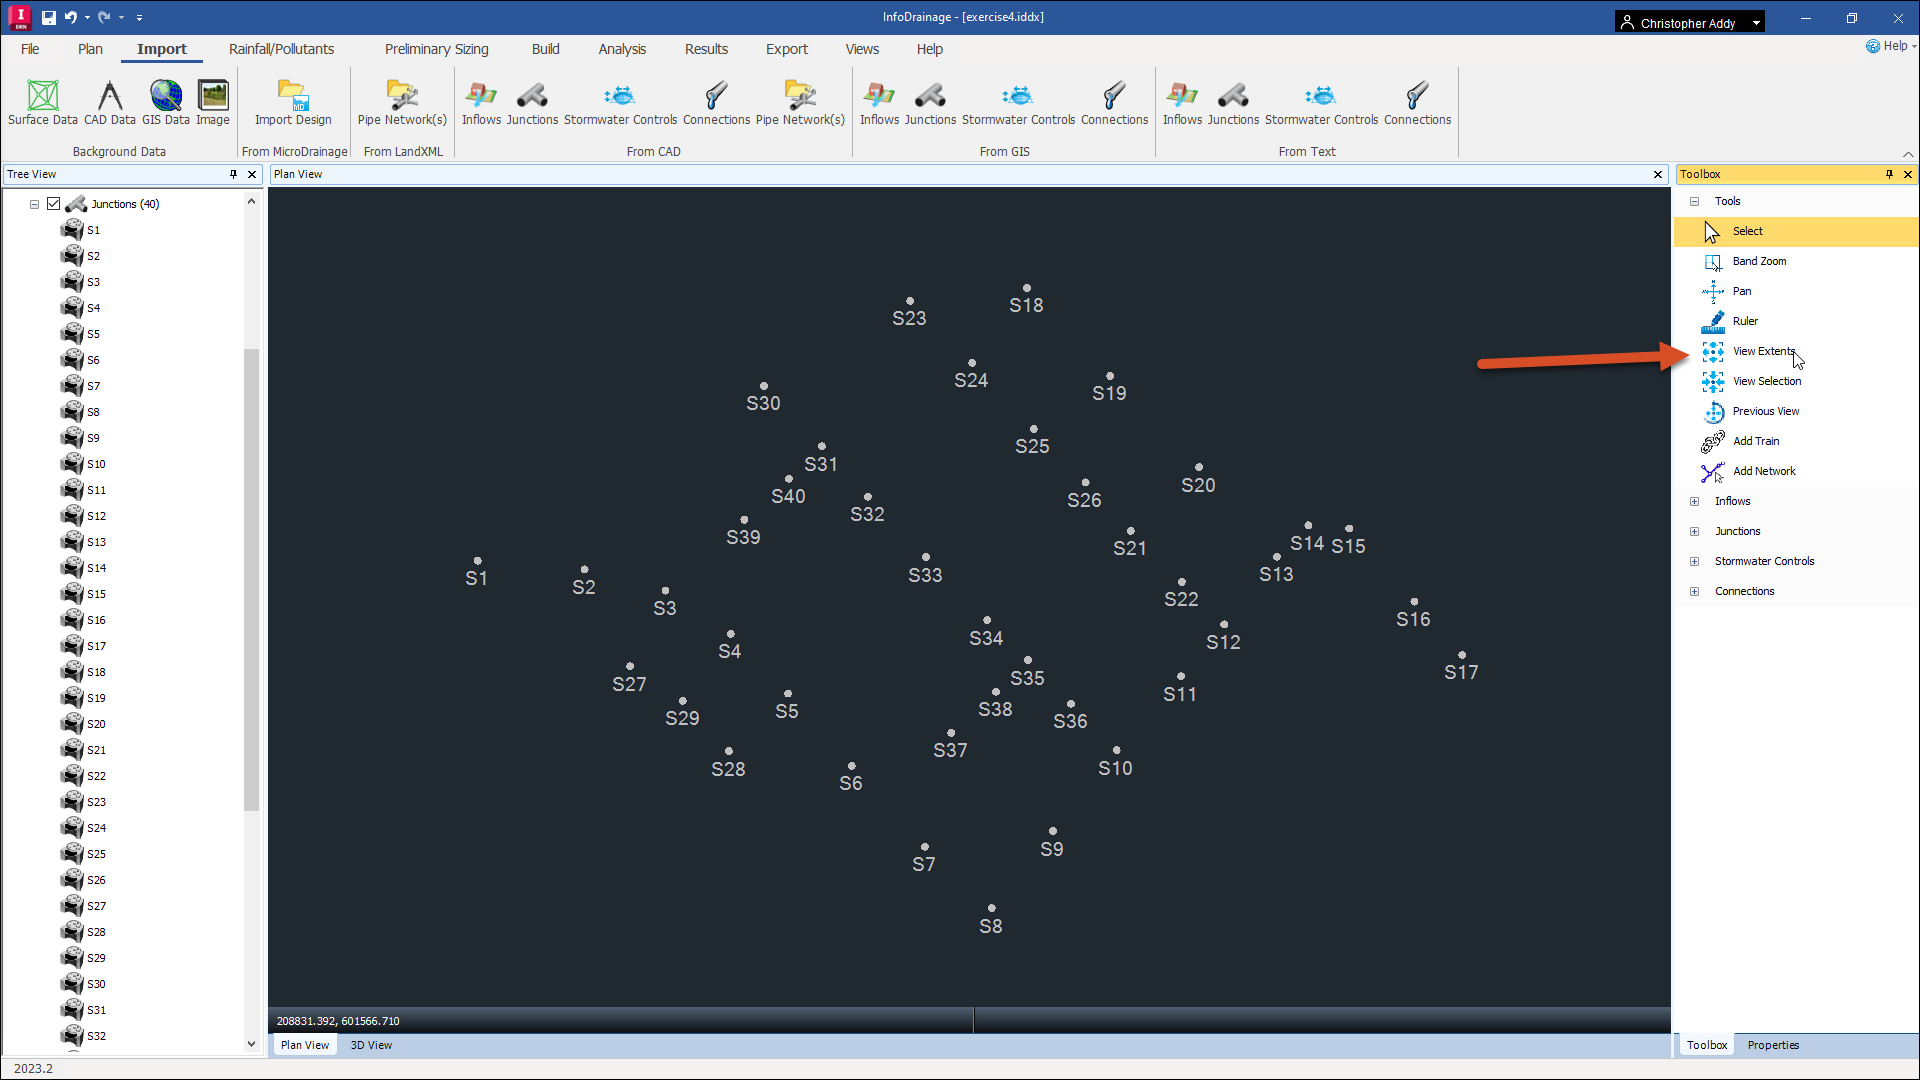
The newly imported data should now provide additional entries
04:26
in the tree view by expanding the junctions,
04:30
click view extents to see a geographical representation
04:34
of the imported CS v data in the plan view
04:38
keep in mind that importing different data sets does
04:41
not need to happen in a certain order.
04:43
In this case you could have started by importing surface cad or G. I. S data first
04:51
by allowing this flexibility
04:53
info drainage removes obstacles from the data import process