& Construction

Integrated BIM tools, including Revit, AutoCAD, and Civil 3D
& Manufacturing

Professional CAD/CAM tools built on Inventor and AutoCAD

Integrated BIM tools, including Revit, AutoCAD, and Civil 3D

Professional CAD/CAM tools built on Inventor and AutoCAD
Create and customize a SuDS known as a cellular storage structure into a drainage system model.
Type:
Tutorial
Length:
6 min.
Tutorial resources
These downloadable resources will be used to complete this tutorial:
Cellular storage structures are a type of sustainable drainage solution (SuDS) that are typically crate-like structures with permeable walls that allow the storage and infiltration of water.
In this example, the outline for the cellular storage structure has already been imported. Pipe 6.003 will be replaced with the cellular storage structure.
First, delete the pipe inside the outline of the cellular storage structure:
To add the cellular storage structure:
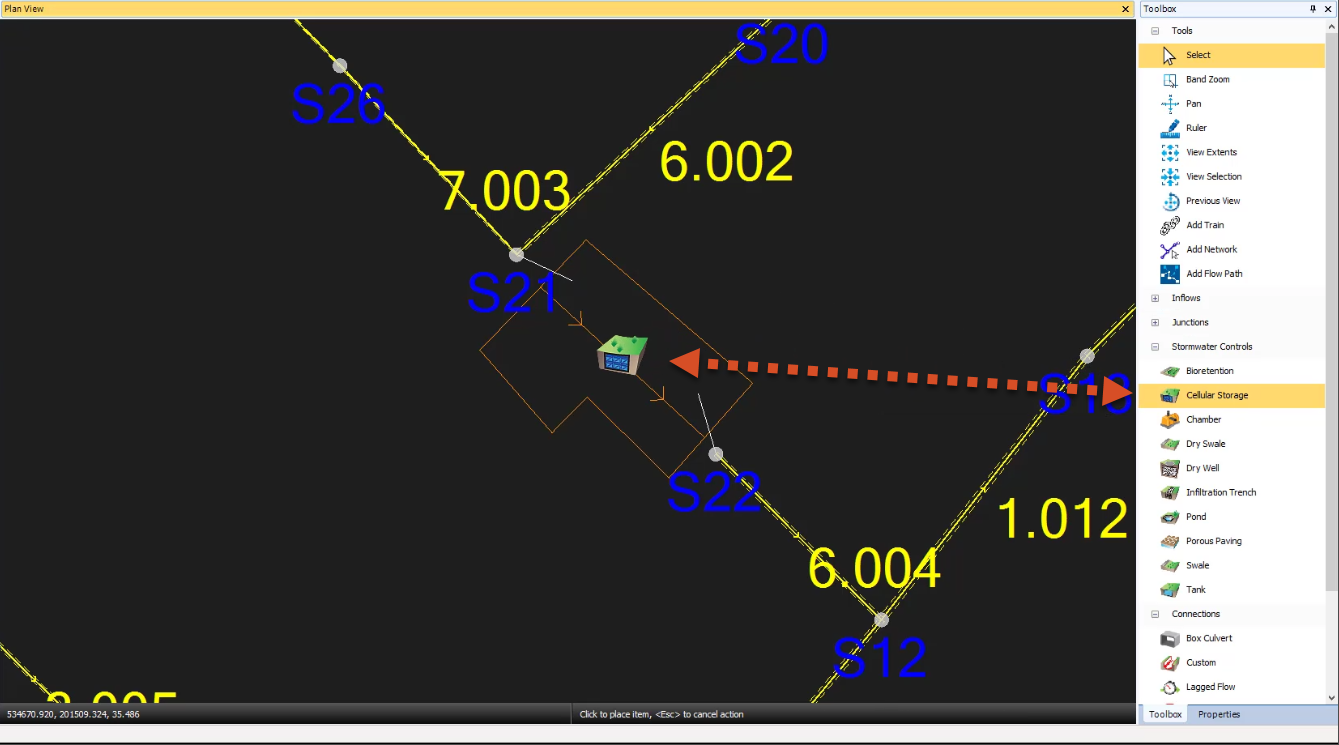
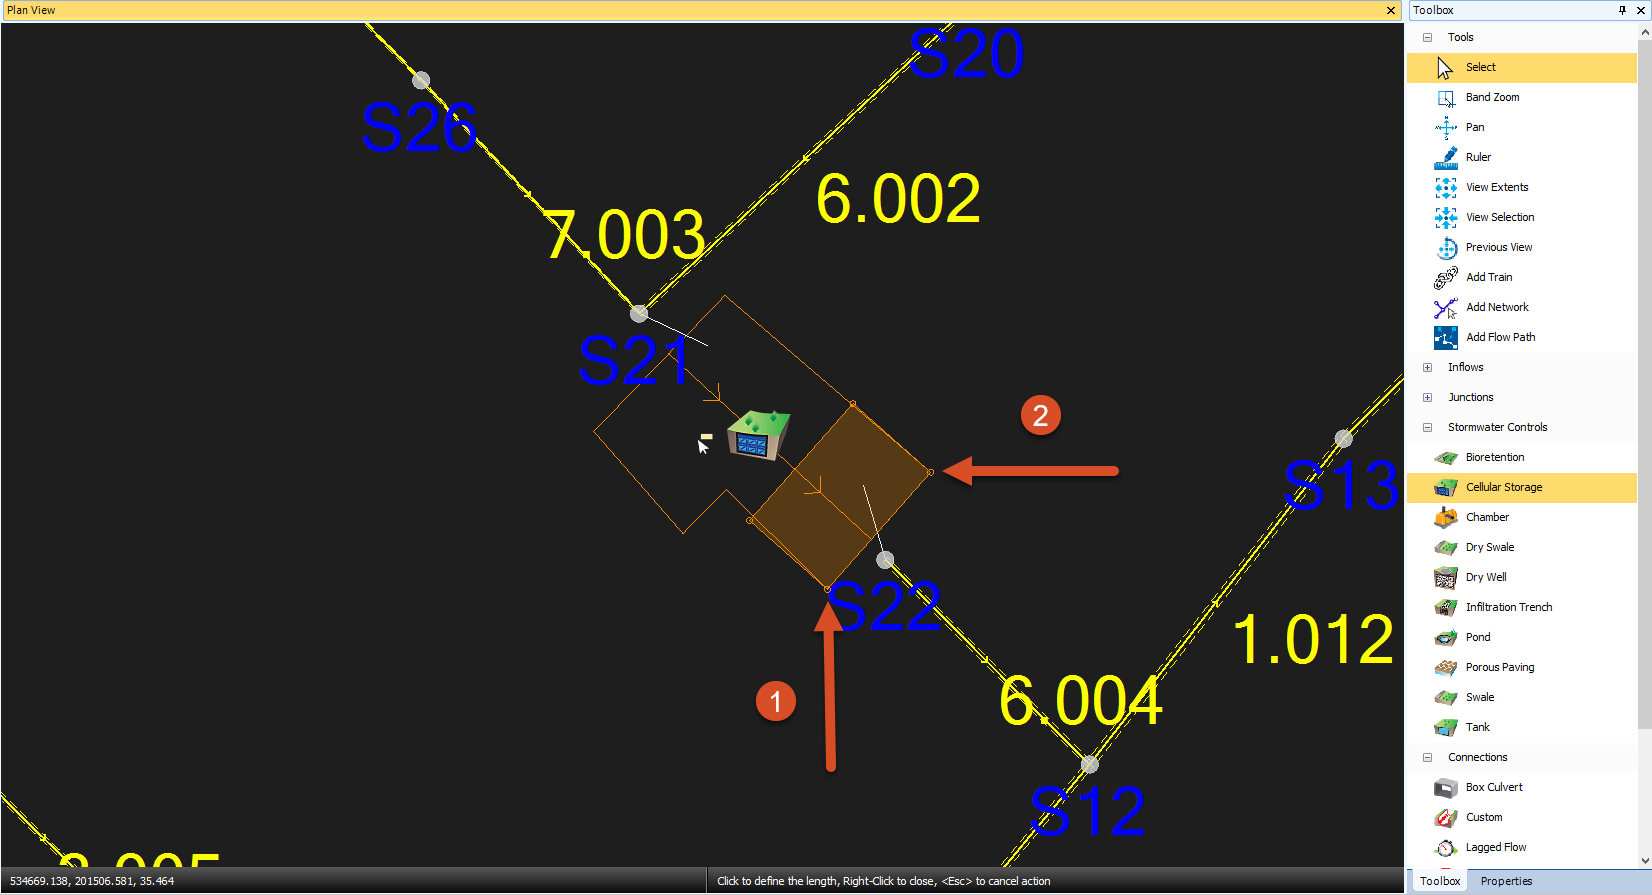
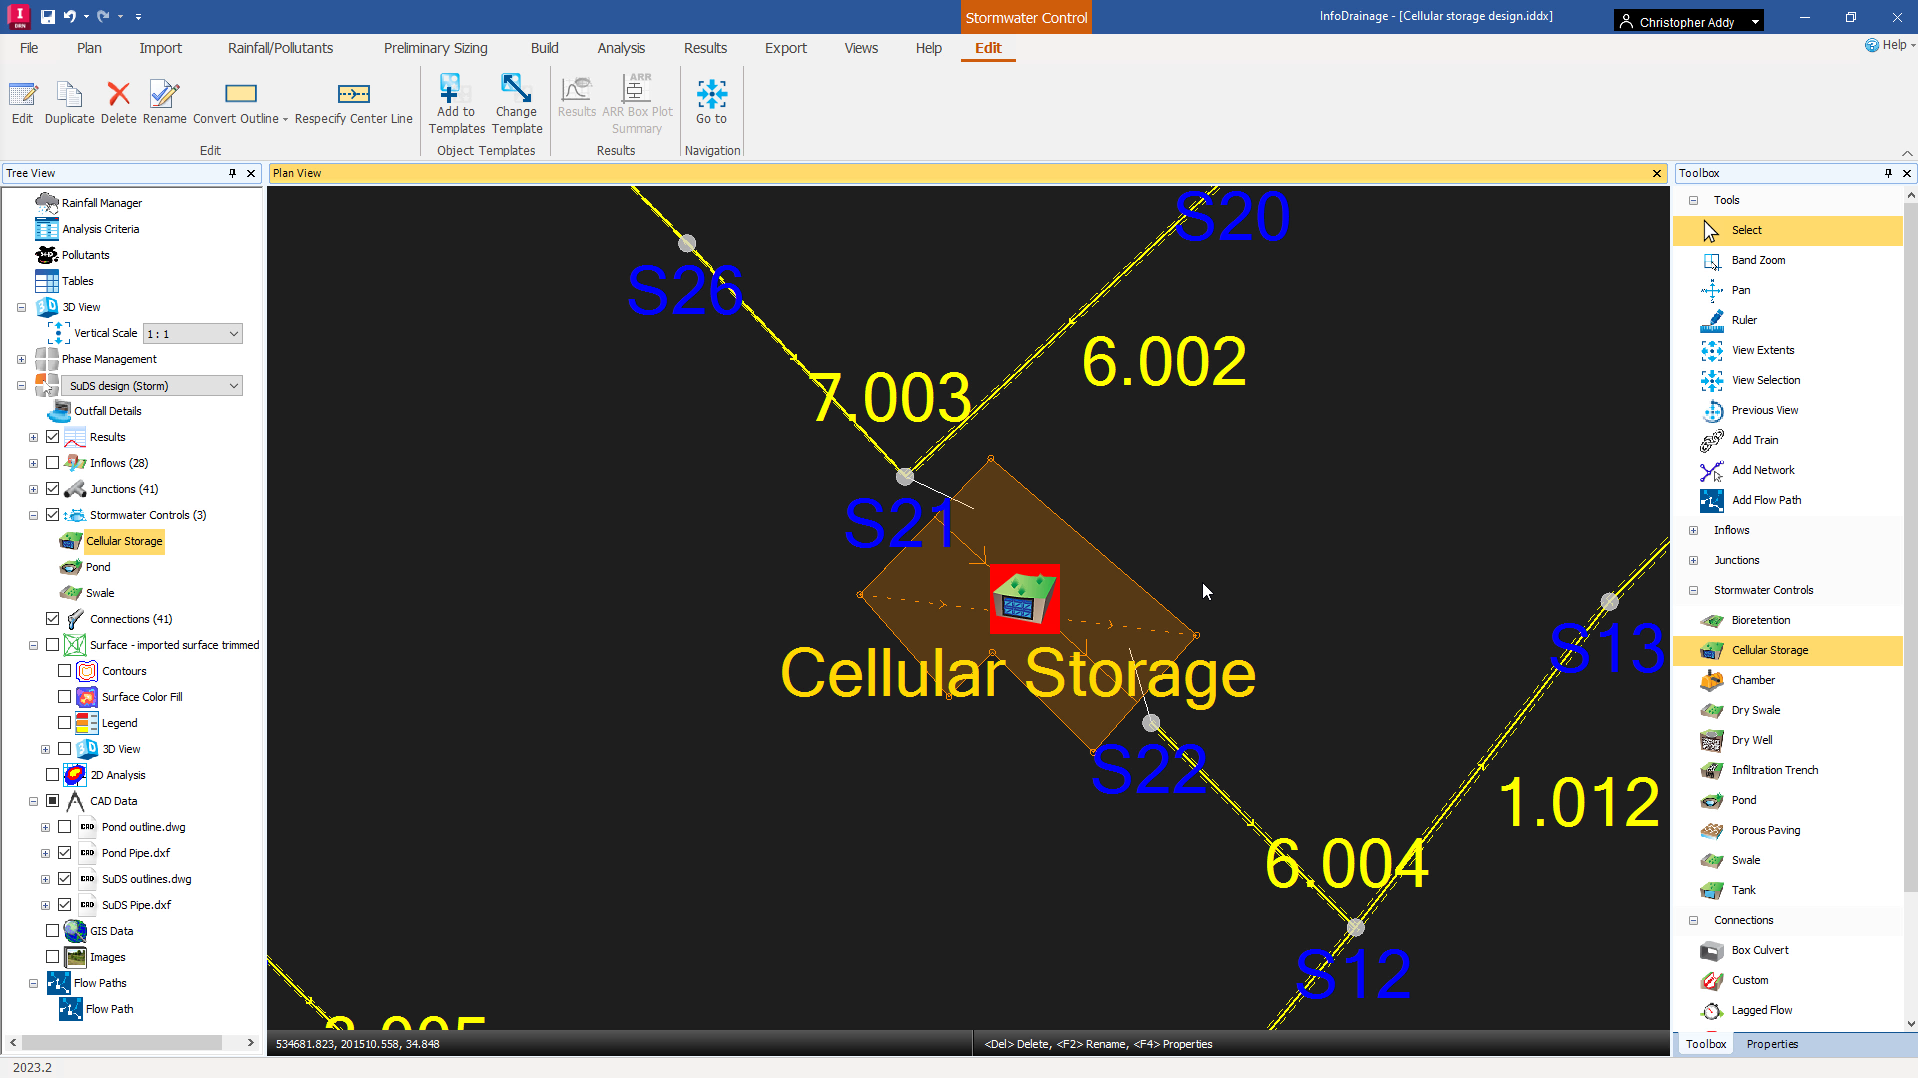
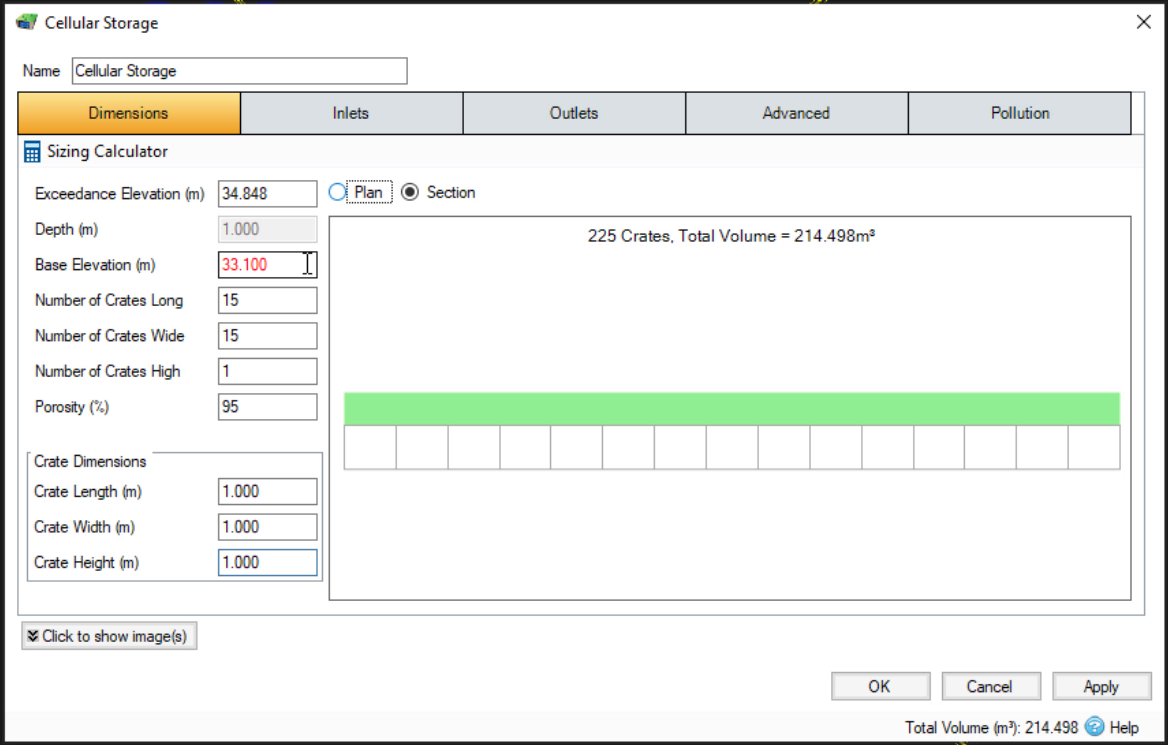
IMPORTANT: cellular storage structures are unusual, in that the parameters you enter do not necessarily correspond with the digitized area shown in the Plan View. Cellular storage structures are crates with predetermined sizes, so you must define the number of crates (unlike ponds and swales).
Note that, in this example, the structure has an exceedance level of 34.848 meters, which is its lowest point. Also, all crates will have a length, width, and height of 1 meter.
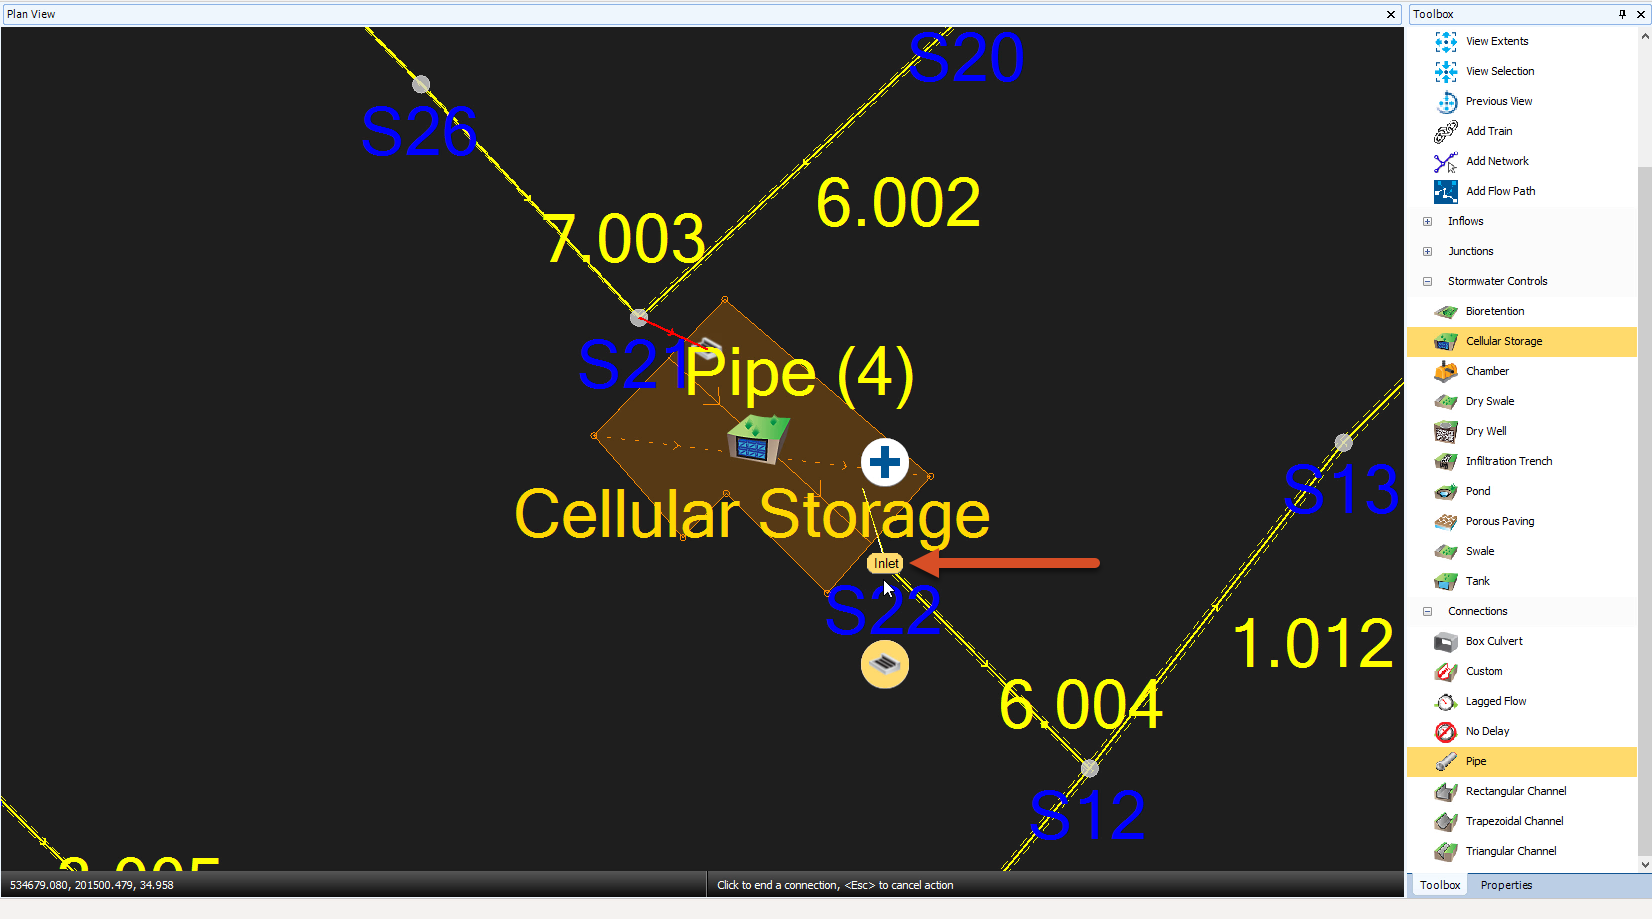
To connect the drainage system pipes to the added cellular storage structure:
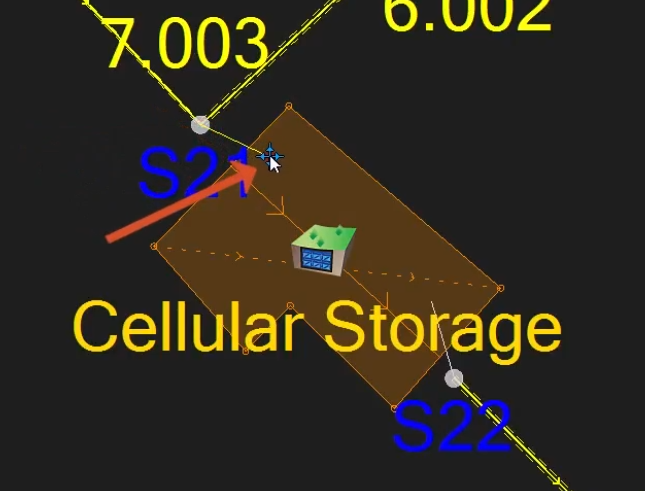
To connect another pipe at the downstream end:
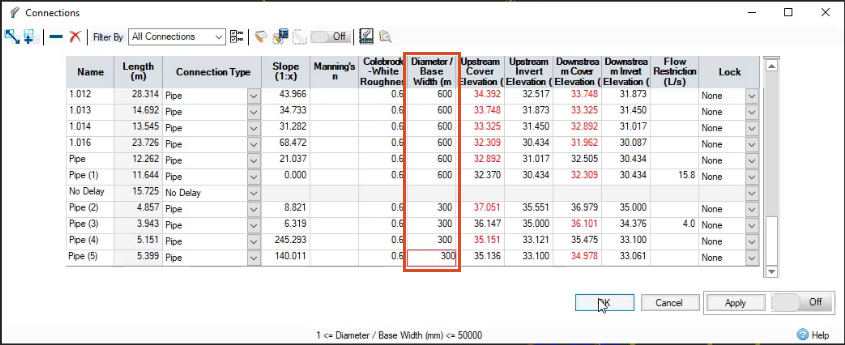
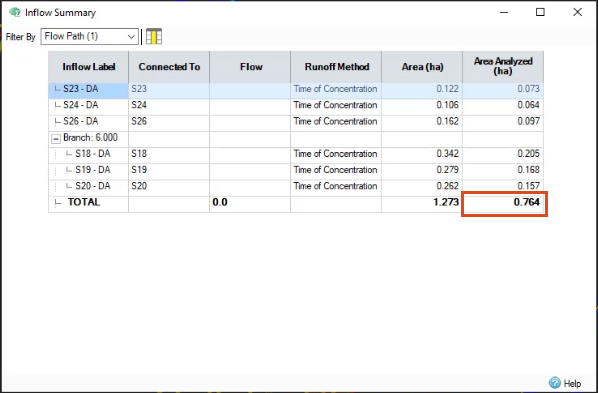
You now know the area and volume of the structure, but you still need to set a discharge limit to fully utilize its storage capacity. For this exercise, a Quick Storage Estimate has already determined a discharge limit of 9 liters per second, meaning you must size the outlet orifice to meet that limit.
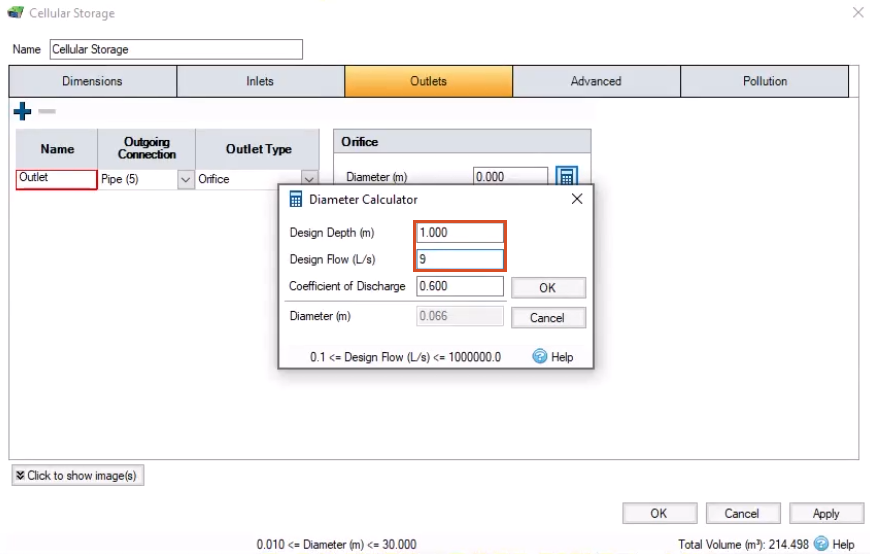
In this example, no errors are listed. The model now includes a cellular storage structure.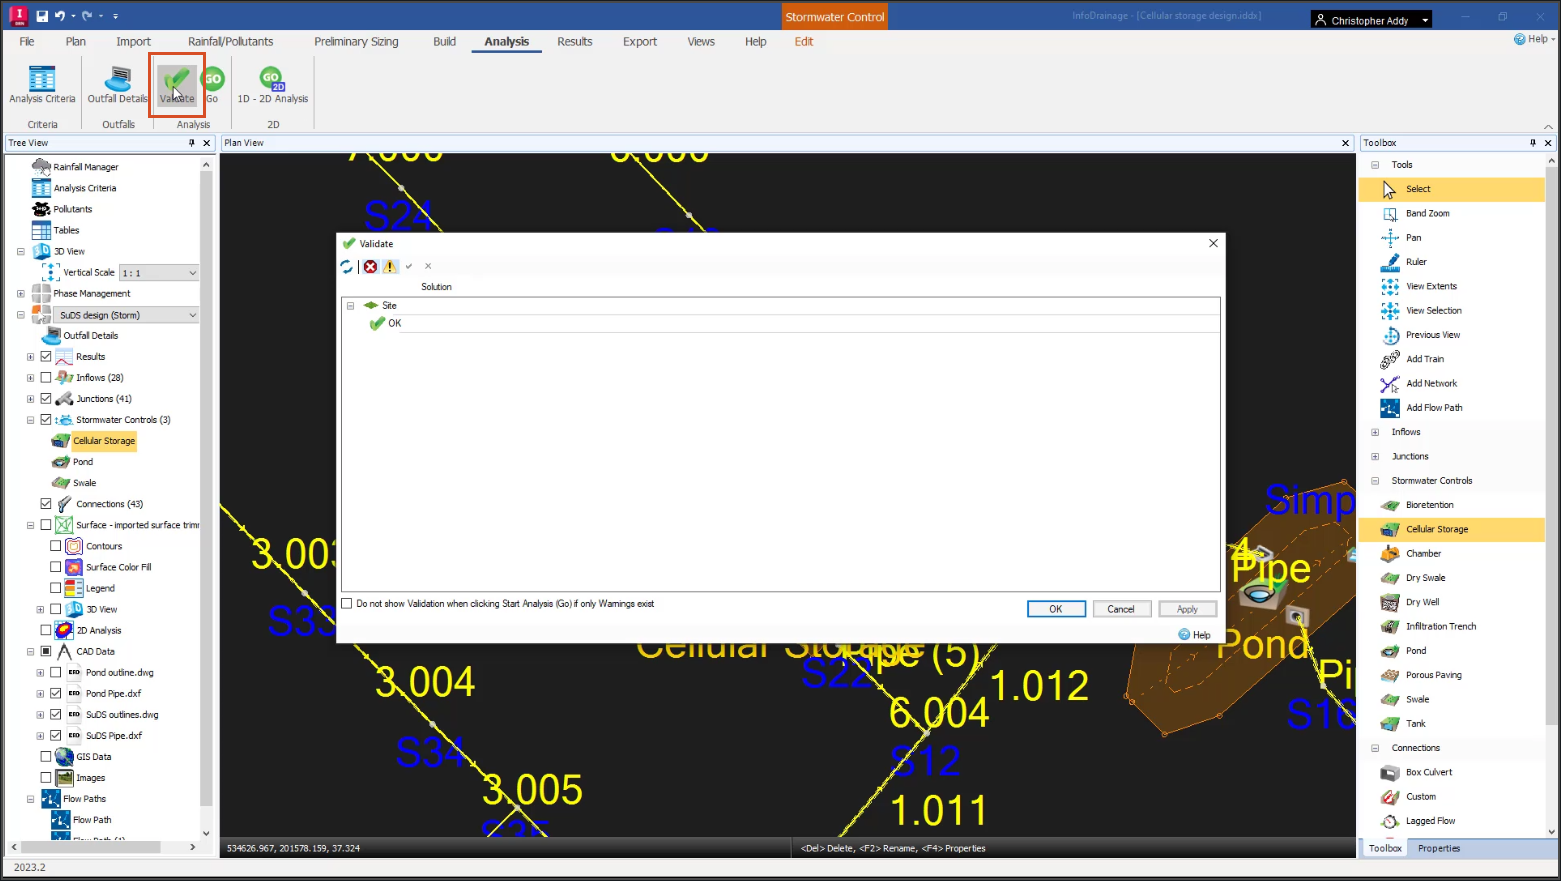
Industry:
Role:
How to buy
Privacy | Do not sell or share my personal information | Cookie preferences | Report noncompliance | Terms of use | Legal | © 2025 Autodesk Inc. All rights reserved
Sign in for the best experience
Save your progress
Get access to courses
Receive personalized recommendations
May we collect and use your data?
Learn more about the Third Party Services we use and our Privacy Statement.May we collect and use your data to tailor your experience?
Explore the benefits of a customized experience by managing your privacy settings for this site or visit our Privacy Statement to learn more about your options.