• InfoWater Pro

Creating a project

Open an existing project or create a new project and initialize the link between ArcGIS Pro and InfoWater Pro.


00:03

When you launch either Argi

00:05

Pro or Info

00:06

Water Pro.

00:07

The Argi

00:08

Pro start page appears

00:10

from this page. You can start new projects or open existing projects

00:16

to open an existing project,

00:18

locate and click the project name in the recent projects list

00:23

to open a project that's not in the list.

00:25

Click open another project to access all projects on your computer,

00:30

find the project and click.

00:31

OK?

00:33

You can also navigate to your model files and open

00:36

the APR file which will skip the start page.

00:40

A useful tip is to pin your favorite projects to the recent

00:43

projects list by hovering over the project name and clicking the pin icon

00:49

to create a new project.

00:51

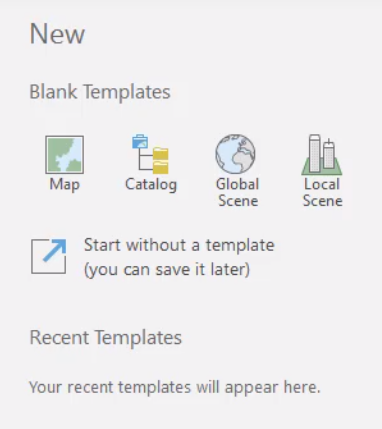
Choose a default template from the blank templates

00:54

section of the start page such as map

00:58

in the create a new project pop-up name,

01:00

your project and update the location if needed.

01:03

Click OK.

01:05

The Argi

01:06

Pro user interface appears,

01:09

click the map tab on the

01:11

Agis Pro ribbon

01:12

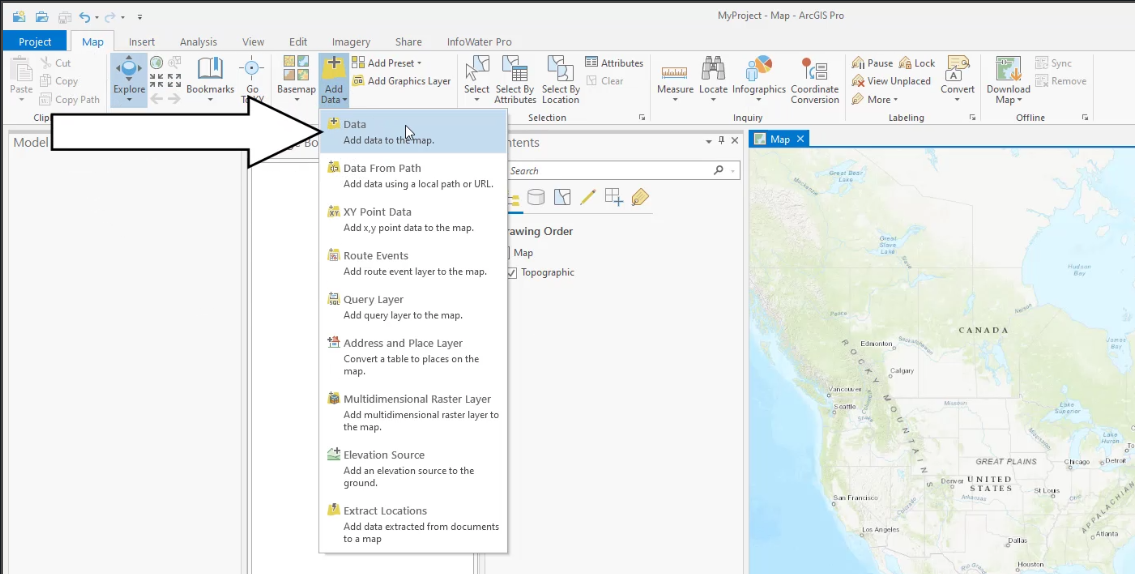
and then click add data,

01:15

navigate to find and select the shape file you want to add to start your project,

01:20

click OK, to load the shape file.

01:23

Now click the info Water pro tab to open the info Water pro ribbon

01:28

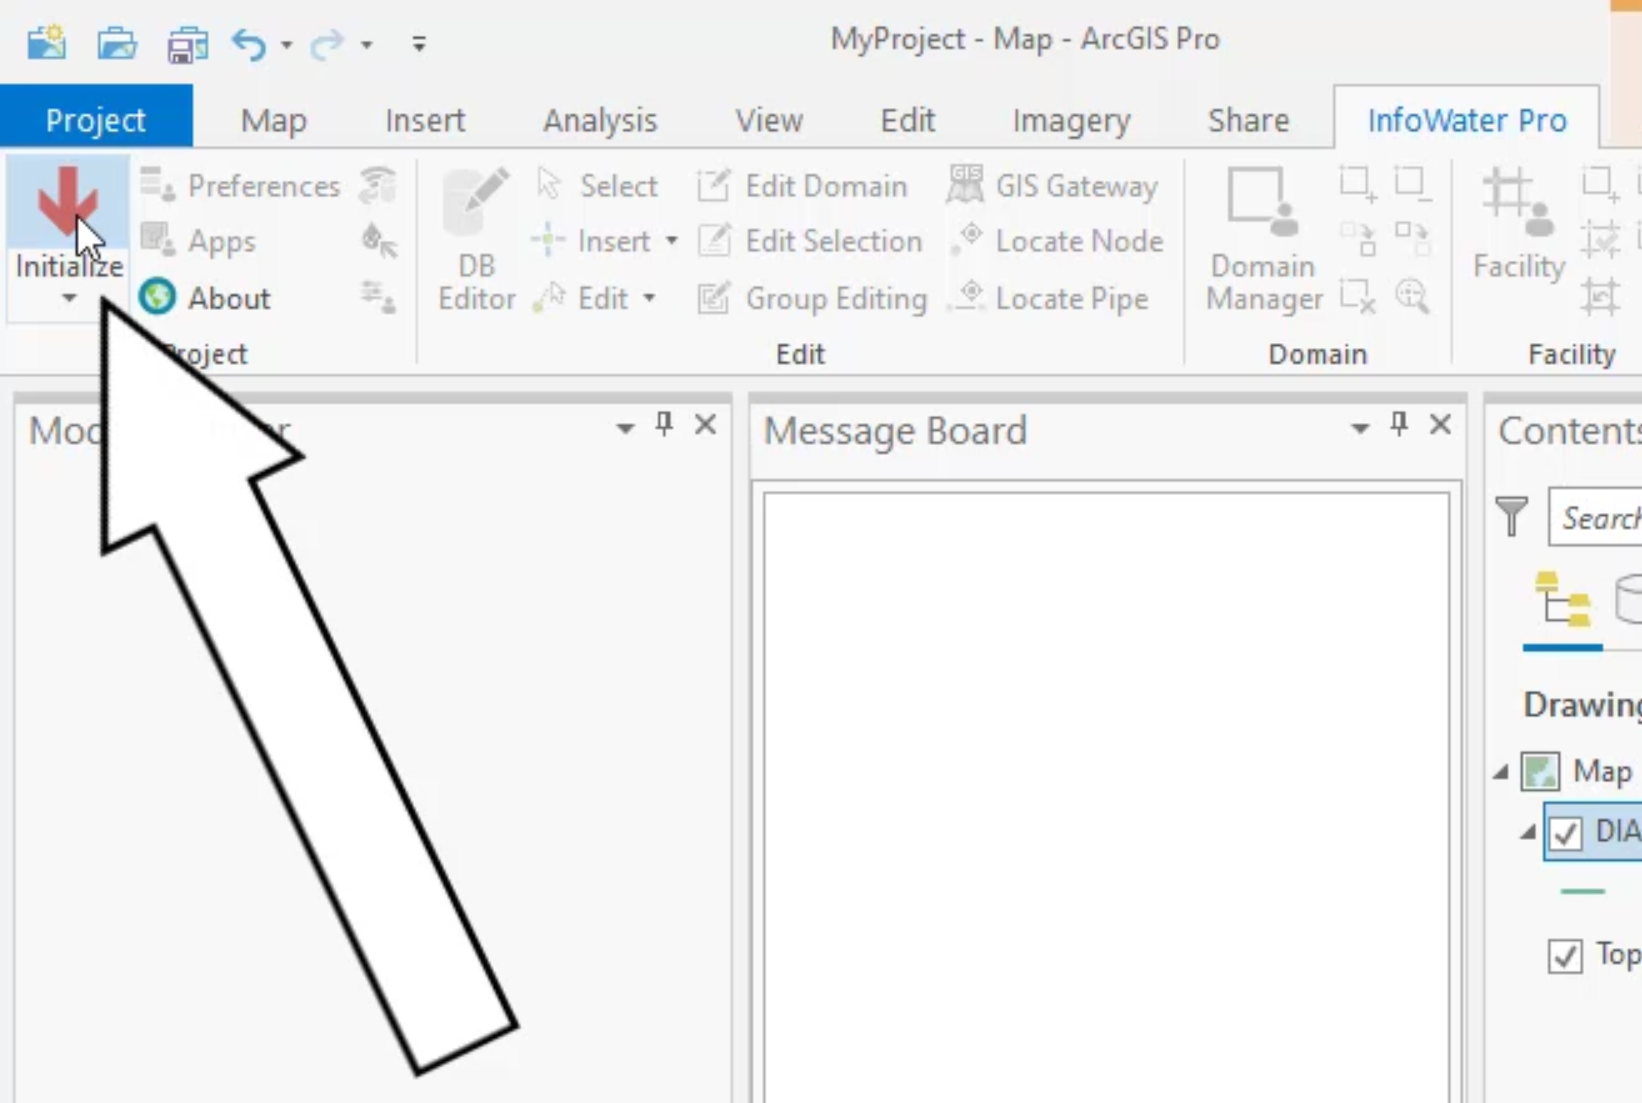
in the project group, click initialize

01:31

this creates the databases necessary to store the model information.

01:36

It also establishes links between the

01:39

Agis Pro document file and the info Water Pro database tables

01:44

in the create new info water project dialog box that appears

01:48

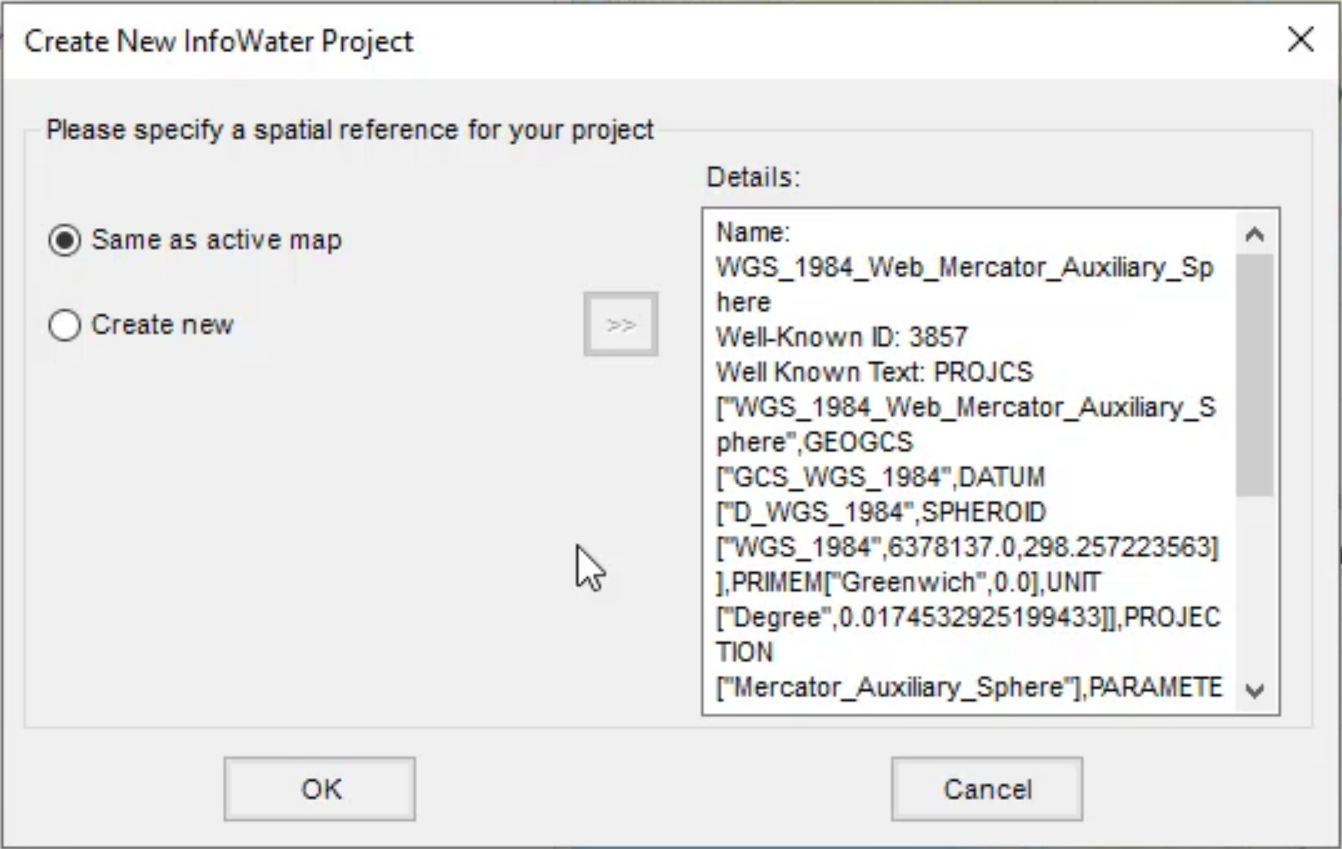
specify a spatial reference for your project.

01:52

Since you will typically begin your own shape file,

01:54

that usually has the correct spatial projection for

01:57

your model select same as active map.

02:01

However, if you did not add in a layer or shape file with a spatial projection,

02:06

you can still specify the spatial projection you

02:08

want the model to use in this window.

02:11

Click OK.

02:13

Once the project is initialized as an info Water pro project,

02:17

click the save icon or press control S to save your project.

02:22

If this is the first time you start info Water Pro,

02:25

you can add the info water pro model explorer

02:28

and message board panels to the existing ARC G

02:31

S panels in the main view area.

02:34

From the view section of the info Water pro tab,

02:37

click the model explorer and message board icons to open the panels.

02:42

Once opened, you can arrange all the panels to your preferred method of working.

Video transcript

00:03

When you launch either Argi

00:05

Pro or Info

00:06

Water Pro.

00:07

The Argi

00:08

Pro start page appears

00:10

from this page. You can start new projects or open existing projects

00:16

to open an existing project,

00:18

locate and click the project name in the recent projects list

00:23

to open a project that's not in the list.

00:25

Click open another project to access all projects on your computer,

00:30

find the project and click.

00:31

OK?

00:33

You can also navigate to your model files and open

00:36

the APR file which will skip the start page.

00:40

A useful tip is to pin your favorite projects to the recent

00:43

projects list by hovering over the project name and clicking the pin icon

00:49

to create a new project.

00:51

Choose a default template from the blank templates

00:54

section of the start page such as map

00:58

in the create a new project pop-up name,

01:00

your project and update the location if needed.

01:03

Click OK.

01:05

The Argi

01:06

Pro user interface appears,

01:09

click the map tab on the

01:11

Agis Pro ribbon

01:12

and then click add data,

01:15

navigate to find and select the shape file you want to add to start your project,

01:20

click OK, to load the shape file.

01:23

Now click the info Water pro tab to open the info Water pro ribbon

01:28

in the project group, click initialize

01:31

this creates the databases necessary to store the model information.

01:36

It also establishes links between the

01:39

Agis Pro document file and the info Water Pro database tables

01:44

in the create new info water project dialog box that appears

01:48

specify a spatial reference for your project.

01:52

Since you will typically begin your own shape file,

01:54

that usually has the correct spatial projection for

01:57

your model select same as active map.

02:01

However, if you did not add in a layer or shape file with a spatial projection,

02:06

you can still specify the spatial projection you

02:08

want the model to use in this window.

02:11

Click OK.

02:13

Once the project is initialized as an info Water pro project,

02:17

click the save icon or press control S to save your project.

02:22

If this is the first time you start info Water Pro,

02:25

you can add the info water pro model explorer

02:28

and message board panels to the existing ARC G

02:31

S panels in the main view area.

02:34

From the view section of the info Water pro tab,

02:37

click the model explorer and message board icons to open the panels.

02:42

Once opened, you can arrange all the panels to your preferred method of working.

Step-by-step:

When you launch either ArcGIS Pro or InfoWater Pro, the ArcGIS Pro start page appears. From this page, you can start new projects or open existing projects.

To open an existing project:
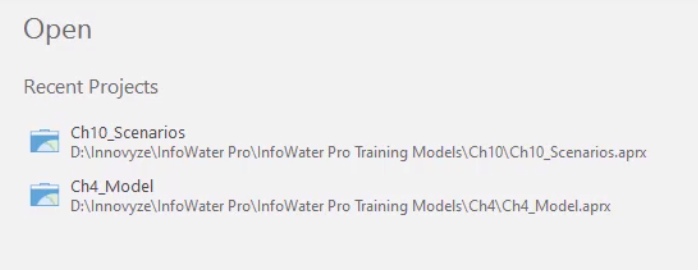
  1. From the ArcGIS Pro start page, locate the project in the Recent Projects list, click Open another project to access all projects, or open the relevant .aprx file directly from your file browser.
    The ArcGIS Pro start page, Open options
  2. To create a new project, from the ArcGIS Pro start page, under Blank Templates, choose a default template, such as Map.
    The ArcGIS Pro start page, Blank Templates options
  3. In the Create a New Project dialog box, name your project.
  4. Browse to the location you wish to save your project.
  5. Click OK.
  6. In ArcGIS Pro, Map ribbon, click Add Data > Data.
    The ArcGIS Pro ribbon, Map tab, Add Data drop-down, with Data being called out as selected
  7. From the Add Data file browser, select the shapefile you want to add to your project.
  8. Click OK.
  9. On the ribbon, InfoWater Pro tab, Project panel, click Initialize to create the necessary databases to store model information and establish links between the ArcGIS Pro file and the InfoWater Pro database.
    The InfoWater Pro tab of the ribbon with Initialize called out as being selected
  10. In the Create New InfoWater project dialog box, for the spatial reference, select Same as active map.
  11. Click OK.
    The Create New InfoWater Project dialog box
  12. Save your project.
Was this information helpful?