Step-by-step guide
In Forma, multiple housing types can be defined and combined—for example, to create housing row units that feature attached garages.
Open the proposal where the housing units will be created. In this example, Proposal1 is already set up, the site limits have been defined, and some row housing units, roads, and a parking lot have been added.
To create a new row housing template:
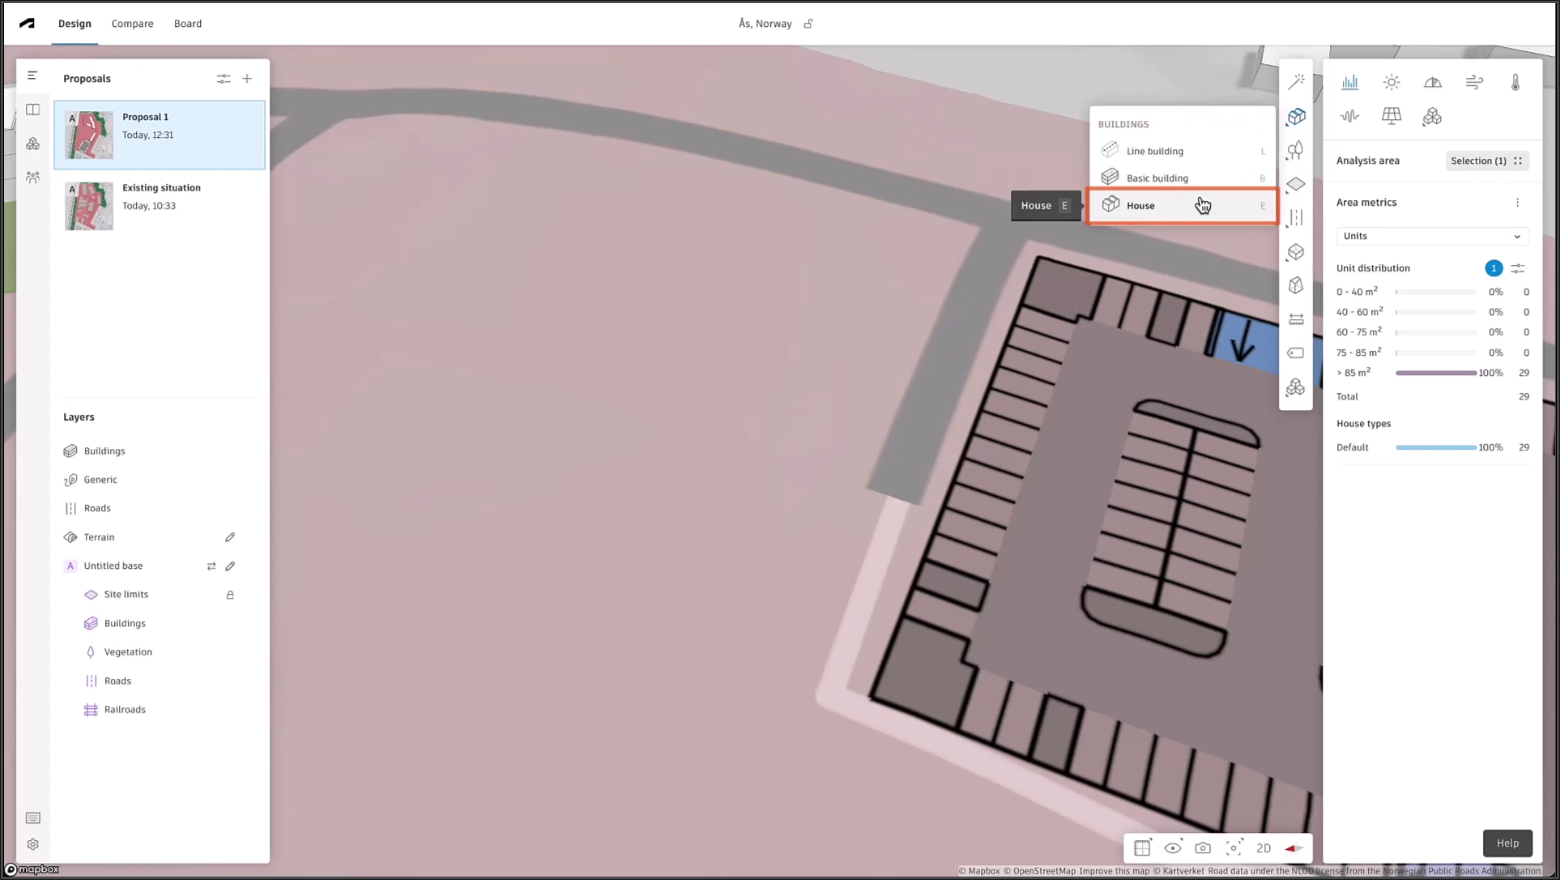
- On the Design toolbar, select Building > House.
- On the canvas, click and drag to draw a line of row houses.
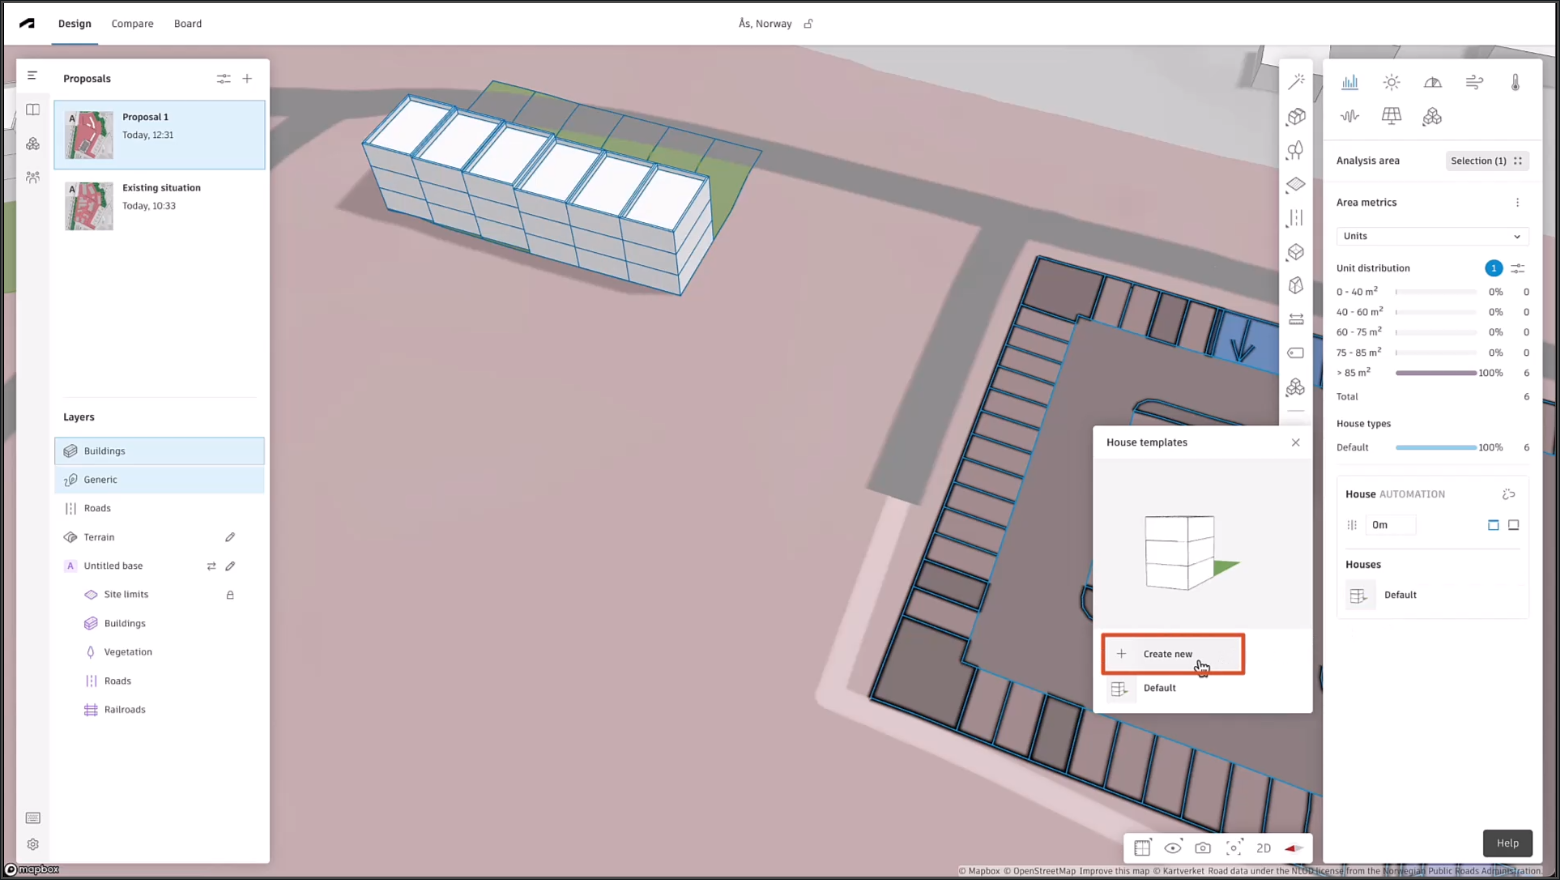
- In the right panel, under Houses, click the Default house type.
- In the House templates dialog box, click Create new.
- In the template settings dialog box, enter the name “Row house type 2”.
Adjust the settings for the new house type:
- Leave the settings for two floors and a pitched roof.
- Change the roof orientation to Across.
- Under Layout, leave the center of the dot grid selected for a bit of green space on either side of the row.
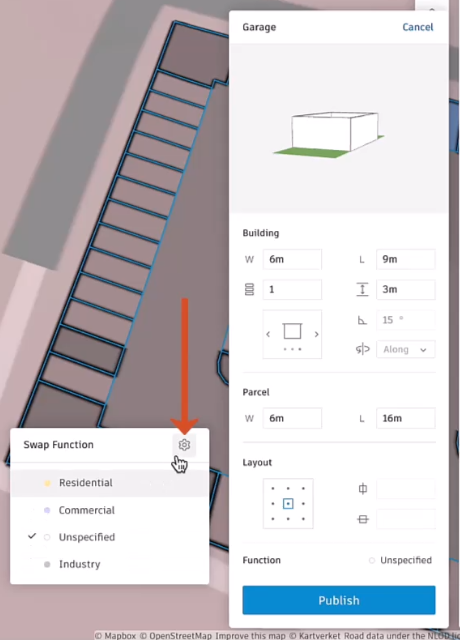
- Click the Unspecified function to open the Swap Function dialog box.
- Select Residential.
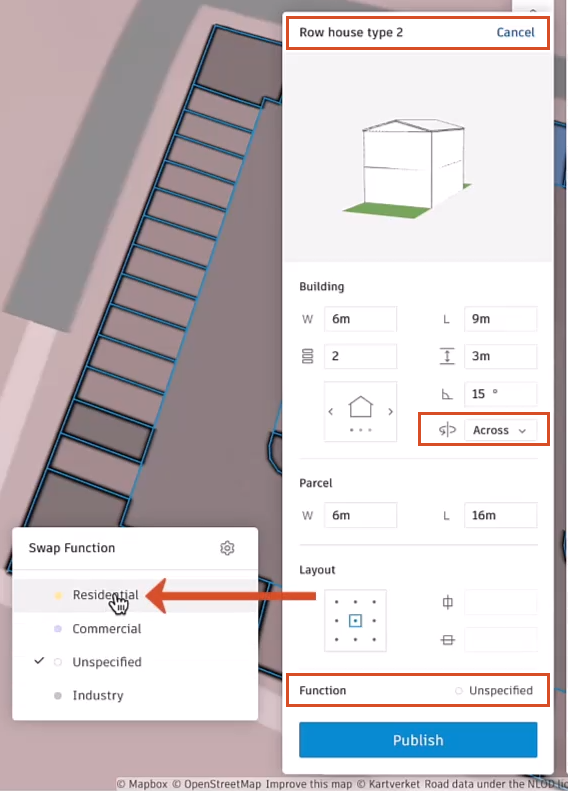
- Click Publish.
Note: On the canvas, the row houses update. In the House templates dialog, Row house type 2 is added to the list.

- Click Create new to create another housing type called “Garage”, with 1 floor and a flat roof.
To create a new function:
- Next to Function, click the active function—in this case, Unspecified—to open the Swap Function dialog box.
- Click Settings.
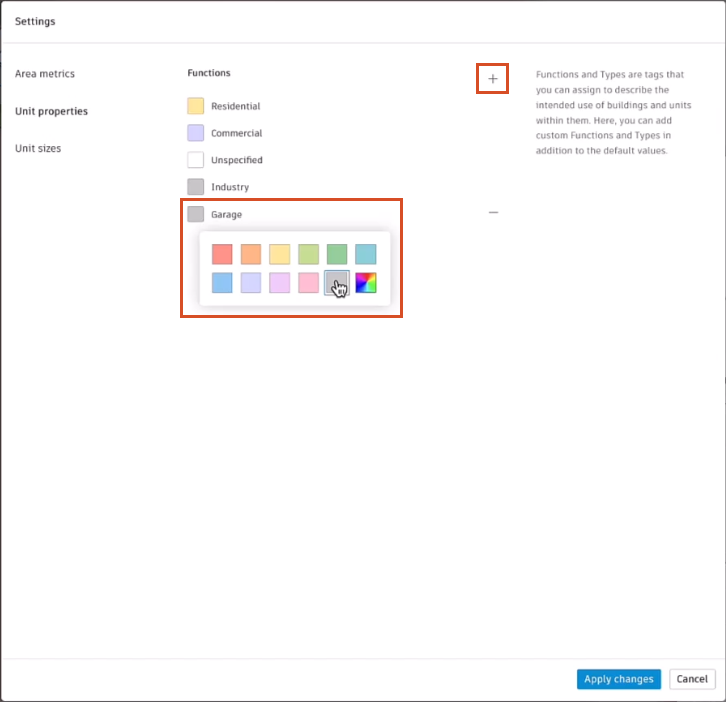
- In the Settings dialog box, click Unit properties. Here, you can add new functions and change the visibility color.
- Adjacent to Functions, click Add (+) to create a new function.
- Rename it “Garage”.
- Select the current color, to give it a gray label.
To exclude the garage from the area metrics:
- Click Area metrics.
- Expand one of the metrics, such as BRA in this example.
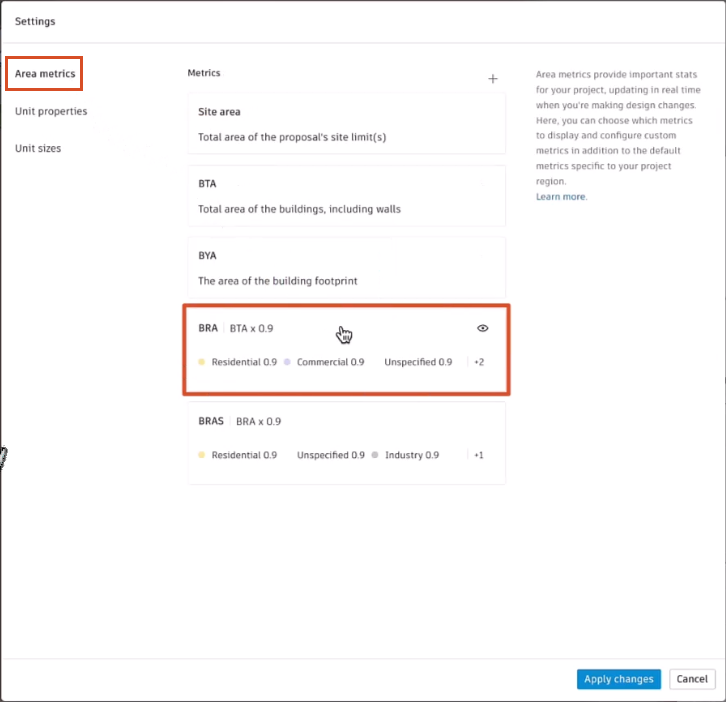
- Next to the Garage function name, click the minus symbol (-) to exclude that function from the calculation method.
- Repeat this for the BRAS metric as well.

- To confirm the changes, click Apply changes.
Since you created a new function, you will have to apply the new function in the Garage template:
- In the Garage dialog box, next to Function, click the active function (Unspecified).
- In the Swap Function dialog box, select Garage to activate it.
- Click Publish.
The Garage housing units update:
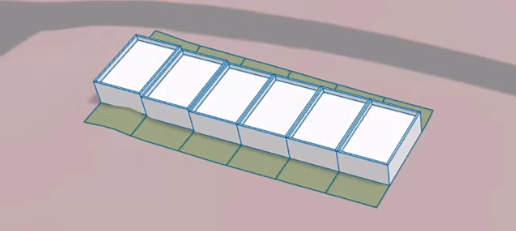
- Close the House templates dialog box.
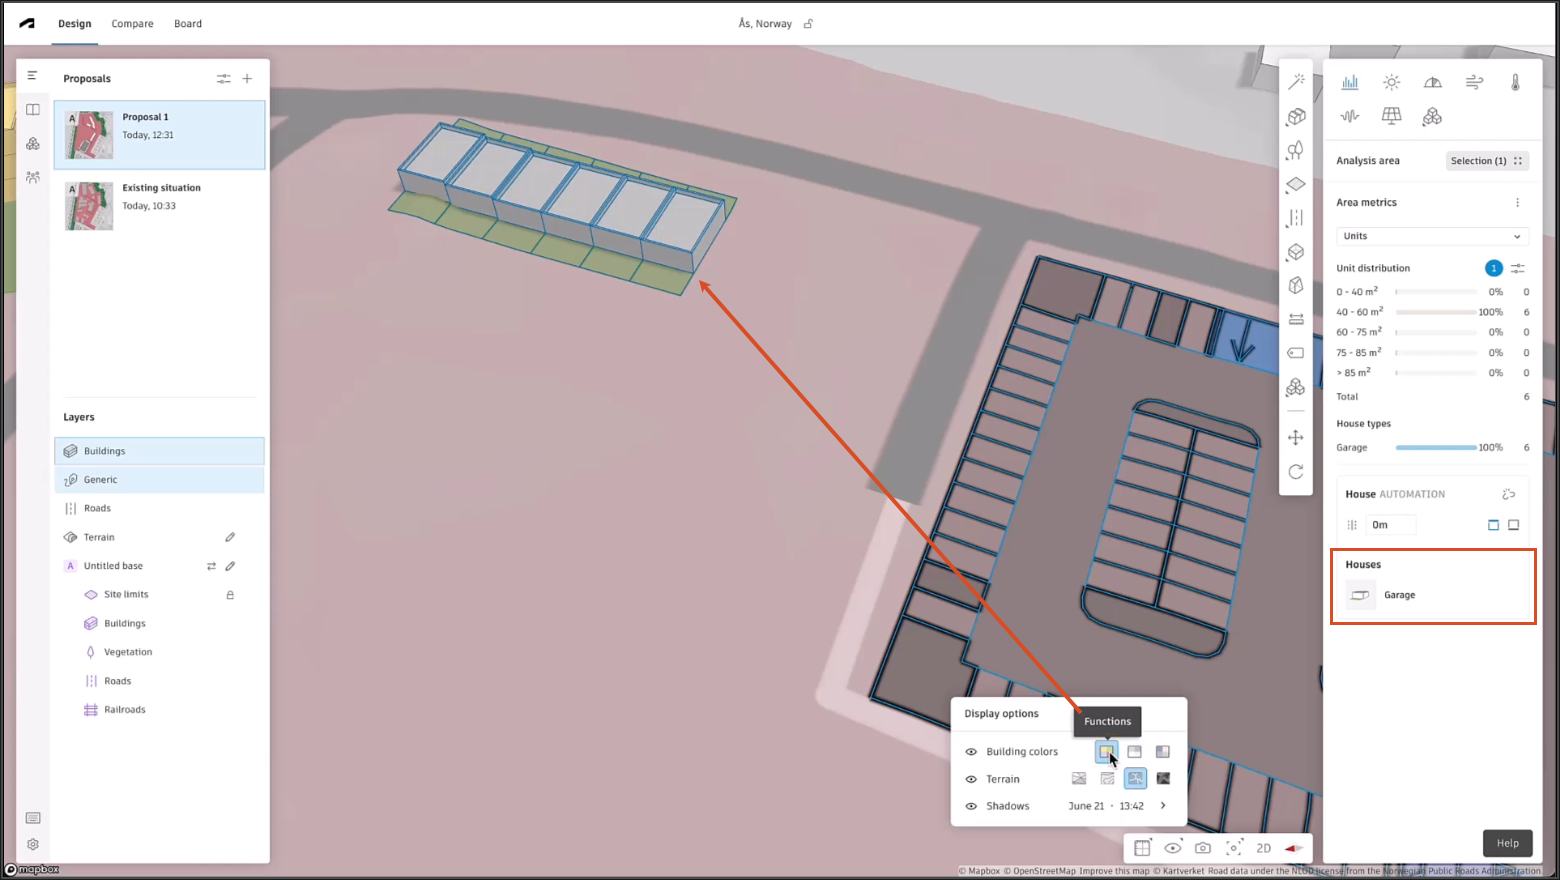
To see the function colors or unit sizes:
- In the Display options, change the Building colors mode to Functions.
To alternate the new Row house type 2 and Garage housing types to simulate row houses with attached garages:
- On the canvas, select every other housing unit in the row.
- In the right panel, click Garage.
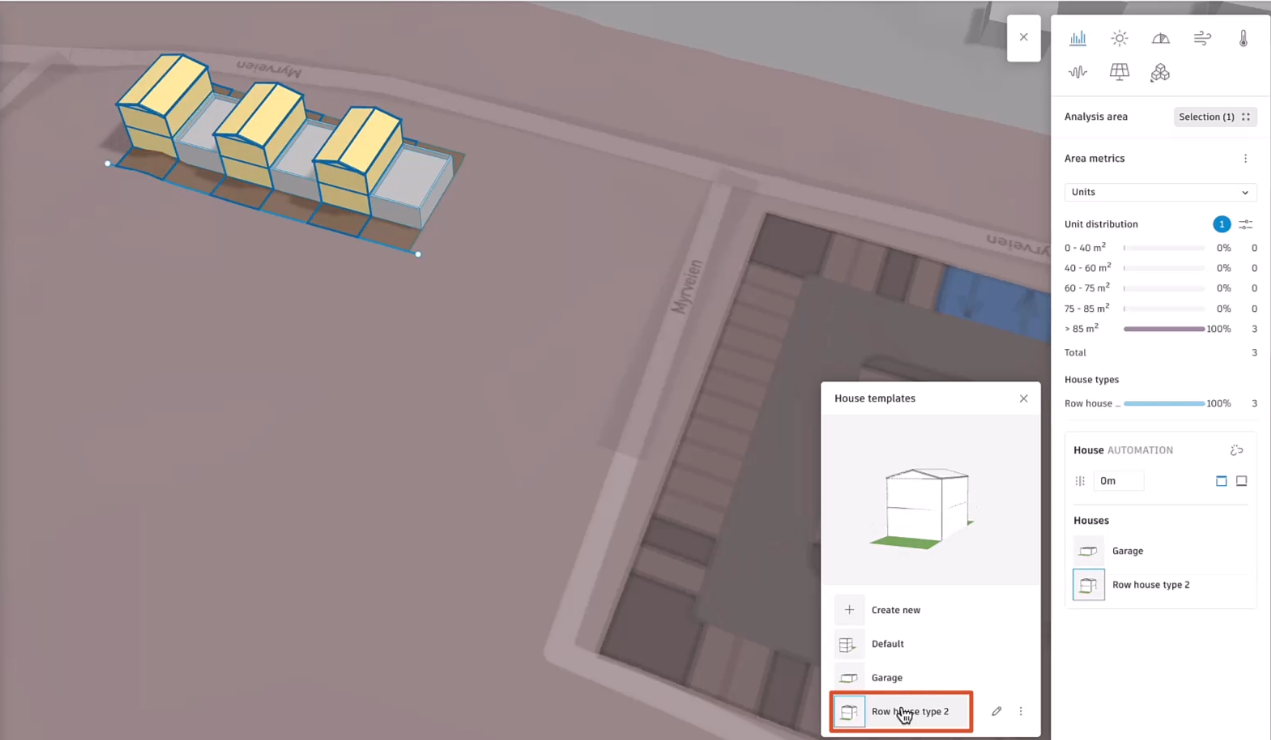
- In the Housing templates dialog box, select Row house type 2.
Now, every other unit is a house. The result is three housing units, each with its own garage.
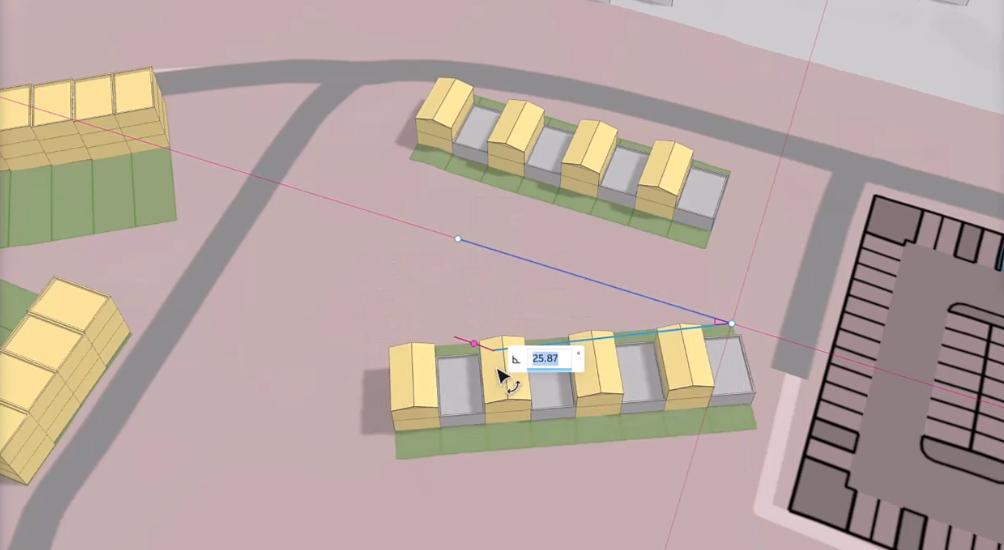
To adjust the location of the units and add more rows:
- In the canvas, edit the row house line.
OR
Press CTRL+C and CTRL+V to copy and paste rows.
- Press R to activate the Rotate tool to align them.
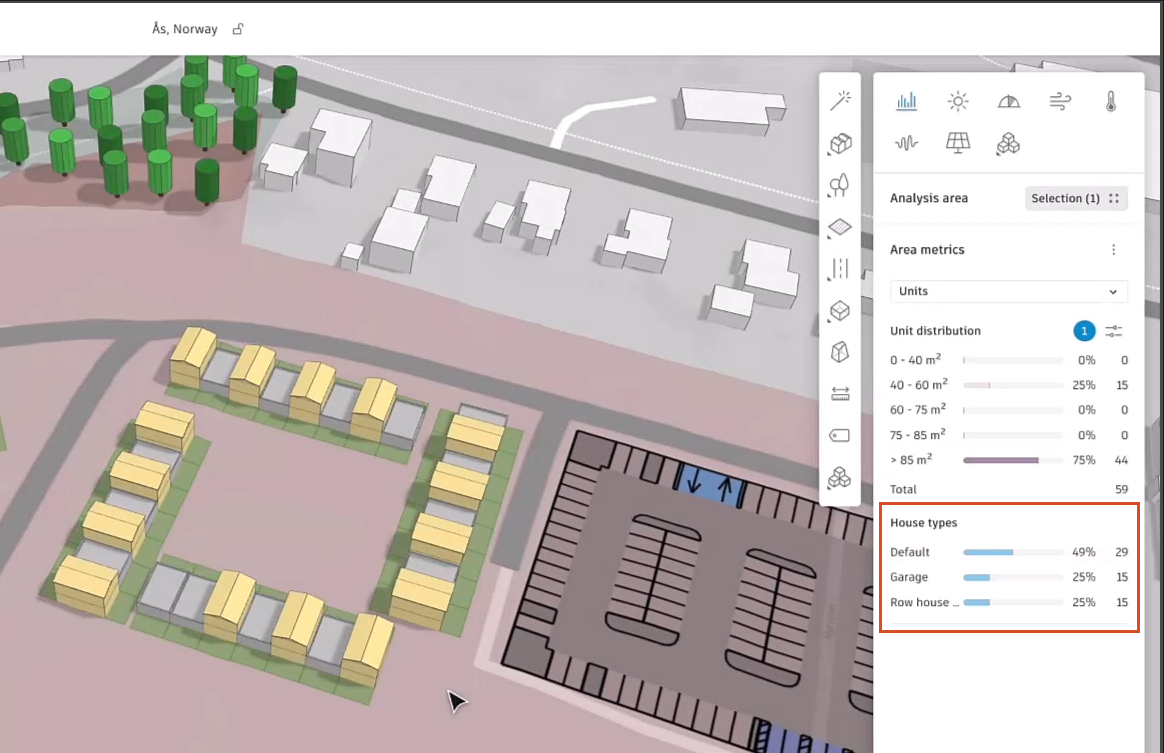
When you have finished creating housing rows, in the right panel, in the Units tab, the breakdown is reported. This example now shows 15 of the type 2 row houses, 15 garages, and 29 of the Default row houses drawn previously.