An Overview of the Refined Scan-to-BIM Workflow
The refined scan-to-BIM workflow incorporates laser scanning, point cloud extraction technology, and BIM intelligent tools to further automate the modeling process and provide realistic visualization to convey design intent. This workflow can be applied across Architecture, Engineering, and Construction (AEC) and Product Design and Manufacturing (PDM) industries, with this article demonstrating its application to remodel and space plan an office, with an overview of the process summarized below.
Scan
A laser scanner had been used to capture the as-built state of the office in order to derive dimensions and available area. The laser scanner used was the Leica BLK360 in conjunction with the Autodesk ReCap Pro app on an iPad. This workflow provided faster registration in the field as the scan progressed. Any suitable scanner may be used to capture the as-built state of the building, with the scan data processed and indexed on the Autodesk ReCap Pro Desktop application.
Process
Once the laser scanning of the building is complete, the scanned data derived needs to be processed, registered and indexed. This is done using Autodesk ReCap Pro on the desktop. This will result in a .RCP file which then can be imported into Autodesk software such as InfraWorks, Civil 3D, Revit, AutoCAD and Inventor. For buildings, this .RCP file will be imported to Revit for intelligent modeling, but before that can occur, we will automatically extract the CAD geometry from the .RCP file.
Want to share your knowledge?
Write an article for AU
Extract
Once the processing of the scanned data is complete and a .RCP file is derived from Autodesk ReCap Pro, the .RCP file is imported into ClearEdge3D EdgeWise for automatic point cloud geometry extraction. This reduces the modeling time by 50-70%, further automating and streamlining the modeling phase in Autodesk Revit. Once the automated geometry extraction process is complete, the geometry can be exported to a .RVT file which can be imported into Autodesk Revit for detailed design and modeling.
Model and Visualize
The extracted geometry from ClearEdge3D EdgeWise is imported into Autodesk Revit and modified and modeled accordingly. This affords the modeler/designer a base to work from, with the geometry elements extracted intelligently to Autodesk Revit families and modeled to requirements and specification. This leads to the model completed at a much quicker rate, a process normally purely manual in nature.
Once the Autodesk Revit model is complete, the model can then be imported into Autodesk Navisworks. This provides the option to save the model as a .NWD file in Autodesk Navisworks, which can then be overlaid relative to the point cloud in Autodesk ReCap Pro for enhanced photorealistic visualization and verification. Autodesk Navisworks also provides the functionality to create panoramic virtual reality by utilizing the Autodesk Cloud Rendering feature, which then can be shared with others to view in a browser or a virtual reality headset.
Construct
The design model of the building is then constructed.
As-Built
Upon completion of construction, the as-built (as-constructed state) of the building needs to be captured and modeled. This can be done by either scanning the as-built state and overlaying the point cloud on the design model, where adjustments are made to represent the final constructed state, or by scanning and extracting the point cloud geometry and applying the necessary finishes to represent the as-built state. We will be using the second option, to demonstrate the power of point cloud geometry extraction technology.
Figures 1 and 2 below depict the refined scan-to-BIM workflow, with Figure 1 illustrating the workflow applied across the AEC and PDM industries. Figure 2 illustrates the workflow applied and demonstrated in this article, highlighting the specific technologies adopted.


The Refined Scan-to-BIM Workflow
Scan

A laser scanner (whichever brand you prefer) is used to capture the as-built state of the office in order to derive dimensions and available area. In this case, the laser scanner used was the Leica BLK360 in conjunction with Autodesk ReCap Pro app for iPad. The process is as follows:
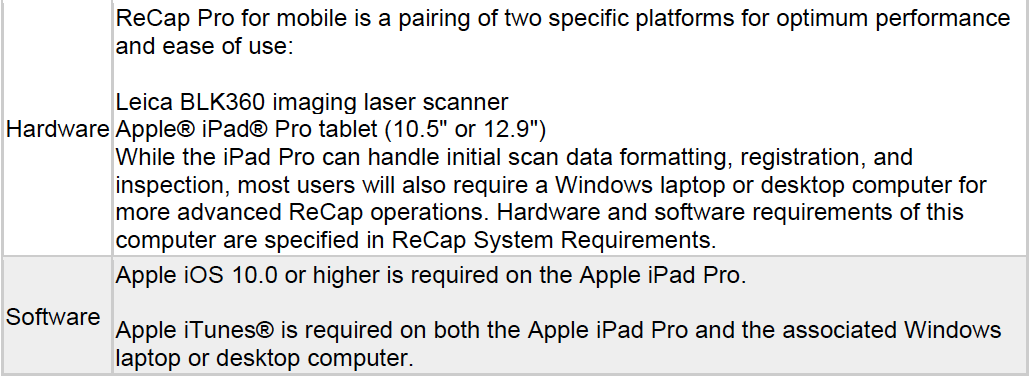
1. Autodesk ReCap Pro for iPad is downloaded onto the iPad from the Apple iStore. The required hardware and software system requirements for the Leica BLK360 and Autodesk ReCap Pro app for iPad can be accessed and viewed on the Autodesk Knowledge Network (AKN) and is tabulated below:
2. Once the Autodesk ReCap Pro for iPad is downloaded onto the iPad from the Apple iStore, we can then proceed to access the ReCap Pro App on the iPad. Upon start-up, you will need to sign in using your Autodesk ID and password. This will require an Internet connection in order to successfully sign in to the app.

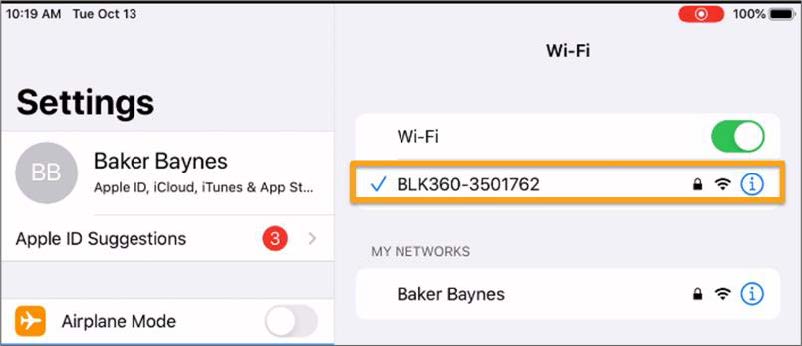
3. Upon successful sign in to the Autodesk ReCap Pro app, we will need to connect the Leica BLK360 laser scanner to the iPad. This connection is achieved via Wi-Fi. We will therefore need to disconnect from the Internet connection we used to sign in to Autodesk ReCap Pro (you will still be signed in to the ReCap Pro app upon disconnecting from the Internet) and connect to the Leica BLK360. The network name and password can be found on the clip of the battery compartment of the BLK360. Upon successful connection to the BLK360, you should see a tick next to the respective network as depicted below:
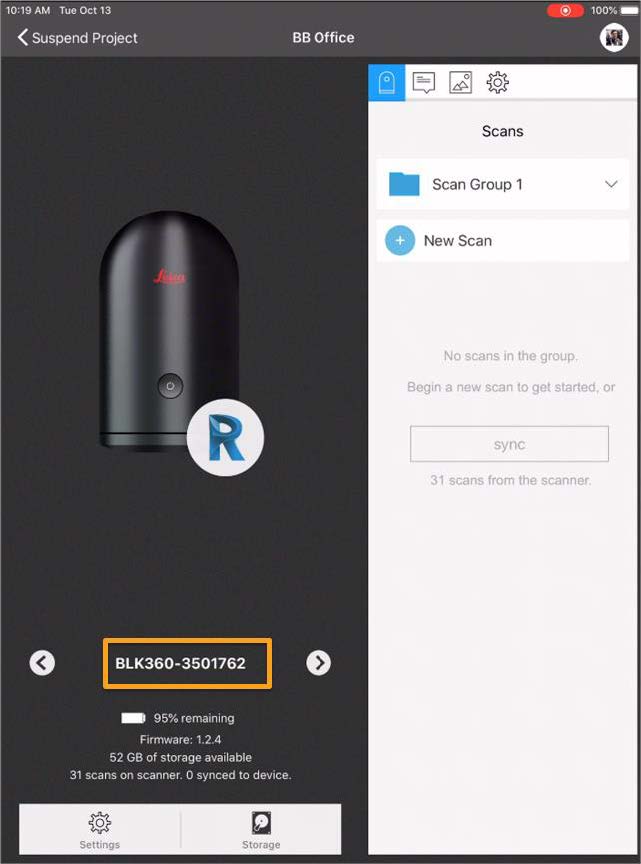
4. Now that the connection is successful, we can now create a project on the ReCap Pro App. This is done by clicking on create a project and giving your project a name and clicking OK. In this case, the project title is 'BB New Office' as depicted below:

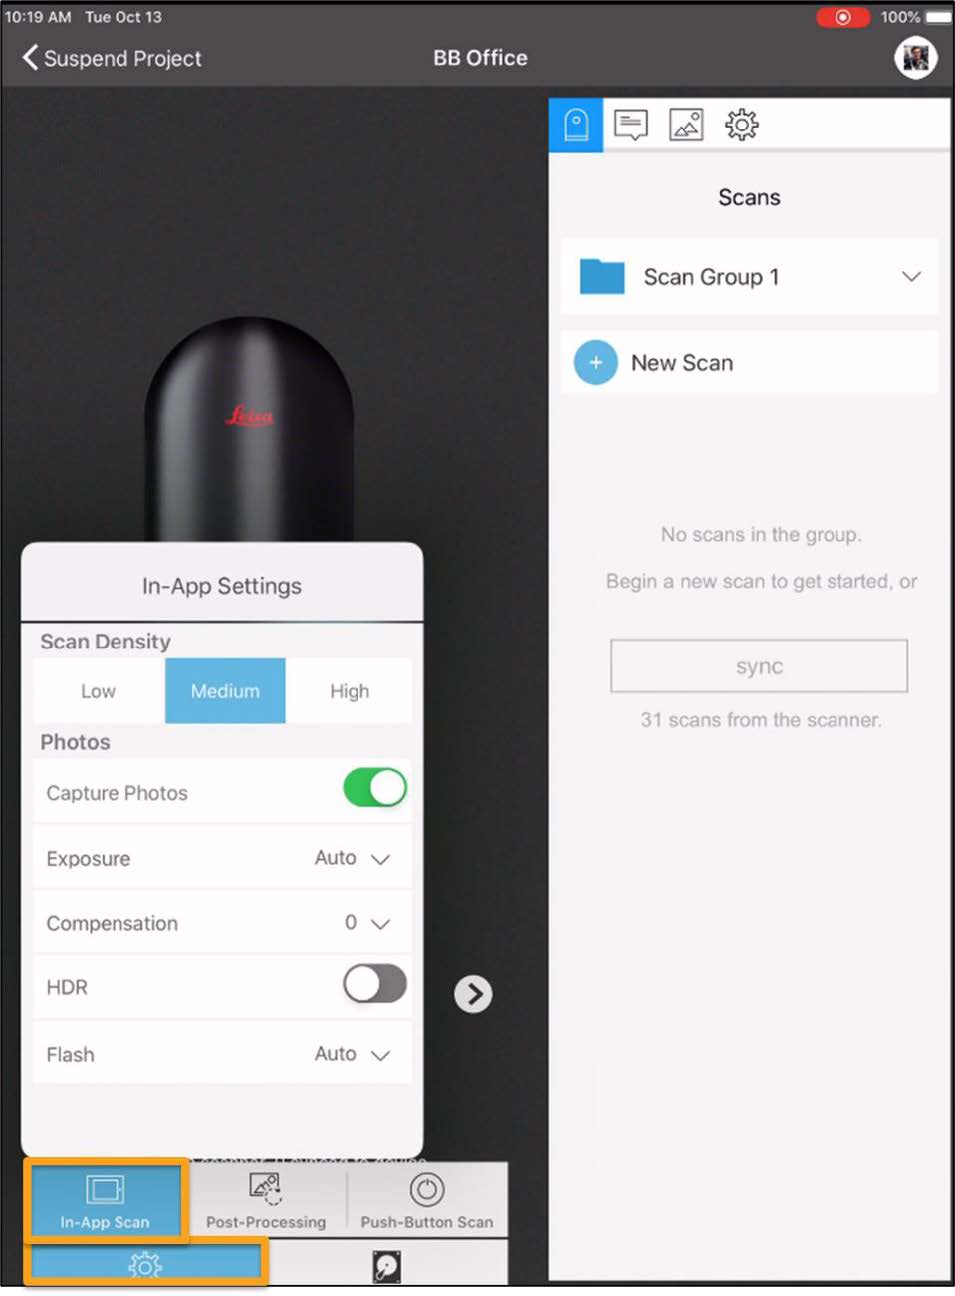
5. Once the project is created, we can then connect the BLK360 to the ReCap Pro App as well as adjust the settings as required. In this case, the scan setting used was medium as depicted below:
6. The scanning of the building can now commence. This is done by clicking on the New Scan option. This will result in the BLK360 starting with capturing the surrounding environment. Upon completion, the scanner indicator light will turn green and then can be placed at the next set up point, and then again clicking the New Scan button to capture the next point. This process is repeated till you have captured the building area required as portrayed below:

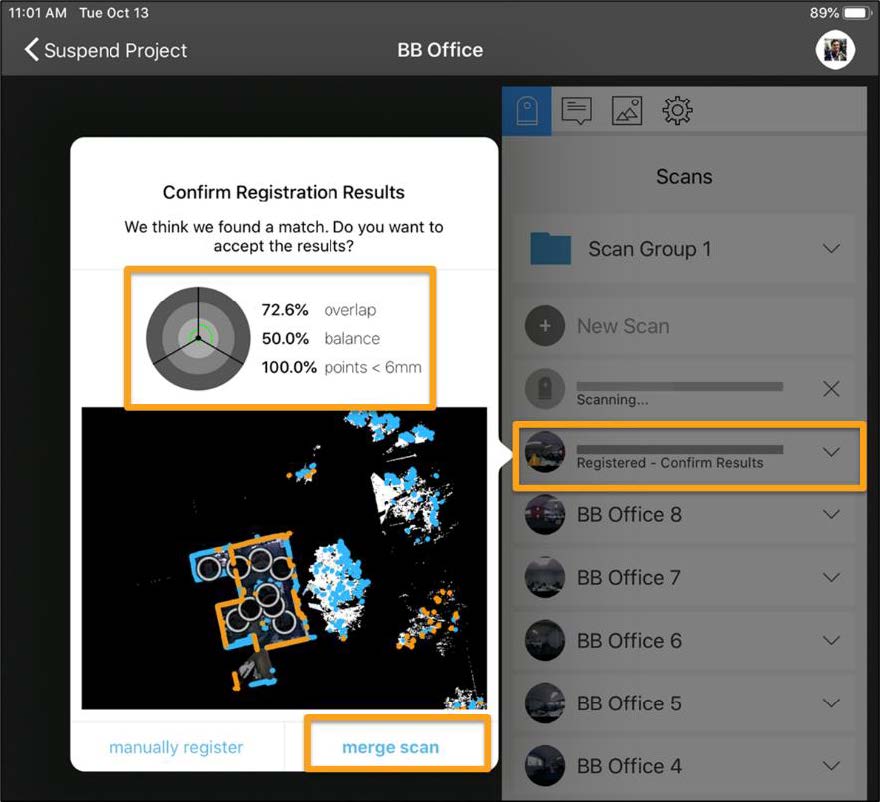
7. Now that the scanning is complete, the derived data will be transferred from the ReCap Pro app on the iPad to the ReCap Pro Desktop App which will be detailed under the processing phase. The scans have been registered in the field as depicted below:
Process

1. Now that the scanning is complete, the derived scan data is transferred from the ReCap Pro app on the iPad to the ReCap Pro Desktop App. This is done by opening the ReCap Pro on the desktop and creating a project, thereafter selecting the transfer from mobile option as depicted below. The iTunes App will also need to be open on the desktop prior to transferring the scan data.

2. Once the data has been imported from the iPad, the scans can then be indexed as the registration of the scans were conducted as the scanning progressed on the iPad. If this has not been done during the progression of the scan, automatic registration will need to be selected for Autodesk ReCap Pro to automatically match/stitch the scans together. Should the software not be able to do this for certain scan files, manual registration will be required which involves matching of three common points between two scan files. In this case, the registration had been done as the scan progressed as mentioned previously.
3. Upon successful completion of the indexing of the scanned data, the consolidated, structured scan can be viewed, resulting in a .RCP file. This .RCP file can then be imported to ClearEdge3D EdgeWise for automated geometry extraction, taking us to the extraction phase of the workflow.

Extract

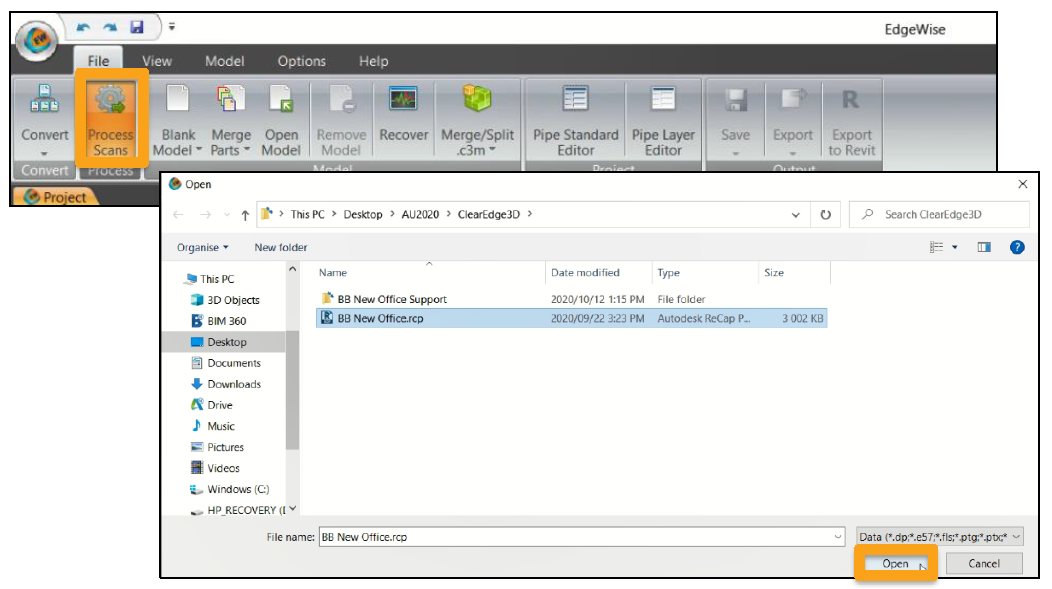
1. Now that the .RCP point cloud file is generated, we can import this file to ClearEdge3D EdgeWise for automated geometry extraction. This software can be applied across various disciplines, resulting in deriving geometry of elements in CAD format to further automate the modeling process. In this case, the software was used to extract the walls, columns and levels of the office space by clicking on the Process Scans option, as depicted below:
Want more? Download the class handout to read on.
Shuaib Yunos is a BIM technical specialist in Civil Infrastructure & Mining at Baker Baynes, South Africa. Being a qualified civil design technologist as well as an Autodesk Certified Instructor, Shuaib has shared his BIM and civil engineering design expertise to help many companies and consultants across the world design more efficiently, intelligently, and economically. Shuaib has presented at many global events and professional bodies such as the South African Institute of Civil Engineers (SAICE), the South African Geotech Conference, BIM Harambee Africa, Autodesk University Africa, as well as being selected to present at the African Smart Cities Summit and Autodesk University Las Vegas in 2018. Shuaib is a champion of BIM for civil infrastructure in Africa and abroad, with the hope to spur on digital transformation within the civil infrastructure industry as well as inspire fellow design professionals to give off their best and have fun while doing it.

